English EN-1
To the Owner Before operating this projector, read this manual thoroughly and operate the projector properly. This projector provides many convenient features and functions. Operating the projector properly enables you to manage those features and maintains it in better condition for a considerable time. Improper operation may result in not only shortening the product-life, but also malfunctions, fire hazard, or other accidents.
NOTE: This symbol and recycle system are applied to EU countres only and not applied to the countries in the other area of the world. Your SANYO product is designed and manufactured with high quality materials and components which can be recycled and reused. This symbol means that electrical and electronic equipment, at their end-of-life, should be disposed of separately from your household waste. Please dispose of this equipment at your local community waste collection/recycling centre.
Safety Instructions All the safety and operating instructions should be read before the product is operated. Read all of the instructions given here and retain them for later use. Unplug this projector from AC power supply before cleaning. Do not use liquid or aerosol cleaners. Use a damp cloth for cleaning. Follow all warnings and instructions marked on the projector.
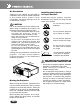
Air Circulation Openings in the cabinet are provided for ventilation and to ensure reliable operation of the product and to protect it from overheating, and these openings must not be blocked or covered. Installing the Projector in Proper Position Install the projector properly. Improper Installation may reduce the lamp life and cause a fire hazard. CAUTION Do not tilt the projector sideways. Hot air is exhausted from the exhaust vent.
Compliance Federal Communications Commission Notice Note: This equipment has been tested and found to comply with the limits for a Class B digital device, pursuant to Part 15 of the FCC Rules. These limits are designed to provide reasonable protection against harmful interference in a residential installation. This equipment generates, uses, and can radiate radio frequency energy, and if not installed and used in accordance with the instructions, may cause harmful interference to radio communications.
Notes on AC Power Cord AC Power Cord must meet requirement of country where you use a projector. Confirm an AC plug type with graphics below and proper AC Power Cord must be used. If supplied AC Power Cord does not match your AC outlet, contact your sales dealer. This projector is equipped with a grounding type AC line plug. Make sure that your outlet fits the plug. Do not defeat the safety purpose of this grounding type plug.
CONTENTS Introduction ............................................................................................................... 8 Projector Features ............................................................................................................ 8 Package Contents ............................................................................................................ 9 Projector Overview ...................................................................................................
Introduction Projector Features The projector integrates high-performance optical engine projection and a user-friendly design to deliver high reliability and ease of use. The projector offers the following features: 3 panel 0.56 inch LCD projector WXGA (1280 x 800 pixels) 1.2X manual zoom lens Auto image re-sizing (Auto-Sync.
Package Contents When you unpack the projector, make sure you have all these components: Projector with Lens Cap AC Power Cord (USA: J2552-0109-00) (UK: J2552-0108-00) (Europe: J2552-0107-00) Remote Control (IR) AAA size batteries for remote control Projector Carrying Case Quick Start Guide VGA Cable (D-Sub to D-Sub) (J2552-0072-03) Owner’s Manual Save the original shipping carton and packing material; they will come in handy if you ever to ship your unit.
Projector Overview Front View 2 1 3 5 4 8 7 11 10 9 8 7 6 1 Front IR remote control sensor 6 AC power socket 2 Projection lens 7 Elevator foot 3 Focus ring 8 Elevator button 4 Zoom ring 9 Ventilation holes 5 Control panel 10 Lens cap strap 11 Lens cap EN-10
Rear View 1 Ventilation holes 2 Connection ports 3 Kensington lock 4 Rear IR remote control sensor 5 Speaker 2 1 5 4 3 Bottom View 1 Air filter cover 2 Lamp cover 3 Ceiling mount (3-M4*6) 1 3 2 3 3 This projector can be used with a ceiling mount for support. The ceiling mount is not included in the package.
Using the Product Control Panel 1 2 LED 1 Lamp LED indicator Refer to “LED Indicator Messages”. 2 Power LED indicator Refer to “LED Indicator Messages”. 5 4 3 Button Function 3 ON / STAND-BY Refer to “Powering On/Off the Projector”. 4 Four directional (INPUT/AUTO PC ) buttons - Use four directional buttons to select items or make adjustments to your selection. - Manually selects an input source. (Left button) - Automatically adjusts Fine Sync and Total Dots.
Connection Ports 2 1 8 1 3 4 5 6 7 AUDIO IN (R/L) Connects an audio output from video equipment or computer to this jack. 2 VIDEO IN Connects composite video output from video equipment to this jack. 3 COMPUTER IN Connects analog RGB output signal from a computer to this jack. 4 S-VIDEO IN Connects S-Video output from video equipment to this jack. 5 DVI-D IN Connects DVI output from a computer to this jack.
Remote Control 1 2 3 4 ON / STAND-BY Refer to “Powering On/Off the Projector”. Four directional (INPUT/AUTO PC) buttons - Use four directional buttons to select items or make adjustments to your selection. - Manually selects an input source. (Left button) - Automatically adjusts Fine Sync and Total Dots. This function is available for computer mode only. (Right button) MENU Displays or exits the on-screen display menus. LIGHT Press and hold this button to activate the LED light.
Installing the Batteries 1. Open the battery cover in the direction shown. 2. Install batteries as indicated by the diagram inside the compartment. 3. Close the battery cover into position. Keep the batteries out of the reach of children. There is a danger of death by accidentally swallowing the battery. Remove batteries from remote control when not using for extended periods. Do not dispose of the used battery along with household waste. Dispose of used batteries according to local regulations.
Remote Control Operation Point the remote control at the infrared remote sensor and press a button. Operating the projector from the front 5m 30 Operating the projector from the rear 5m 30 Do not point the LED light pointer directly to the people's eyes (especially small children). There is a danger of injuiry to the eyes. The remote control may not operate when there is sunlight or other strong light such as a fluorescent lamp shining on the remote sensor.
Installation Connecting the Projector 1 Audio Cable 5 2 VGA Cable (D-Sub to D-Sub)* 6 3 DVI Cable 7 4 RS232C Cable 8 * One cable is supplied. Other cables are not Laptop type 1 YCbCr Cable Composite Video Cable VGA (D-Sub) to HDTV (RCA) Cable S-Video Cable supplied with the projector. Desktop type 2 3 4 2 5 6 8 7 When connecting cable, power cords of both a projector and external equipment should be disconnected from AC outlet. The figure above is a sample connection.
Powering On/Off the Projector Powering on the projector: 1. 2. 3. 4. Remove the projector lens cap. Complete the AC power cord and peripheral signal cable(s) connections. Press ON / STAND-BY button to turn on the projector. Turn on your source (computer, notebook, DVD, etc.). The projector automatically detects your source. J When searching message appears on the screen, ensure that the appropriate signal cable(s) are securely connected.
Adjusting the Projected Image Adjusting the Projector Height Elevator button Elevator foot The projector is equipped with two elevator feet to adjust the image height up to 9.0 degrees. To raise the image: 1. Press the elevator button. 2. Raise the image to the desired height angle, then release the button to lock the elevator feet into position. To lower the image: 1. Press the elevator button. 2. Lower the image, then release the button to lock the elevator feet into position.
Adjusting the Projector Zoom and Focus Zoom ring Focus ring 1. Adjust the image by rotating the zoom ring. Rotate to the right to reduce the image. Rotate to the left to enlarge the image. 2. Focus the image by rotating the focus ring. A still image is recommended for focusing.
Adjusting Projection Image Size Refer to the graphic and table below to determine the screen size and projection distance. 302 272 212 251.7 152 226.7 92 176.7 62 126.7 32 76.7 51.7 26.7 1.0m (Min.) 2m 3m 5m 7m 9m 10m (Max.) PROJECTION DISTANCE (METER) 1.0 2.0 3.0 5.0 7.0 9.0 10.0 16:10 SCREEN Wide SIZE-DIAGONAL (INCH) Tele 32 62 92 152 212 272 302 26.7 51.7 76.7 126.7 176.7 226.7 251.
Menu Operation The projector has multilingual On Screen Display menus that allow you to make image adjustments and change a variety of settings.
How to operate 1. Press MENU button to open the OSD menu. 2. When OSD is displayed, use S / T buttons to select any feature in the main menu. After selecting the desired main menu feature, press X button to enter sub-menu for feature setting. 3. Adjust the settings with W / X buttons. 4. Press MENU button, the screen will return to the main menu. 5. To exit OSD, press MENU button again. The OSD menu will close and the projector will automatically save the new settings.
Picture (Computer Mode) Brightness Adjusts brightness of the image. Press W to darken the image. Press X to lighten the image. Contrast Adjusts contrast of the image. Press W to decrease the contrast. Press X to increase the contrast. Fine Sync “Fine Sync” synchronizes the signal timing of the display with that of the graphic card. If you experience an unstable or flickering image, use the fine sync function to correct it.
Picture (Video Mode) Brightness Adjusts the brightness of the image. Contrast Adjusts contrast of the image. Sharpness Adjusts the sharpness of the image. Color Adjusts the color saturation of the image. Tint Adjusts the color balance of red and green. Color Temperature Adjusts color temperature. At higher temperature, the screen looks colder; at lower temperature, the screen looks warmer. If you select “USER”, “Red”, “Green” and “Blue” can be adjusted. Red Manually adjusts red.
Image (Computer Mode) Aspect Use this function to choose your desired image size. Q 1 TO 1 : Keep the image with original widthheight ratio. Q FILL ASPECT : Maintain the original aspect ration of the input signal while enlarging to fill as much of the output display as possible. 16: 9 input on a 4:3 output will result in back bars on the top and bottom. Q FILL ALL : The input source will be scaled to fit the projection screen.
FILL ALL 1280 x 800 Any type ofresolution. Always fill the whole LCD. H Position (Horizontal Position) Press W to move the image left. Press X to move the image right. V Position (Vertical Position) Press W to move the image down. Press X to move the image up. Auto PC Adj. Automatically scans the input source.
Image (Video Mode) Aspect Use this function to choose your desired image size. Q 4:3 : Change the original aspect 1:1 to 4:3 at the composite video input Q 1 TO 1 : Keep the image with original width-height ratio at the component input. Q FILL ALL : The input source will be scaled to fit the projection screen. Q ANAMORPHIC : Maintain the original aspect ratio in the center of the output image or S-video input. and place the majority of the distortion towards the horizontal edges of the image.
Setting (Computer / Video Mode) Menu Position Choose the menu location on the display screen. Mounting Front-Desktop The factory default setting. Front-Ceiling When you select this function, the projector turns the image upside down for ceilingmounted projection. Rear-Desktop When you select this function, the projector reverses the image so you can project behind a translucent screen. Rear-Ceiling When you select this function, the projector reverses and turns the image upside down at same time.
Sound (Computer / Video Mode) Volume Press W to decrease the volume. Press X to increase the volume. Mute Choose “ON” to turn mute on. Choose “OFF” to turn mute off. Advanced (Computer / Video Mode) Factory Default Press X to enter its menu. Press MENU button to return the display parameters on all menus to the factory default settings. Filter Counter Reset Press X to enter its sub-menu. Press MENU button to set the filter counter to 0.
Maintenance The projector needs proper maintenance. You should keep the lens clean as dust, dirt or spots will project on the screen and diminish image quality. If any other parts need replacing, contact your dealer or qualified service personnel. When cleaning any part of the projector, always switch off and unplug the projector first. Warning: Never open any of the covers on the projector. Dangerous electrical voltages inside the projector can cause severe injury.
Cleaning the Air Filter The air filter, which is located at the bottom of the projector, should be cleaned after every 100 hours of use. If it is not cleaned periodically, it can become clogged with dust and prevent the projector from being ventilated properly. This can cause over heating and damage the projector. When the projector reached a specified time, the filter warning message “Please clean up filter” appears on the screen, notifying the cleaning is necessary. To clean the air filter: 1.
Replacing the Lamp Projector lamps have a finite life. Replace the lamp when: A warning message “Lamp is approaching the end of its useful life in full power operation. Replacement suggested!” appears on the screen. The image becomes darker and hues become weaker after a lamp has been for a long period of time. Refer to section titled “LED Indicator Messages” for further details. The lamp becomes high temperature after turning off the projector with the ON/ STAND-BY button.
1. Turn off the projector and unplug the AC power cord. 2. Place a protective sheet (cloth) beneath the projector. Turn the projector over so you can access the lamp cover. 3. Loosen the access panel screw and open the panel. 4. Loosen the screws on the bottom of the lamp assembly. 5. Grasp the lamp handle and pull the lamp assembly directly out of the projector. 6. Replace with the new lamp. 7. Tighten the screws on the bottom of lamp assembly. 8. Tighten the screw on the lamp cover. 9.
Specifications Display Type 3 panel 0.56 inch LCD projector Resolution (Pixels) 1280 x 800 (1,024,000 dot x 3) Lens Manual Zoom (1.2X) Aspect Ratio 16:10 (Default) Screen Size 26.7" - 302" Lamp 210W Video Compatibility NTSC3.58, NTSC4.
Appendix LED Indicator Messages Projector Status LED Type Power LED Lamp LED Color Status Color Status Meaning - Off The projector is powered and ready. On - Off Preparing lamp ignition. Green On Green On The lamp is in good condition. Lamp ignition Green On Red Green Standby Green Flashing Lamp waiting Green Lamp on failure Flashing The lamp ignition failed at turning on. The lamp ignition failed during normal operation.
Compatibility Modes Computer (COMPUTER IN / DVI-D IN terminal): Mode Resolution fH (kHz) fV (Hz) VGA mode 3 VGA VESA 72 Hz VGA VESA 75 Hz VGA VESA 85 Hz SVGA VESA 56 Hz SVGA VESA 60 Hz SVGA VESA 72 Hz SVGA VESA 75 Hz SVGA VESA 85 Hz XGA VESA 60 Hz XGA VESA 70 Hz XGA VESA 75 Hz XGA VESA 85 Hz SXGA VESA 70 Hz SXGA VESA 75 Hz SXGA VESA 85 Hz SXGA VESA 60 Hz SXGA VESA 75 Hz SXGA VESA 60 Hz WXGA VESA 60Hz WXGA VESA 75Hz WXGA VESA 85Hz WXGA VESA 60Hz WXGA VESA 60Hz WXGA VESA 75Hz WXGA VESA 85Hz 640 x 480 31
Troubleshooting Refer to the symptoms and measures listed below before sending the projector for repairs. If the problem persists, contact your local reseller or service center. Please refer to “LED Indicator Messages” (p.36) as well. Solution Cause The AC power cord is not plugged Plug in the AC power cord. in. T h e A C p o w e r c o r d i s n o t Connect the AC power cord to the projector correctly. connected to the projector. Tighten the screw on the lamp The lamp cover is loose. cover.
Cause Symptom R e m o t e c o n t r o l The batteries could be weak. doesn’t work. The polarity is not correct. Solution Replace with a new set of batteries. (p. 15) Install the batteries with correct polarities. (p. 15) The remote control is not being Use the remote control within used within the effective range. the effective range. (p. 16) There are some obstructions C h e c k t h a t t h e r e a r e n o t between the remote control and obstructions between the remote projector. control and projector.
Serial Control Interface This projector provides a function to control the projector's operations by using the RS-232C serial port. Connection and Operation 1 Connect a RS-232C serial cross cable to RS-232C PORT on the projector and serial port on the PC. 2 Launch a communication software provided with PC and setup the communication condition as follows: 3 Send the command strings by the HEX key (HEX is in the range of 0-9 and a-f) for controlling the projector.
Printed in China Part No. 1AA6P1P5446-(KJ3A) SANYO Electric Co., Ltd.