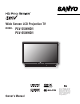
HIGH-DEFINITION TELEVISION Wide Screen LCD Projection TV MODEL PLV-55WHD1 PLV-65WHD1 ™ ® Owner’s Manual ® “As an E N E R G Y S T A R ® Partner, SANYO North America Corporation has determined that this product meets the ENERGY S T A R ® guidelines for energy efficiency.
CAUTION RISK OF ELECTRIC SHOCK DO NOT OPEN CAUTION: TO REDUCE THE RISK OF ELECTRIC SHOCK, DO NOT REMOVE COVER (OR BACK). NO USER-SERVICEABLE PARTS INSIDE EXCEPT LAMP REPLACEMENT. REFER SERVICING TO QUALIFIED SERVICE PERSONNEL. THIS SYMBOL INDICATES THAT DANGEROUS VOLTAGE CONSTITUTING A RISK OF ELECTRIC SHOCK IS PRESENT WITHIN THIS UNIT. THIS SYMBOL INDICATES THAT THERE ARE IMPORTANT OPERATING AND MAINTENANCE INSTRUCTIONS IN THE LITERATURE ACCOMPANYING THIS UNIT.
Welcome to the World of Sanyo Thank you for purchasing this Sanyo LCD Projection Television. You made an excellent choice for Performance, Reliability, Features, Value, and Styling. Important Information Before installing and operating this LCD Projection TV, read this manual thoroughly. This LCD Projection TV provides many convenient features and functions. Operating the LCD Projection TV properly enables you to manage those features and maintain it in good condition for many years to come.
FEATURES This LCD Projection TV is designed with the most advanced technology for various use. The LCD Projection TV has a large screen and uses built-in multimedia features, a palette of 16.77 million colors, and matrix liquid crystal display (LCD) technology.
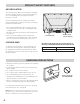
INSTALLATION PRECAUTIONS CHILD SAFETY Sanyo is committed to making home entertainment safe and enjoyable. Always use a factory authorized table or stand when positioning your LCD Projection TV. Use appropriate brackets, braces, or straps to anchor your furniture in place. But never screw anything directly to the LCD Projection TV. Do not place your LCD Projection TV on dressers, shelves, desks, carts, etc.
PRODUCT SAFETY FEATURES AIR CIRCULATION The openings in the cabinet are provided for ventilation. To ensure reliable operation of the product and protect it from overheating, these openings must not be blocked or covered. Hot air is exhausted from the exhaust vent. When using or installing the LCD Projection TV, the following precautions must be taken. • Do not put any flammable object or spray can near the LCD Projection TV. Hot air is exhausted from the ventilation holes.
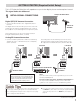
GETTING STARTED (Required Initial Setup) This LCD Projection Television will reproduce a crystal clear digital picture and exceptional sound. The signal makes the difference! 1 DIGITAL ANTENNA INPUT INITIAL SIGNAL CONNECTIONS Digital (DTV) RF Antenna Connection DIGITAL AUDIO OUTPUT DIGITAL ANTENNA IN • Connect an RF antenna to the “Digital Antenna In” terminal. The digital tuner in this LCD Projection TV receives HD signals from an antenna.
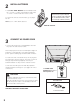
2 INSTALL BATTERIES • Install two “AAA” Batteries (not included) so that the “+” and “–” marks on the batteries match the “+” and “–” marks inside the remote control. To review the remote control function, go to pages 18–19. IMPORTANT: Spent or discharged batteries must be recycled or disposed properly in compliance with all applicable laws. For detailed information, contact your local County Solid Waste Authority. Note: Use two “AAA” alkaline batteries.
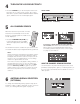
4 TURN ON THE LCD PROJECTION TV • Press the POWER key on the front panel of the LCD Projection TV or on the remote control. The cooling fans start to operate and the POWER indicator flashes green, and after a few seconds it lights green. FRONT PANEL POWER POWER indicator 5 LAMP REPLACE POWER WARNING POWER key ALL CHANNEL SEARCH When the television is powered on for the first time, it automatically checks for the presence of an RF signal. The initial screen will be displayed.
7 TURN OFF THE LCD PROJECTION TV • Press the POWER key on the front panel of the LCD Projection TV or on the remote control. The POWER indicator becomes orange and it continues while the cooling fans are running (for about four minutes). The LCD Projection TV can be turned on again during this period or after the indicator is turned off. • When the LCD Projection TV has cooled down enough, the POWER indicator will be turned off. Then you can unplug the AC power cord.
FRONT, SIDE, AND BACK PANELS FRONT PANEL POWER RIGHT SIDE PANEL LAMP REPLACE POWER (See items 1, 8, & 17 on pages 18 & 19.
CHOOSE YOUR CONNECTION This LCD Projection TV is designed to handle several different connections making it compatible with Digital and Analog devices. Digital Signal Connections HDMI Will accept HDTV (High Bandwidth Video component and Audio 5.1) In order to receive the best performance from your LCD Projection TV, choose your connection using this chart; then go to the specified page for detailed instructions.
DIGITAL AV CONNECTIONS This is the best option for picture and sound! Using the HDMI connection, which has highdefinition content protection, provides you with uncompressed digital video and audio, Dolby® Digital 5.1 or PCM sound. This connection requires only one cable. As Real As It Gets! To avoid problems with some brands of external equipment, follow this procedure when connecting cables and powering on your equipment.
CONNECTING STB WITH DVI OUTPUT TO HDMI INPUT CONNECTING DIGITAL AUDIO OUT TO A MULTI-CHANNEL RECEIVER Switch off the LCD Projection TV and external equipment before connecting cable. (Cable is not supplied.) Connect the STB’s DVI Output to a “DVI to HDMI Cable;” then connect the cable to the LCD Projection TV’s HDMI input. Dolby® Digital Audio provides 5.1 channels of surround sound (five full-range channels [5] and one lowfrequency effect channel [.1]). A fiber optics cable is used to carry the 5.
ANALOG AV CONNECTIONS USING COMPONENT JACKS TO CONNECT A DVD PLAYER OR OTHER DIGITAL EQUIPMENT The Component Video jacks will accept HDTV, EDTV, or SDTV video content. 2 Switch off the LCD Projection TV and external equipment before connecting cable. (Cable is not supplied.) Follow these steps to easily connect your STB or DVD Player to this LCD Projection TV. Connect DVD Player or similar digital equipment’s Component Video Out to the LCD Projection TV’s Video (VIDEO2 or VIDEO3) jacks.
USING THE ANALOG VIDEO1 JACKS TO CONNECT A VCR (OR OTHER ANALOG DEVICE) Switch off the LCD Projection TV and external equipment before connecting cable. (Cable is not supplied.) Connect VCR’s Audio Video Out to the LCD Projection TV’s VIDEO1 jacks. 2 1 Note: For Mono VCR (Single Audio Jack), connect VCR Audio Out to LCD Projection TV’s AUDIO-L (MONO) Input. Optional: Connect VCR’s S-Video Out to the LCD Projection TV's S-VIDEO In Jack.
CONNECTING ANALOG AUDIO OUT JACKS TO A STEREO AMPLIFIER Switch off the LCD Projection TV and external equipment before connecting cable. (Cable is not supplied.) Connect the LCD Projection TV’s AUDIO OUT (R/L) to the Stereo Amplifier In (R/L). 1 Note: For Mono Audio Amplifier (Single Audio Jack), connect to AUDIO-L (MONO) Input. 2 3 Optional: Connect WOOFER jack to the Woofer Amplifier Input. Press POWER to turn on the LCD Projection TV, then turn on external equipment.
USING THE REMOTE CONTROL PRECAUTIONS To ensure safe operation, please observe the following precautions: Risk of explosion, if battery is replaced by an incorrect type. Use two (2) AAA alkaline batteries, see page 8. If batteries have leaked in the remote control, carefully wipe the case clean and load new batteries. Replace both batteries at the same time. Do not use a new battery with a used battery. Do not expose the remote control to moisture or heat.
r RECALL Key—Select the first channel you want to watch; then select another channel using the NUMBER keys. Press RECALL to switch easily between the channels. Note: The RECALL key is inactive when an external input is selected (Video 1, Video 2, Video 3, or HDMI) and it cannot toggle between a Digital channel and an Analog channel. See TUNER key description. t MENU Key—Press this key to display the on-screen menu.
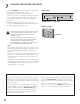
ADJUSTMENT AND SETUP BASIC MENU OPERATION The on-screen menu system provides the viewer with easy access to adjustments and settings. Just use the MENU, CURSOR, ENTER, and EXIT keys on the remote control and follow the on-screen instructions. Generally, you will use the Cursor ed keys to select a menu item and the Cursor < > keys to make an adjustment. The ENTER key confirms a setting. Press the EXIT key to return to normal TV viewing.
DIGITAL CABLE SEARCH (OPTIONAL) DIGITAL ADD-ON SEARCH This LCD Projection TV can receive unscrambled (ClearQAM) digital cable channels, when available. However, not all cable companies provide ClearQAM digital channels. Searching for digital cable channels will take about 10 minutes, please be patient. DIGITAL ANTENNA IN Connect a Digital Cable signal directly to the LCD Projection TV Digital Antenna In Terminal. Press the TUNER key to select the Digital Tuner.
ANALOG ANTENNA SIGNAL Use this feature to switch between analog off-air channels and analog cable channels. Press the TUNER key to select analog channels. 1 2 3 4 5 Press the MENU key to display the Main menu. To Delete channels from the Channel Scan Memory Use the CHANNEL (CH ed) keys or numerical keys to select desired channel. HINT: Press the TUNER key to switch between Digital and Analog Channel Scan memories. Press the ENTER key to delete the channel. The display will change to “Deleted.
DIGITAL CAPTION Closed-Captioning is hidden textual information transmitted along with the picture and sound. Turning Captioning ON causes the LCD Projection TV to open these captions and superimpose them on the screen. Because different types of closed-captions can be transmitted with the picture and sound, separate captioning modes are provided. The captioning modes recognized by this model are: Analog EIA-608B and Digital EIA-708B. Local broadcasters decide which caption signals to transmit.
V-GUIDE (PARENTAL CONTROL) NOTE: THIS FEATURE IS DESIGNED TO COMPLY WITH THE UNITED STATES OF AMERICA’S FCC V-CHIP REGULATIONS. THEREFORE, IT MAY NOT FUNCTION WITH BROADCASTS THAT ORIGINATE IN OTHER COUNTRIES. V-GUIDE RATINGS—AT-A-GLANCE MPAA (Movie) RATING TV RATING CONTENT RATING This Sanyo television is equipped with an electronic VChip to interpret MPAA (Motion Picture Association of America) and TV Parental Guidelines rating codes.
TO TEMPORARILY UNBLOCK MPAA OR TV PROGRAM 1 2 3 Press the MENU key to display the Main menu. Use the CURSOR ed keys to highlight (green) V-Guide. Press ENTER. Use the CURSOR ed keys to select Off. Press ENTER. This will temporarily set V-Guide to Off. When V-Guide is reset to On (follow steps 1–2), the LCD Projection TV will automatically revert to previously selected block ratings. TO UNBLOCK/BLOCK ALL MPAA OR ALL TV PROGRAM 1 2 3 4 Press the MENU key to display the Main menu.
PICTURE ADJUSTMENT 1 2 3 Press the MENU key to display the Main menu. Use the CURSOR ed keys to highlight (green) Picture . Press ENTER. Use the CURSOR ed keys to highlight (green) Auto (factory preset settings) or Manual. Press ENTER. MANUAL ADJUSTMENTS Use the CURSOR ed keys to select the option you want to adjust. Then use the CURSOR < > keys to make an adjustment. When you have finished making adjustments, press the EXIT key to return to normal T V viewing.
SOUND ADJUSTMENT 1 2 3 Press the MENU key to display the Main menu. Use the CURSOR ed keys to highlight (green) Sound. Press ENTER. Use the CURSOR ed keys to highlight (green) Auto (factory preset settings) or Manual. Press ENTER. MANUAL ADJUSTMENTS Use the CURSOR ed keys to select the option you want to adjust. Then use the CURSOR < > keys to make an adjustment. When you have finished making adjustments, press the EXIT key to return to normal T V viewing.
POWER MANAGEMENT LAMP COUNTER RESET For reducing power consumption as well as maintaining the lamp life, Power Management turns off the lamp when the LCD Projection TV is not used for a certain period. Be sure to reset the lamp counter after the lamp is replaced. When the lamp counter is reset, the LAMP REPLACE indicator will be turned off. Press the MENU key to display the Main menu.
HELPFUL HINTS (PROBLEMS/SOLUTIONS) Because of the Quality we build into our product, very few problems are actual LCD Projection TV defects. Most problems only involve simple hookup or setup changes that can be solved by the customer. Please check the chart below and try the solutions listed for your problem. If the problem still persists after following all operating instructions, contact the dealer where you purchased the LCD Projection TV or Sanyo Fisher customer service.
MAINTENANCE AND CLEANING CLEANING THE LCD PROJECTION TV The surface of the cabinet can be damaged if not properly maintained. Many common household aerosol sprays, cleaning agents, solvents, and polishes will cause permanent damage to the fine surface. 1. Unplug the power cord before cleaning the LCD Projection TV. 2. Gently wipe the screen and cabinet with a dry soft cloth. The screen is likely to be damaged if it is not maintained properly. Do not use hard objects like a hard cloth or paper.
LAMP REPLACEMENT The projection lamp has a service life and it needs to be replaced when it reaches the end-of-life. When the lamp of this LCD Projection TV reaches the end-of-life, the LAMP REPLACE indicator will light yellow. If this indicator turns to yellow, replace the lamp with a new one promptly. FRONT PANEL LAMP REPLACE This indicator will light yellow when the projection lamp reaches the end-of-life.
LAMP HANDLING PRECAUTIONS This LCD Projection TV uses a high-pressure lamp which must be handled carefully and properly. Improper handling may result in accidents, injury, or create a fire hazard. ● Lamp lifetime may differ from lamp to lamp and according to the environment of use. There is no guarantee of the same lifetime for each lamp. Some lamps may fail or terminate their lifetime in a shorter period of time than other similar lamps.
SPECIFICATIONS Screen Size (Measured Diagonally): PLV-65WHD1: 65-inches/PLV-55WHD1: 55-inches LCD Panel System: 0.
DIMENSIONS PLV-65WHD1: 60.6 (1538) PLV-65WHD1: 18.4 (468) PLV-55WHD1: 50.9 (1294) PLV-55WHD1: 15.6 (397) PLV-55WHD1: 34.0 (864) PLV-65WHD1: 40.0 (1016) Unit: inch (mm) OPTIONAL PARTS The parts listed below are optionally supplied. When ordering those parts, specify item name and Type No. to the sales dealer. ● LCD Projection TV stand Type No.: PLV-5565STD (for both PLV-55WHD1 and PLV-65WHD1) This symbol on the nameplate means the product is Listed by Underwriters Laboratories Inc.
Printed in China Part No. 610 329 9211 (1AA6P1P5187-- M8PA) SANYO Electric Co., Ltd.