
Operation Manual


73 English
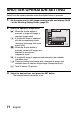
SHUTTER OPERATION SETTING
Making a schedule shot
You can enter a captured still image in the schedule.
1 Select the schedule photo icon & from the operation mode menu,
and press the SET button.
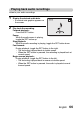
2 Press the SET button again.
h The calendar appears on the LCD
monitor.
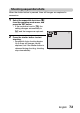
3 Toggle the SET button left, right, up
and down to move the orange frame
to the date you wish to save the
image to.
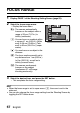
4 Press the SET button.
h The Shooting Screen appears.
5 Compose the subject, and press the
shutter button to snap the picture.
h The captured image is saved to the
date you selected in step 3.
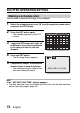
HINT
If the “SET DATE AND TIME” display appears...
i The date and time have not yet been set. Be sure to set the date and time
before capturing images (page 23).
30
23
16
9
2
31
24
17
10
3
25
18
11
4
26
19
12
5
27
20
13
6
28
21
14
7
29
22
15
8
1
10
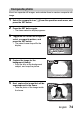
OCT. 2005 05.10.11
SUN MON TUE WED THU FRI SAT
DATE : 2005 /10 / 11 (TUE)