INSTRUCTION MANUAL VPC-S6 Digital Camera Important note This manual explains how to safely operate the VPC-S6. Please read these instructions carefully before using the camera. Make sure to read and understand the separate booklet “SAFETY MANUAL”. Keep this manual in a safe place for later reference.
Warning TO PREVENT THE RISK OF FIRE OR ELECTRIC SHOCK, DO NOT EXPOSE THIS APPLIANCE TO RAIN OR MOISTURE FOR AMERICAN USERS The following advisory is included in accordance with the laws of the State of California (USA): WARNING: This product contains chemicals, including lead, known to the State of California to cause cancer, birth defects or other reproductive harm. Wash hands after handling.
FOR CANADIAN USERS i This Class B digital apparatus complies with Canadian ICES-003. FOR EU USERS Note: iThis symbol mark and recycle system apply only to EU countries and do not apply to countries in other areas of the world. Your SANYO product is designed and manufactured with high quality materials and components which can be recycled and reused. This symbol means that electrical and electronic equipment, at their end-of-life, should be disposed of separately from your household waste.
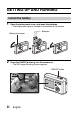
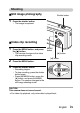
GETTING UP AND RUNNING Install the battery 1 Open the battery/card cover, and insert the batteries. h The battery/card cover is located on the bottom of the camera. Batteries Battery/card cover 2 Press the ON/OFF button to turn the camera on. h The Still Image Shooting Screen appears.
Shooting kStill image photography 1 Shutter button Press the shutter button. h The image is captured. kVideo clip recording 1 Press the MENU button, and press the [m] button. h The camera changes to the video clip recording mode. MENU button [m] button [l] button 2 3 Press the MENU button. Press the shutter button. h Recording begins. h To stop recording, press the shutter button again. h Press the MENU button, press the [l] button, and press the MENU button.
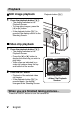
Playback kStill image playback 1 Playback button [=] Press the playback button [=]. h The display switches to the Playback Screen. h To view other images, press the [l] or [m] button. h If the playback button [=] is pressed, the display returns to the Shooting Screen. kVideo clip playback 1 2 Press the playback button [=]. h The display switches to the Playback Screen. h Press the [l] or [m] button to display the video clip you wish to play back.
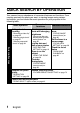
QUICK SEARCH BY OPERATION Your camera has an abundance of convenient features and functions. From creating precisely the photo you want, to viewing images using various techniques, you can locate the exact operation for your purposes in the following table.
Convenient functions Basic operation Additional functions Shoot in bright conditions • “EXPOSURE CORRECTION” on page 39 • “FLASH SETTING” on page 37 • “SCENE SELECT” (night view mode) on page 42 Increase the camera’s sensitivity “ISO SENSITIVITY” on page 70 Photographing people Shooting/recording • • • • “SCENE SELECT” (portrait mode/night view mode) on page 42 “SHUTTER OPERATION SETTING” (ID photos) on page 67 “FILTERS” (cosmetic filter) on page 45 “FLASH SETTING” (red-eye reduction) on page 37 Ph
Basic operation Convenient functions Additional functions Getting started viewing images • “Playing back the video clip” on page 33 Playback • “Viewing still images” on page 29 Search for image data Check the focus status • “9-image display playback” on page 30 • “ZOOM JUMP PLAYBACK” on page 82 Magnify an image • “Magnifying (zooming in) the image” on page 31 Change the angle of view • “ROTATE IMAGE” on page 84 Slideshow playback • “SLIDESHOW PLAYBACK” on page 95 Adjust the LCD monitor brightne
CONTENTS GETTING UP AND RUNNING .............................................................. iii QUICK SEARCH BY OPERATION ........................................................1 CONTENTS ............................................................................................4 CHECKING THE INCLUDED ACCESSORIES ......................................7 GETTING THE MOST OUT OF YOUR CAMERA ..................................9 SYSTEM MAP .....................................................................
CONTENTS SHOOTING (SHOOTING SETTING SCREEN) ACCESSING THE SHOOTING SETTING SCREEN ........................... 47 TOUCH SENSOR (TOUCH FOCUS) SETTING .................................. 57 RESOLUTION SETTING ..................................................................... 58 FOCUS RANGE ................................................................................... 59 SELF-TIMER ........................................................................................ 61 SHUTTER OPERATION SETTING ....
OPTION SETTINGS DISPLAYING THE OPTION SCREEN .................................................98 OPERATION SOUNDS ......................................................................101 HELP DISPLAY ..................................................................................103 POST-VIEW SETTING .......................................................................104 DIGITAL ZOOM SETTING .................................................................105 LCD MONITOR BRIGHTNESS .................
CHECKING THE INCLUDED ACCESSORIES 7 i Handstrap: 1 i SANYO Software Pack (CD-ROM): 1 i AA alkaline batteries: 2 (batteries made exclusively to be used as included accessories) i Dedicated USB interface cable: 1 i “SAFETY MANUAL” (safety precautions booklet) Please read this booklet carefully before using the digital camera.
Attaching the handstrap Media cards that can be used with this camera The types of card that can be inserted into and used with this camera are: i SD Memory Card i Multi Media Card What “card” means in this manual i In this manual, SD Memory Cards and Multi Media Cards that can be used in this digital camera are referred to as “card”.
GETTING THE MOST OUT OF YOUR CAMERA Your camera can take still photos and record video clips. It’s loaded with lots of functions that are possible only in a digital camera, including a super-quick focus, an easy-to-understand guidance display on a large screen, a more extensive Scene Select feature, and more. You’ll never miss a photo opportunity, thanks to the quick focus: Touch focus (see page 22) Just touch the shutter button lightly, and the touch sensor automatically focuses the image (touch focus).
Mode Select Screen Switch between the still photo shooting and video clip recording modes with a single on-screen action. Accessing the Shooting Setting Screen has never been so fast.
SYSTEM MAP The included accessories can be used to connect your camera to a computer or printer. By connecting the camera to your computer, you can, for example, copy your photos to the computer’s hard disk. You can connect it to a printer for direct printing of your photos. Or take the card to a photo shop to have your photos printed there.
SETUP PARTS NAMES Front Shutter button Touch sensor indicator ON/OFF button Flash Mirror: Check the camera angle when taking a picture of yourself.
PARTS NAMES Rear Playback button [=] Zoom switch [W]/[T] Strap holder MENU button [n] button [m] button LCD monitor Bottom SET button [o] button Access light [l] button Battery/card cover DC IN terminal h Use only the SANYO-specified AC adaptor.
INSTALLING THE CARD AND BATTERIES Your camera has an internal 15MB memory, when means that you can take photos (record image data) even when no card is installed. By using a card, however, you will be able to take many more photos. The card can be used after it has been formatted with the camera (page 113). 1 2 Open the battery/card cover. h While gently pressing the battery/card cover, slide it open. Insert the card. h Firmly insert the card until it clicks into place.
INSTALLING THE CARD AND BATTERIES 3 4 Insert the batteries. h Make sure that the batteries’ polarities (M and N) are correct. Close the battery/card cover. When removing the card... h To remove the card, press it down, and then release. The card will protrude slightly, and you can then pull it out.
CAUTION Be careful when removing the card. i Do not attempt to forcibly remove the card. i Never remove the card when the access light is flashing quickly. In doing so, you risk losing the data stored in the card. Manganese batteries cannot be used. i Not only do manganese batteries have a short battery life, but there is the danger of their overheating and causing damage to the digital camera.
TURNING THE CAMERA ON AND OFF Turning on the camera In the shooting mode 1 Press the ON/OFF button. h The camera turns on. h The camera turns on in the shooting mode that was active before it was last turned off. ON/OFF button In the playback mode 1 Press the playback button [=] for at least one second. h The Playback Screen appears on the LCD monitor (page 29). Playback button [=] LCD monitor Turning off the camera 1 17 Press the ON/OFF button. h The camera turns off.
Turning on the camera when the power save (sleep) function is active In order to preserve battery power, the power save (sleep) function will automatically turn off the camera after one minute of no use during shooting, or five minutes of no use during playback (factory-preset setting). i When the power save function is active, you can restore the power by any of the following methods: h Press the playback button [=]. h Press the SET or MENU button. h Press the shutter button. h Press the ON/OFF button.
DATE AND TIME SETTING The camera will record the date and time an image is captured so that you can display them during playback. Therefore, before capturing images, make sure the correct date and time are set. Example: To set the clock to 7:30 p.m. on December 24, 2005 1 2 3 4 19 Press the ON/OFF button to turn the camera on, and press the MENU button. Press the [o] button. h The Shooting Setting Screen appears (page 47). Display the Option Screen (page 98).
5 6 7 Set the date. 1 Select “DATE”. 2 Press the SET button. h The Set Date Screen appears. 3 Set the date to “2005/12/24”. h The date is set in the following order: Set the year → Set the month → Set the day. h Press the [l] or [m] button to select the year, month or day. Press the [n] or [o] button to increase or decrease the number. 4 Press the SET button. CLOCK SET DATE Set the time. 1 Select “TIME”. 2 Press the SET button. h The Set Time Screen appears. 3 Set the time to “19:30”.
DATE AND TIME SETTING h If “DISP OFF” is selected, the date the image was captured is not shown during playback. 4 Press the SET button. 8 Select “EXIT”, and press the SET button. h The date and time setting is completed, and you are returned to the Option Screen. h To return to the Shooting Screen, press the MENU button. HINT i Under normal conditions, while the batteries are being replaced, an internal battery will maintain the date and time settings.
BASIC OPERATION BEFORE TAKING PICTURES How to hold the camera Hold the camera securely, keeping your elbows close to your body and making sure the camera is stable. Correct hold Incorrect hold A finger is blocking the lens or flash. Make sure that the lens and flash are not blocked by your fingers or the handstrap. HINT i Images captured in the still image shooting mode can be rotated when they are played back (page 84).
BEFORE TAKING PICTURES Using the autofocus The autofocus will work in almost all situations; however, there are certain conditions that may cause the autofocus function to not work properly. If the autofocus function is not working properly, set the focus range to capture images (page 59). k Conditions that may cause incorrect focus The following examples are some of the situations where the autofocus function may not work.
The following examples are some of the situations where the autofocus function may work, but not as desired. i When both near and far objects are present Use the focus-lock function to lock the focus on an object at the same distance as the desired subject, then reposition the camera to compose the picture. i Fast-moving subjects Use the focus-lock function to lock the focus on an object at the same distance as the desired subject, then reposition the camera to compose the picture.
BEFORE TAKING PICTURES How to switch the shooting mode Your camera can both capture still photos (still image shooting mode) and record video clips (video clip recording mode). When shooting, you can switch the shooting mode on the Mode Select Screen. 1 Press the ON/OFF button to turn the camera on, and press the MENU button. h The Mode Select Screen appears. 2 Press the [l] or [m] button. h The shooting mode is switched.
Hints for taking pictures Muting the operation sounds i The operation sounds that are generated, for example, when the shutter button, MENU button or SET button is pressed, can be muted (page 101). Where is the image data saved? i All the image and sound data is recorded in the camera’s internal memory or on the card installed in the camera. i When a card is installed in the camera, the data is recorded on the card. If no card is installed, the data is recorded in the camera’s internal memory.
CAPTURING AND PLAYING BACK STILL IMAGES There are two modes for capturing still images. In the normal still image mode, one image is captured each time the shutter button is pressed. In the sequential shots mode, when you press the shutter button, several successive images are captured. For more information about taking sequential shots, please see page 64. Shooting single shots 1 2 Press the ON/OFF button to turn the camera on. h The Still Image Shooting Screen appears.
3 4 Gently press the shutter button. h Press the shutter button gently, taking care not to move the camera. h The image that was captured appears on the LCD monitor as long as the shutter button is kept pressed (post view). Release your finger from the shutter button. h The captured image is recorded. HINT Focus indicator What is the camera focusing on? Target mark i A target mark & on the LCD monitor shows the area the camera is focusing on.
CAPTURING AND PLAYING BACK STILL IMAGES Viewing still images The steps for viewing both single shots and sequential shots are the same. 5 6 Press the playback button [=]. h If the playback button [=] was pressed to turn the camera on, however, press the playback button [=] for at least 1 second. h The image most recently captured appears on the LCD monitor. Playback button [=] View other images. h Press the [l] or [m] button to display the previous or next image.
9-image display playback 1 2 3 Press the playback button [=]. Zoom switch Press [W] ([P]) on the zoom switch. h The 9-image display appears. Select the image to play back. h Press the arrow buttons to move the orange frame to the desired image, and press the SET button. h Instead of pressing the SET button, you can press [T] ([]]) on the zoom switch to show the image full screen.
CAPTURING AND PLAYING BACK STILL IMAGES Magnifying (zooming in) the image 1 2 Display the image that you want to magnify. Press [T] ([]]) on the zoom switch. h Magnification is enabled. h The image is magnified, and the central portion of image is displayed. h Press the arrow buttons to view different parts of the magnified image. To magnify: Magnification increases with each press of [T] ([]]) on the zoom switch.
VIDEO CLIP RECORDING AND PLAYBACK Recording a video clip 1 2 3 4 5 Press the ON/OFF button to turn the camera on. ON/OFF button MENU button Press the MENU button. h The Mode Select Screen appears. Press the [m] button to select “MOVIE”, and press the MENU button. h The Video Clip Recording Screen appears. Press the shutter button. h Video clip recording begins. During recording, the recording time is shown on the LCD monitor.
VIDEO CLIP RECORDING AND PLAYBACK Playing back the video clip 6 7 Press the playback button [=]. h If the playback button [=] was pressed to turn the camera on, however, press the playback button [=] for at least 1 second. h The video clip just recorded appears on the LCD monitor. h Video clips are indicated by a video clip pattern along the top and bottom of the screen. Press the SET button. h Video clip playback begins. h To stop playback, press the SET button again.
Outline of playback operation To do this... Pause Do this During playback, press the SET button. To play back During forward While playback is paused, press the [m] one image playback button. at a time During reverse While playback is paused, press the [l] (singleplayback button. frame step) Slow playback During forward While playback is paused, press and hold the playback [m] button. During reverse While playback is paused, press and hold the playback [l] button.
VIDEO CLIP RECORDING AND PLAYBACK HINT Adjusting the LCD monitor brightness i While the Shooting Screen is active, you can quickly access the screen for adjusting the brightness of the LCD monitor by pressing the MENU button for at least 1 second. Display the video clip playback point i During video clip playback, press the MENU button for at least 1 second to display a bar showing the current playback point in the video clip. i Press the MENU button for about 1 second to cancel the bar.
USING THE ZOOM Your camera has two zoom functions: optical zoom and digital zoom. You can specify whether or not the digital zoom is enabled (page 105). 1 2 3 Point the camera lens at the subject. Press the zoom switch to compose the desired image. [T]: Zoom in on the subject. [W]: Zoom out. h When the zoom switch is pressed, the zoom bar appears on the LCD monitor. h When the optical zoom factor is at maximum, zooming stops temporarily.
FLASH SETTING The flash is used not only for taking pictures where there is insufficient light, but also when the subject is in shade or in backlight conditions. Your camera’s flash has four modes of operation (automatic flash mode, forced flash mode, flash off mode and red-eye reduction mode). Select the flash mode that is appropriate for the surrounding conditions. The flash can be enabled only when taking single-shot still images. 1 Display the Still Image Shooting Screen (page 27).
3 4 Press the [n] ([?]) button to set the flash mode. h Each time the [n] ([?]) button is pressed, the flash mode changes. h Display the icon for the desired flash mode. Press the shutter button. h The picture is snapped and the flash operates according to the selected mode. HINT In the automatic flash mode... i In the automatic flash mode, when the subject is in focus, a k icon appearing on the LCD monitor indicates that the flash will operate.
EXPOSURE CORRECTION When capturing images, you can make the image lighter or darker. 1 2 3 Point the camera lens at the subject. h If the Mode Select Screen or a menu screen (Shooting Setting Screen) is active, press the MENU button to exit it. With the Shooting Setting Screen not showing, press the [m] ( ) button. h The exposure correction bar appears. [l] button Press the [l] or [m] button to adjust the exposure. h The exposure setting numerical value is shown at the left end of the exposure bar.
SHOOTING (EASY SETTING MODE) EASY SETTINGS SCREEN With the Easy Settings Screen, it’s a cinch to get beautiful photos every time, simply by selecting the setting that matches your shooting conditions. 1 2 3 Press the ON/OFF button to turn the camera on, and press the MENU button. h The Mode Select Screen appears. ON/OFF button MENU button Press the [l] or [m] button to select the desired shooting mode. Press the [n] button. h The Easy Settings Screen appears.
OVERVIEW OF THE EASY SETTINGS SCREEN SCENE: FULL AUTO USE AUTO SETTINGS 1 Scene select menu (page 42) .
SCENE SELECT You can select from various preset settings (aperture, shutter speed, etc.) for specific shooting conditions. 1 2 Display the Easy Settings Screen (page 40). Select the scene select menu. .: The camera automatically makes the optimum settings suitable for the surrounding conditions (full auto). /: Capture a split-second image of a fast-moving subject (sports mode). 0: Enhance the 3D feeling of the subject by blurring the background (portrait mode).
SCENE SELECT 3 4 43 Select the desired icon from the scene select menu, and press the SET button. h This completes the scene select setting. Take the picture. For video clip recording, see page 32. For still image shooting, see page 27. h To return to normal photography, select . from the scene select menu, and press the SET button.
Scene select and operation mode The scene select functions that are available depend on the active operation mode (page 63). Operation mode Single shots c Composite photo - Sequential shots P Auto bracket shot I Full auto . O O O Sports / O O — ID photo .
FILTERS The filter feature changes image characteristics such as color tones, to apply unique effects to the photographed image. 1 Display the Easy Settings Screen (page 40). 2 Select the filter menu. 6: No filter is used (none). 7: Skin tones are enhanced in closeup shots (cosmetic filter). 8: Snap black-and-white photos FILTER : NO (monochrome filter). SHOOT WITHOUT 9: Create a sepia-tone photo (sepia FILTERS filter). ?: Accentuates the outlines in the image (sharpness filter).
3 4 Select the desired icon from the filter menu, and press the SET button. h This completes the filter setting. Take the picture. For video clip recording, see page 32. For still image shooting, see page 27. h To return to normal photography, select 6 from the filter menu, and press the SET button. HINT i A table showing the limitations for settings corresponding to filter icons other than 6 is on page 139.
SHOOTING (SHOOTING SETTING SCREEN) ACCESSING THE SHOOTING SETTING SCREEN The Shooting Setting Screen is used to adjust the focus range and self-timer settings; to select the single-shot, sequential shots, composite photo, or ID photo operation mode; and to manage various settings such as turning the shutter button touch sensor ON/OFF. 1 2 3 Press the ON/OFF button to turn the camera on, and press the MENU button. h The Mode Select Screen appears.
Switching the page The Shooting Setting Screen consists of two pages: PAGE 1 and PAGE 2. 1 2 Display the Shooting Setting Screen. Press the [l] button. h The Shooting Setting Screen PAGE changes. h Each time the [l] button pressed, the PAGE changes.
ACCESSING THE SHOOTING SETTING SCREEN Overview of the Shooting Setting Screen (still images) PAGE 1 12 TOUCH SENSOR ON 49 English
1 Touch sensor menu (page 57) #: Set the shutter button touch sensor to ON. $: Set the shutter button touch sensor to OFF. 2 Resolution menu (page 58) y: Shoot at 2,816 × 2,112 pixels, low compression k: Shoot at 3,680 × 2,760 resolution x: Shoot at 2,816 × 2,112 pixels, standard compression z: Shoot at 2,288 × 1,712 resolution t: Shoot at 1,600 × 1,200 resolution [: Shoot at 640 × 480 resolution 3 Focus range menu (page 59) *: +: ): -: L: Shoot using the autofocus.
ACCESSING THE SHOOTING SETTING SCREEN PAGE 2 12 FOCUS METHOD 9-PT AUTOFOCUS 51 English
1 Focus mode menu (page 68) B: 9-point focus mode C: Spot focus mode 2 Light-measuring mode (EXP MEASURE) menu (page 69) n: Multi-section lightmeasuring setting W: Center-weighted lightmeasuring setting Y: Spot light-measuring setting 5 Exposure correction icon (page 39) h Change the brightness of the image. 6 PAGE display (page 48) 7 Option icon (page 98) h Displays the Option Screen.
ACCESSING THE SHOOTING SETTING SCREEN Overview of the Shooting Setting Screen (video clips) PAGE 1 10:15 TOUCH SENSOR ON 53 English
1 Touch sensor menu (page 57) #: Set the shutter button touch sensor to ON. $: Set the shutter button touch sensor to OFF. 2 Video clip mode menu (page 58) 0: Shoot at 320 × 240 pixels (15 frames/second, standard compression) ,: Shoot at 160 × 120 pixels (15 frames/second, standard compression) 3 Focus range menu (page 59) *: +: ): -: Shoot using the autofocus.
ACCESSING THE SHOOTING SETTING SCREEN PAGE 2 10:15 FLICKER REDUCT OFF 55 English
1 Flicker-reduction menu (page 73) *: Set the flicker-reduction function to OFF. o: Set the flicker-reduction function to ON. 2 ISO sensitivity menu (page 70) t: Sets the ISO sensitivity *: u: v: w: 4 Exposure correction icon (page 39) h Change the brightness of the image. 5 PAGE display (page 48) 6 Option icon (page 98) h Displays the Option Screen. 7 Help display (page 103) 8 Remaining battery power (page 117) automatically (corresponds to ISO100 to 400).
TOUCH SENSOR (TOUCH FOCUS) SETTING The touch sensor function, by which the autofocus is activated by a fingertouch on the shutter button, can be set to ON or OFF. When the touch sensor function is set to OFF, the autofocus is activated when you press the shutter button halfway; then gently press the shutter button to snap the picture. 1 2 Display PAGE 1 of the Shooting Setting Screen (page 47). Select the touch sensor menu. h The sensor menu appears. #: The touch sensor function is set to ON.
RESOLUTION SETTING By setting the image resolution (pixels) to a higher setting, image detail is enhanced for a smoother, finer picture. However, the file size also becomes large and uses more memory. Select the resolution setting that suits your purpose. 1 2 Display PAGE 1 of the Shooting Setting Screen (page 47). In the still image shooting mode, select the resolution menu; in the video clip recording mode, select the video clip mode menu. h The resolution menu or video clip mode menu appears.
FOCUS RANGE 1 2 Display PAGE 1 of the Shooting Setting Screen (page 47). Select the focus range menu. h The focus menu appears. *: The camera automatically focuses on the subject within a range of 10 cm (3.94 in.) (Wide end) or 40 cm (15.75 in.) (Tele end) to infinity (autofocus). 12 FOCUS AUTO +: You can focus on a subject within a range of 5 cm (1.97 in.) (Wide end) or 40 cm (15.75 in.) (Tele end) to 70 cm (27.56 in.) (macro). ): You can focus on a subject in the distance (infinity).
How to use the manual focus 1 2 3 4 Display PAGE 1 of the Shooting Setting Screen (page 47). Select the manual focus icon - from the focus menu, and press the SET button. Press the SET button. h The focus distance adjustment bar appears. 12 Press the [l] or [m] button to adjust the focus distance, and press the SET button. h The focus distance is set, and you are returned to the Shooting Screen.
SELF-TIMER 1 2 Display PAGE 1 of the Shooting Setting Screen (page 47). Select the self-timer menu. h The self-timer icons are shown. N: Turns off the self-timer function. y: The image is captured about 2 seconds after the shutter button is pressed. x: The image is captured about 10 seconds after the shutter button is pressed. 3 61 12 SELF-TIMER OFF Select the desired icon from the self-timer menu, and press the SET button. h This completes the self-timer setting.
HINT To pause or cancel the self-timer function... i If the shutter button is pressed again before the shutter is released, the self-timer countdown temporarily stops. Press the shutter button one more time to restart the self-timer. i To cancel self-timer photography, set the self-timer setting to off N. i After the self-timer picture is snapped, the self-timer is automatically reset to off N. When x is selected...
SHUTTER OPERATION SETTING Select how the camera operates when the shutter button is pressed. 1 2 Set the camera to the still image shooting mode, and display PAGE 1 of the Shooting Setting Screen (page 47). Select the operation mode menu. c: When the shutter button is pressed, a single still image is captured (single shot). MODE P: When the shutter button is PHOTOGRAPH 1 IMAGE pressed, several still images are captured in succession (sequential shots).
Shooting sequential shots When the shutter button is pressed, still images are captured in succession. 1 2 Select the sequential shots icon P from the operation mode menu, and press the SET button. h If the resolution is set to k, the setting changes automatically to y. Press the shutter button to start shooting. h Sequential shots shooting begins. yx : 5 images zt[ : 7 images h Note that if the shutter button is released during shooting, shooting stops immediately.
SHUTTER OPERATION SETTING How to use the auto bracket shots (bracket series) feature Successive still images are captured as the exposure changes (bracket series). 1 2 65 Select the bracket series icon I from the operation mode menu, and press the SET button. h If the resolution is set to E, the setting automatically changes to y. Press the shutter button. h When the shutter button is pressed, shooting begins. h It is not necessary to keep the shutter button depressed.
Composite photo Shoot two separate still images, and combine them to create a composite still image. 1 2 3 4 Select the composite icon - from the operation mode menu, and press the SET button. h If the resolution is set to k, the setting changes automatically to y. Press the SET button again. h The frame selection display appears. Press the [l] or [m] button to select a composite pattern, and press the SET button. h The selected frame shape fills the display.
SHUTTER OPERATION SETTING ID photos You can create ID photos to use in circulars, ads, and other publications, as well as in identification documents. 1 2 3 Select the ID photo icon . from the operation mode menu, and press the SET button. Press the MENU button twice. h The ID photo outline appears on the LCD display. 12 Align the subject with the ID photo outline, and snap the picture. h After the preview screen for the captured image appears, you are returned to the Shooting Setting Screen.
FOCUS AREA SETTING You can choose from the following 2 types of autofocus (still image shooting only): 9-point range finder focus: The correct focus is determined from 9 different focus points within the shooting area visible on the LCD monitor. When the image is focused, a target mark & appears. Spot focus: The camera focuses on the subject in the center of the LCD monitor. 1 2 3 Display the Shooting Setting Screen (page 47). Select the focus mode menu. h The focus mode menu appears.
LIGHT-MEASURING MODE SETTING You can select from 3 types of light-measuring modes. Multi-section light-measuring: The exposure is adjusted after sampling from multiple areas of the entire shooting screen. Center-weighted light-measuring: The exposure is adjusted after light is measured from the entire image, but with emphasis on the center area. Spot light-measuring: You can compose the picture and capture the image after first measuring the light only at the center spot of the LCD monitor.
ISO SENSITIVITY With the initial settings, the ISO sensitivity is automatically set according to the brightness of the subject. However, the ISO sensitivity can be set to a fixed setting. 1 2 Display PAGE 2 of the Shooting Setting Screen (page 47). Select the ISO sensitivity menu. h The ISO sensitivity menu appears. t: Sets the ISO sensitivity automatically (equivalent to ISO50 to 200 [video clip recording mode: ISO100 to 400]).
WHITE BALANCE This camera automatically adjusts the white balance under most lighting conditions. However, if you want to specify the lighting conditions or change the overall tone of the image, the white balance can be manually set. 1 2 Display PAGE 2 of the Shooting Setting Screen (page 47). Select the white balance menu. h The white balance menu appears. 12 >: The camera will make the white WHITE BALANCE AUTO balance adjustment automatically based on the natural and artificial light conditions.
3 Select the desired icon, and press the SET button. h This completes the white balance setting. h Once the white balance setting is programmed for the ] icon, it is retained even if another white balance setting (>, r, o, p, or q) is selected. If you changed to another setting, whenever you select the ] icon and press the SET button, the previously programmed setting is recalled. HINT To cancel the white balance setting i Perform step 1, select >, and then press the SET button.
FLICKER-REDUCTION SETTING The flicker-reduction setting reduces the flicker phenomenon that results when filming video clips under fluorescent lights and the like where the background lighting pulsates at the frequency of the power supply. The flickerreduction setting is set for a frequency of 50 Hz. 1 2 Set the camera to the video clip recording mode, and display PAGE 2 of the Shooting Setting Screen (page 47). Select the flicker-reduction menu. h The flicker-reduction menu appears.
PLAYBACK PAGE 1 (BASIC SETTINGS) DISPLAYING THE PLAYBACK SETTING SCREENS The Playback Setting Screens are used to adjust your camera’s playback settings. 1 2 Press the playback button [=]. h The display changes to the Playback Screen. Playback button [=] Press the MENU button. h The Playback Setting Screen appears. MENU button PROTECT Change image protect setting To cancel the Playback Setting Screen When the MENU button is pressed, you are returned to the Playback Screen.
DISPLAYING THE PLAYBACK SETTING SCREENS Switching the page The Playback Setting Screen consists of two pages: PAGE 1 and PAGE 2. 1 2 Display a Playback Setting Screen. Press the [l] button. h The Playback Setting Screen changes to the other PAGE. h Each time the [l] button is pressed, the PAGE changes.
Overview of the Playback Setting Screens PAGE 1 PROTECT Change image protect setting 1 Protect (page 78) h Protect data from accidental erasure (write protect). 2 Erase (page 80) h Delete images from the card memory. 3 Zoom jump playback (page 82) h Magnify the image for a better view of the details. 4 Resize (page 83) h Reduce the resolution of a still image. 5 Rotate image (page 84) h Rotate still images. 6 Extract still image (page 85) h Extract a still image from a video clip.
DISPLAYING THE PLAYBACK SETTING SCREENS PAGE 2 COPY IMAGE Copy image 1 Copy image (page 86) 2 Print settings (page 88) h Specify the print settings. 3 Slideshow (page 95) h Play back the images in a slideshow format. 4 PAGE display (page 75) 77 English 5 Option icon (page 98) h Display the Option Screen.
IMAGE PROTECT Prevent accidental erasure of data. 1 2 3 Display the data that you want to protect from accidental erasure, and display PAGE 1 of the Playback Setting Screen (page 74). Select the protect icon A, and press the SET button. h “LOCK?” appears. h If the protect mode has already been enabled for the data, then “UNLOCK?” appears. Press the [n] or [o] button to select “YES”, and press the SET button. h The protect mode is set for the data. h The protect mark B indicates that the data is locked.
IMAGE PROTECT CAUTION i Even if the protect mode is set for certain data files, they will be erased if the card is reformatted (page 113). HINT To select a different image in steps 2 and 3... i Press the [l] or [m] button. To cancel the protect mode for an image... i Display the desired data and repeat steps 1 to 3. The protect mark B will disappear and the protect mode is canceled.
ERASING DATA You can erase data that is stored on the card if you no longer need it. You can erase the data one at a time, or all at once. 1 2 3 4 To erase data from the card, perform the erase procedure with the card installed in the camera. To erase data from the camera’s internal memory, remove the card before performing the erase procedure. Display PAGE 1 of the Playback Setting Screen (page 74). Select the erase icon c, and press the SET button. h The Erase Mode Screen appears.
ERASING DATA 5 Select “YES” and press the SET button. h The currently displayed image is deleted. h To erase other data, select the data, and press the SET button. h The Erase Confirmation Screen again appears. To erase the data, select “YES”, and press the SET button. When data erase is completed, “NO IMAGE” is shown. CAUTION About protected images i Data which is protected from accidental erase cannot be erased.
ZOOM JUMP PLAYBACK You can magnify a portion of a still image to check the accuracy of the focus. 1 2 3 Display a still image to view using zoom jump playback. Zoom switch Press the SET button. h The image is magnified. h If the magnified view appears to be in focus, then the overall image will be in focus. Press the arrow buttons to move to the part you wish to magnify, and press [T] ([]]) on the zoom switch. h The displayed area is further magnified.
CHANGING IMAGE SIZE (RESIZE) The size of a still image that has already been captured at a resolution of t or more can be changed to 1,600 × 1,200 pixels or 640 × 480 pixels. The resized image is saved as a separate image. 1 Display the still image whose size you want to change. 2 Display PAGE 1 of the Playback Setting Screen (page 74). 3 Select the resize icon I, and press the SET button. h The Resize Screen appears.
ROTATE IMAGE Captured still images can be rotated to the correct orientation for viewing. 1 2 Display the image you wish to rotate, and display PAGE 1 of the Playback Setting Screen (page 74). Select the rotate icon L, and press the SET button. h The Rotate Image Screen appears. RIGHT:Rotates image clockwise 90 degrees. LEFT: Rotates image counterclockwise 90 degrees. EXIT: Return to the Playback Setting Screen. 3 ROTATE RIGHT LEFT EXIT Select “RIGHT” or “LEFT”, and press the SET button.
EXTRACTING A STILL IMAGE FROM A VIDEO CLIP You can select one image (scene) from a video clip, copy it, and save it as a still image (the original data remains unchanged). 1 2 3 Play back a video clip, and pause at the point you wish to copy and save. Display PAGE 1 of the Playback Setting Screen (page 74). Select the extract still icon 7, and press the SET button. h The screen to extract an image appears. YES: The image is copied and saved as a still image (the original data is left unchanged).
COPY DATA Images recorded in the camera’s internal memory can be copied to the card, and likewise from the card to the internal memory. 1 Insert the card in the camera (page 14). 2 Display PAGE 2 of the Playback Setting Screen (page 74). 3 4 Select the copy image icon S, and press the SET button. h The Copy Image Screen appears. Press the [n] or [o] button to select the copy direction.
COPY DATA 5 6 7 87 Press the SET button. h The screen to select the type of copy appears. h The copy source is shown in the background on the screen. COPY SINGLE: Copy the data for one image. COPY ALL: Copy all the data from the copy source to the copy destination. Select the desired type of copy. 1 Press the [l] or [m] button to display the image you wish to copy. 2 Press the [n] or [o] button to select “COPY SINGLE”.
PRINT SETTINGS In addition to using your printer to print out still images captured with your camera, as with conventional film, you can have prints made at shops offering digital print services. Moreover, this camera is DPOF-compatible, so you can use the camera to specify the number of prints, whether or not the date is displayed on the print, and also to specify an index print. Display the Print Settings Screen 1 2 Display PAGE 2 of the Playback Setting Screen (page 74).
PRINT SETTINGS HINT Printing a single frame from a video clip i To print with a printer or have the digital print service shop print out a still image from a video clip, you must first save it (save frame [page 85]) as a still image. About the DPOF format i DPOF (Digital Print Order Format) is a print order format. You can connect your camera to a DPOF-compatible printer to produce your prints.
Specifying date imprinting and number of prints You can specify print settings for each individual image (EACH IMAGE), or apply the print settings to all the images on the card (ALL IMAGES). 1 2 3 Display the Print Setting Screen (page 88). Select ALL IMAGES or EACH IMAGE. ALL IMAGES: The set print settings are applied to all the still images on the card. EACH IMAGE: The set print settings are applied only to the image currently displayed. PRINT SETTING ALL IMAGES Press the SET button.
PRINT SETTINGS 4 91 Specify whether the date is displayed on the print, and the number of prints. 1 Press the [n] or [o] button to select “DATE”. 2 Press the SET button. h The Print Date Screen appears. 3 Press the [n] or [o] button to select the desired option. YES:Print the date. NO: Do not print the date. 4 Press the SET button. h You are returned to the Date/ Copies Print Screen. 1 Press the [n] or [o] button to select “COPIES”.
5 Select “ADD TO PRINT SETTING” and press the SET button. h The Confirm Print Settings Screen appears. If the print settings are correct: Select “EXIT”, and press the SET button. If the print settings were changed: Select “MODIFY PRINT SETTING”, and press the SET button. EACH IMAGE SETTINGS DATE YES DATE: YES COPIES 1 COPIES : 1 MODIFY PRINT SETTING EXIT Index print Printing out many small images on one sheet is called an “index print”.
PRINT SETTINGS 3 4 Press the SET button. h The Index Print Screen appears. YES: Specify an index print copy. EXIT: Discontinue the setting procedure, and return to the Print Setting Screen. INDEX SET INDEX PRINT? YES EXIT Select “YES”, and press the SET button. h This completes the setting for the index print. You are returned to the Print Setting Screen. Changing the print settings 1 2 Follow steps 1 to 4 on pages 90 and 91. Select “MODIFY PRINT SETTING”, and press the SET button.
Clearing all the print settings Delete the print settings for all images. 1 Display the Print Setting Screen (page 88). 2 Select “ALL CLEAR”. PRINT SETTING ALL IMAGES EACH IMAGE INDEX ALL CLEAR EXIT 3 4 Press the SET button. h The Confirm All Clear Screen appears. YES: Clear the print settings for all images. EXIT: Cancel the clear procedure and return to the Print Setting Screen. Select “YES”, and press the SET button.
SLIDESHOW PLAYBACK 1 2 Display PAGE 2 of the Playback Setting Screen (page 74). Select the slideshow icon V, and press the SET button. h The Slideshow Screen appears. TIME: Adjust the transition speed (the period that an image is displayed before it changes to the next image). SLIDESHOW TIME EFFECT START EXIT EFFECT: Select a transition effect as an image changes to the next image. START: Begin slideshow playback. EXIT: Return to the Playback Setting Screen.
3 Select “START”, and press the SET button. h Slideshow playback starts. h To stop slideshow playback, press the SET button or MENU button.
DISPLAYING IMAGE PROPERTIES (INFORMATION SCREEN) On the Information Screen you can check what the settings were when an image was captured. 1 2 97 Display the desired image (pages 29 and 33). Press and hold the MENU button for at least 2 seconds. h The Information Screen appears. h If the MENU button is pressed again, the Information Screen is canceled.
OPTION SETTINGS DISPLAYING THE OPTION SCREEN The Option Screen is used to adjust various camera settings. 1 2 3 Display the Shooting Setting Screen or Playback Setting screen. h Shooting Setting Screen, see (page 47) h Playback Setting Screen, see (page 74) Press the [n] or [o] button to select the PAGE indication. Press the [m] button. h The Option Screen appears. h If the [o] button is pressed, the Option Screen menu appears. PAGE indication 12 ADV.
DISPLAYING THE OPTION SCREEN Overview of the Option Screen 1/2 CLOCK SET OPERATION BEEP HELP DISP POST VIEW DIGITAL ZOOM LCD BRIGHTNESS LANGUAGE POWER SAVE FILE NO.
1 Date and time setting (page 19) h Set the camera’s internal clock. 2 Operation sounds setting (page 101) h Adjust the operation sounds produced when the camera’s buttons are pressed. 3 Help display setting (page 103) h Turn the help display on or off. 4 Post-view (page 104) h Specify how long a still image is displayed on the LCD monitor after it is captured. 5 Digital zoom (page 105) h Set the digital zoom to ON or OFF. 6 Monitor brightness (page 106) h Adjust the brightness of the LCD monitor.
OPERATION SOUNDS This setting allows you to set whether or not a confirming audio signal sounds when the operation buttons (shutter button, SET button, MENU button, etc.) are pressed. 1 2 Display the Option Screen (page 98). Select the operation beep icon ?, and press the SET button. h The Operation Beep Setting Screen appears. h The current settings are shown on the screen. h If “ALL OFF” is selected and the SET button pressed, all the operation sounds are muted.
3 4 5 6 7 Select “CHANGE SETTINGS”, and press the SET button. h The screen to select the operation buttons appears. SHUTTER: Set the sound for the shutter button. KEY SW: Set the sounds of the operation buttons (except for the ON/OFF button and shutter button). EXIT: Return to the Operation Sounds Screen. OPERATION BEEP SHUTTER ON KEY SW ON EXIT Select the desired operation button, and press the SET button. h The screen to change the setting appears.
HELP DISPLAY You can set whether or not the help messages are shown on the LCD monitor. 1 2 3 Display the Option Screen (page 98). Select the help display icon r and press the SET button. h The Help Setting Screen appears. ON: The HELP messages are enabled. OFF: The HELP messages are disabled. Select the desired setting, and press the SET button. h This completes the help display setting.
POST-VIEW SETTING Specify the duration that the captured image appears on the LCD monitor (post-view) after the shutter button is pressed. 1 2 3 Display the Option Screen (page 98). Select the post-view icon o, and press the SET button. h The Post-view Screen appears. 1 SEC: The post-view image is displayed for 1 second. 2 SEC: The post-view image is displayed for 2 seconds. OFF: The post-view image is not displayed. POST VIEW 1SEC 2SEC OFF Select the desired setting, and press the SET button.
DIGITAL ZOOM SETTING Set the digital zoom setting to ON or OFF. If the deterioration of image quality characteristic of the digital zoom function is not to your liking, you may choose to disable the digital zoom (OFF) and shoot using only the optical zoom. 1 2 Display the Option Screen (page 98). Select the digital zoom icon Q, and press the SET button. h The Digital Zoom Screen appears. ON: Digital zoom is enabled. OFF: Digital zoom is disabled.
LCD MONITOR BRIGHTNESS Adjust the brightness of the camera’s LCD monitor display. Use this adjustment when the monitor image is difficult to view because of ambient lighting. In addition, in very bright surroundings, such as outdoors on a sunny day, you can turn the backlight OFF to preserve battery power. 1 2 Display the Option Screen (page 98). Select the LCD brightness icon ,, and press the SET button. h The brightness control display appears.
SCREEN LANGUAGE You can set the LCD monitor of your camera to display the messages in any one of several languages. 1 2 3 Display the Option Screen (page 98). Select the language icon z, and press the SET button. h The Language Screen appears. DEUTSCH: German ENGLISH: English ESPAÑOL: Spanish FRANCAIS: French ITALIANO: Italian NEDERLANDS:Dutch : Russian : Japanese : Korean : Chinese (traditional) : Chinese (simplified) LANGUAGE Select the desired language, and press the SET button.
POWER SAVE FUNCTION Your camera has a “power save” function whereby the power automatically turns off after a specified period of inactivity. The power save function works to conserve the battery power when the camera is not being used, or to prevent the batteries from dying if the camera has accidentally been left on. You can specify the elapsed time (standby time) before the power save function is activated. 1 2 Display the Option Screen (page 98). Select the power save icon ?, and press the SET button.
POWER SAVE FUNCTION 3 4 5 Select the desired option, and press the SET button. h The Set Standby Time Screen appears. POWER SAVE BATT/CAM 1 min Press the [n] or [o] button to set the standby time. Press the SET button. h The power save function is set.
FILE No. RESET FUNCTION If a newly formatted (page 113) card is used, the file name (image number) of the captured image automatically begins from 0001. If the card is subsequently reformatted, or if a different reformatted card is used, the file names again begin from 0001. This is because the file number reset function is set to “ON”, and consequently it results in more than one card containing images with the same numbers.
FILE No. RESET FUNCTION i If Card B already has image data in it when it replaces Card A, file names are assigned as follows. When the highest image number on Card B (before replacing) is lower than the highest image number on Card A: the file name of the next recorded image continues from last file name recorded on Card A. Card A 0001, 0002 ..... 0012, 0013 Replace card Card B 0001, 0002, 0014, 0015 ......
1 2 3 4 Display the Option Screen (page 98). Select the file number reset icon i. FILE NO. RESET Press the SET button. h The File Number Reset Screen appears. ON: The file number reset function is “ON”. OFF: The file number reset function is “OFF”. ON OFF Select “OFF”, and press the SET button. h The file number reset function was set to OFF. HINT i Until the file number reset function is turned “ON”, consecutive file names are assigned.
INITIALIZING THE CARD MEMORY AND INTERNAL MEMORY The supplied card must be formatted with this camera. In addition, a card must be formatted with this camera: i After purchasing, when used for the first time, or i If it was formatted using a personal computer or another digital camera. The card cannot be reformatted if the lock switch is set to the “LOCK” position. Proceed with the reformat procedure after setting the lock switch to the unlocked position.
4 5 6 Select the desired format option, and press the SET button. h The Confirm Format Screen appears. Select “YES”. Press the SET button. h Formatting begins. h During formatting, “FORMATTING” and “DO NOT POWER OFF” are shown on the LCD monitor. CAUTION Caution during reformatting i Please do not turn off the camera or insert/remove the card while the card is being formatted. Reformatting erases the data i When the card or internal memory is initialized, all the recorded data is erased.
RESETTING THE CAMERA SETTINGS Reset the camera to the factory-preset settings. 1 2 3 Display the Option Screen (page 98). Select the reset settings icon 2, and press the SET button. h The Reset Settings Screen appears. YES: Reset to the factory-preset settings. NO: Do not change the settings, and return to the Option Screen. RESET SETTINGS RESET? YES NO Select “YES”, and press the SET button. h The camera settings are reset to the factory-preset settings.
CHECKING THE REMAINING INTERNAL MEMORY AND CARD MEMORY You can check how many images can be captured on the card. For a table showing the maximum number of images and recording time for the internal memory and for a specific card, please see “Possible No. of Images/Possible Shooting Time” on page 146. 1 Press the ON/OFF button to turn the camera on, and press the MENU button. h The Mode Select Screen appears. Select PHOTO, and press the MENU button.
CHECKING THE REMAINING BATTERY CHARGE When using batteries, the remaining battery charge can be checked on the LCD monitor. Make sure to check this indicator before capturing an image. For an indication of the possible length of time for battery operation, see page 145. 1 Display a Shooting or Playback Setting Screen (pages 47 and 74). h The battery remaining charge indicator appears in the lower right corner of the LCD monitor.
HINT i If any data is present, you can also check the remaining battery charge on the Playback Setting Screen or Information Screen. i Battery life may differ even among batteries of the same type. i Depending on the usage of the camera (such as the number of times the flash is used, etc.) or the ambient temperature (temperatures below 10°C [50°F]) the number of images that can be saved on fully charged batteries will vary greatly.
OTHER DEVICES AND CONNECTIONS DIRECT PRINTING Your camera supports the PictBridge function. By connecting the camera directly to a PictBridge-enabled printer, the camera’s LCD monitor can be used to select images and initiate printing (PictBridge printing). Print preparations 1 2 Insert the card containing the images you wish to print in the camera. Turn the printer on, and use the supplied USB interface cable to connect the camera to the printer.
3 Select “PictBridge”, and press the SET button. h The Print Settings Screen appears. PRINTING MODE ONE IMAGE Print this image CAUTION Caution when connecting a printer i If the power to the printer is turned off while it is connected, the camera may not operate correctly. If the camera does not operate correctly, disconnect the USB interface cable, turn off the camera, and then reconnect the cable. i During PictBridge printing, the camera’s button operation response is slower.
DIRECT PRINTING To select one image and print it (one image) Procedure to select one still image and print it. 1 2 3 Complete the printing setup (page 119). Select the one image icon Y, and press the SET button. h The screen to select images for printing appears. Press the [l] or [m] button. h Specify the image to print.
4 5 Specify the number of prints. 1 Select “COPIES”, and press the SET button. 2 Press the [n] or [o] button to specify the number of prints. 3 Press the SET button. h “PRINT” is selected. 100-0009 ONE IMAGE COPIES 1 PRINT EXIT Press the SET button. h Printing begins. HINT To cancel printing 1 During printing, press the [o] button. h The Confirm Cancel Printing Screen appears. 2 Select “YES”, and press the SET button. h If “EXIT” is selected and the SET button is pressed, printing resumes.
DIRECT PRINTING To print all the images (all images) Print all of the images. 1 2 3 Complete the printing setup (page 119). Select the all images icon u, and press the SET button. h The Print All Images Screen appears. Select “PRINT”, and press the SET button. h Printing begins. ALL IMAGES 100-0009 PRINT EXIT CAUTION Printing is not possible if there are more than 999 still images in the card. i Delete unwanted images before printing.
Thumbnail prints (index) Make an index print of all the images. 1 2 3 Complete the printing setup (page 119). Select the index print icon [, and press the SET button. h The Index Print Screen appears. Select “PRINT”, and press the SET button. h Printing begins.
DIRECT PRINTING To print the images that are set to print (print reserved images) Procedure to print all the images that are set to print. 1 2 3 Make the print settings (page 88), and complete the printing setup (page 119). Select the DPOF icon w, and press the SET button. h The Print Scheduled Images Screen appears. Select “PRINT”, and press the SET button. h Printing begins. h Printing begins about 1 minute after the SET button is pressed.
To change the printer settings and print images (change printer settings) Images are printed according to settings specified by the camera, such as paper type, size, layout, printing quality, etc. 1 2 Complete the printing setup (page 119). Select the printer settings icon v, and press the SET button. h The Printer Settings Screen appears. MEDIA TYPE: Specify the type of paper used for printing. PAPER SIZE: Specify the size of paper used for printing.
DIRECT PRINTING 3 4 Adjust the printer settings. 1 Press the [n] or [o] button to select a printer setting parameter, and press the SET button. h The screen to set the selected parameter appears. 2 Press the [n] or [o] button to adjust the setting, and press the SET button. h The selected parameter is set, and you are returned to the Printer Settings Screen. h Follow the same procedure to adjust the other parameters, as desired.
APPENDICES COMMONLY ASKED QUESTIONS If you have a question about the camera operation, you might find the answer in this compilation of commonly asked questions. Question Why doesn’t the power turn on? Power Why are the batteries consumed so quickly? Why does the icon appear? Answer Due to cold temperatures, the batteries temporarily lost their power. The ambient temperature is very low. The battery life has expired. The remaining battery power is low.
COMMONLY ASKED QUESTIONS Question Are the settings retained even after the camera is turned off? Answer — Which resolution setting should I use? — What is the difference between the digital zoom and the optical zoom? — Shooting 129 English Action All settings except the self-timer and the exposure correction are retained even after the camera is turned off.
Question How can I get the distant view into focus? Answer — The video clip I shot outdoors is completely white. When used in cold weather, why does the image seem to leave traces as it moves? Why does the displayed image contain some red, blue and green dots, or why are black spots visible? — Shooting LCD monitor Condition due to the liquid crystals. Action Set the scene select function to the landscape 1 mode when photographing.
COMMONLY ASKED QUESTIONS Question Why is the image too bright? Answer The subject was too bright. Why is the image out of focus? The focus is not locked properly. Why doesn’t the zoom jump playback work? Zoom jump playback does not work for an image that was created from a magnified portion of a zoom jump image, or for video clips. This may happen when trying to play back images stored on a card from a different digital camera.
Question Why isn’t the magnified image clear? Viewing images Why isn’t the captured image clear? Can I play back image data that I edited using my computer? Printing Misc. Why does a message appear during PictBridge printing? Why does the “CARD FULL” or “INTERNAL MEMORY FULL” message appear? Why does the “CARD IS PROTECTED” message appear? Why can’t the camera be operated? Answer Due to the characteristics of the camera, magnified images appear less clear.
COMMONLY ASKED QUESTIONS Question Can I use my camera abroad? Why does the “SYSTEM ERROR” message appear? Misc. 133 English Answer — A problem has occurred within the camera or card. Action If you have questions about using the AC adaptor and power cord abroad, please consult with a dealer near you for advice. Check the following items: 1 Remove the card and then install it again. 2 Remove the batteries and then install them again. 3 Install a different card.
TROUBLESHOOTING Before taking your camera to the repair shop, check the following table for a possible solution to the problem. CAMERA Problem No power. Power The camera turns off by itself. An image is not captured when the shutter button is pressed. Shooting Reference page Cause Action The batteries are dead. The battery has not been inserted correctly. The battery/ card cover is not completely closed. The power save function is operating. Insert new batteries.
TROUBLESHOOTING Problem Cause Action An image is not captured when the shutter button is pressed. The maximum number of images that can be captured or the maximum video clip recording time has been reached. Install a new card. Erase the images that are not necessary. Save the images to separate media, then erase all the images from the card. Remove your finger from the shutter button, and then use the operation buttons. Set the flash to automatic flash mode or forced flash mode. Insert new batteries.
Shooting LCD monitor Problem Cause When zooming in or out, the zoom movement stops momentarily. There is noise in the captured image. The optical zoom has moved to the maximum magnification position. The ISO sensitivity setting is too high. The playback mode is not active. The flash was blocked by a finger or other object. No playback image appears. The image is too dark. The subject was too far away. Viewing images The subject was lit from behind. There is not enough light.
TROUBLESHOOTING Problem Cause Action The video clip picture is flickering. The video clip was recorded under fluorescent lighting. The forced flash mode is selected. The subject was too bright. Set the flickerreduction setting to on. The image is too bright. Viewing images The image is not in focus. 137 English The ISO sensitivity setting is incorrect. The subject is too close to the camera. The focus setting is not correct. The camera moved when the shutter button was pressed.
Problem The colors of the images captured indoors are not correct. Viewing images A part of the image is missing. “NO IMAGE” is shown. Image editing Misc. You cannot edit or rotate an image. The “PROTECTED” message appears and the data cannot be erased. When a 1GB card is used, the recording capacity is less than that indicated in the section “Possible No. of Images/ Possible Shooting Time”. Cause This is due to ambient lighting. The white balance setting is incorrect.
TROUBLESHOOTING Notes regarding the scene select feature and filters During still image shooting . When using a filter, the + focus range setting is not available. / 0 1 The + and ) focus range settings are not available. 2 3 139 English Focus range: Fixed at ). Flash: Fixed at l.
During video clip recording . When using a filter, the + focus range setting is not available. / 0 1 The + and ) focus range settings are not available. 2 3 The focus range is fixed at ). About the scene select function and focus range settings i The scene select function changes to . when the focus range is set to +. i Even if you set the focus range to +, ) or -, it changes to * when the scene select function is set to . or 3.
SPECIFICATIONS Camera Type Recording system Image file format Data storage media Camera effective number of pixels Image sensor 141 English CCD digital camera (recording and playback) Digital recording Still images: JPEG format (DCF, DPOF, Exif 2.
Recording resolution White balance Lens Aperture Exposure control type Light-measuring modes k: 3,680 × 2,760 pixels (single-shot still images only) y: 2,816 × 2,112 pixels (single-shot still images and sequential shots only) x: 2,816 × 2,112 pixels (single-shot still images and sequential shots only) z: 2,288 × 1,712 pixels (single-shot still images and sequential shots only) t: 1,600 × 1,200 pixels (single-shot still images and sequential shots only) [: 640 × 480 pixels (single-shot still images and s
SPECIFICATIONS Range Digital zoom Shutter speed Sensitivity LCD monitor 143 English Normal photography: 10 cm (3.94 in.) to ∞ (Wide), 40 cm (15.75 in.) to ∞ (Tele) Macro photography: 5 cm (1.97 in.) to 70 cm (27.56 in.) (Wide), 40 cm (15.75 in.) to 70 cm (27.56 in.) (Tele) For shooting: 1x to 4x (except resolution k) For playback: 1x to 57.5x (varies with resolution) Single-shot mode: 1/2 to 1/1,500 sec. (Maximum approx. 2 seconds when the scene select function is set to fireworks 3 etc.
Flash working range Flash modes Focus Self-timer Time/date Ambient environment Temperature Humidity Power supply Batteries AC adaptor (sold separately) Dimensions (not including protuberances, depth at narrowest dimension) Weight GN = 6.5 Approx. 10 cm (3.94 in.) to 3.2 m (10.50 ft.) (Wide) Approx. 40 cm (15.75 in.) to 1.8 m (5.91 ft.) (Tele) Auto-flash, forced flash, flash off, red-eye reduction TTL-type AF (9-point range finder/spot focus), manual focus (14 steps) Approx.
SPECIFICATIONS Camera Connector USB/AV (communication/sound and image output) terminal DC IN (external DC power input) terminal USB 2.0 (High-speed) DC 3.4 V (for exclusive use with the separately sold AC adaptor (model VAR-G4AEX for Europe, U.K. and others, and model VARG4AU for North America and others)) Battery life Possible No. of Images* Maximum playback time** Alkaline batteries (supplied) Nickel metal hydride batteries sold separately: HR-3UF) 120 images 360 images 380 min. 530 min.
Possible No. of Images/Possible Shooting Time The table shows the possible number of captured images and the possible recording time for the camera’s internal memory (15MB) and for the commercially available 128MB and 1GB SD Memory Cards. Shooting Resolution mode setting setting Single-shot mode/ Sequential shots mode Video clip mode k*1 y x z t [ 0 , Internal memory 4 images 5 images 7 images 11 images 22 images 116 images 1 min. 30 sec. 2 min. 45 sec.
SPECIFICATIONS Concerning the access light The camera’s access light will light, flash, or be off, depending on the different camera operations.
Others Apple, Macintosh and QuickTime are trademarks or registered trademarks of Apple Computer Inc. Windows and Windows NT are registered trademarks of Microsoft Corporation. All other company and product names are registered trademarks or trademarks of their respective owners. CAUTION i It is forbidden to copy this manual, whole or in part, without prior written permission.
HINTS FOR TAKING PICTURES Taking great pictures in difficult surroundings is easier than you might think. By keeping a few points in mind and choosing the correct settings, you can create photos that you’ll be proud to display and share. If images are blurred even when the autofocus is used Your camera employs an autofocus function. When you snap a picture using the autofocus, the camera automatically adjusts the settings so that the image will be in focus.
Photographing a moving subject Situation: You would like to snap an action shot of a moving child or pet. The autofocus is activated, but because the subject is moving, the image may be blurred. In particular, when the distance between the camera and the subject is changing, it is difficult to lock the focus on the subject. Here are some hints for successfully capturing images of moving subjects.
HINTS FOR TAKING PICTURES Shooting portraits (portrait mode 0) Points: i Choose a background that doesn’t detract from your subject. i Move in close to your subject. i Pay attention to lighting and how it affects your subject. NOTE i If the background is distracting, it will not show your subject to his best advantage. Move in closer to your subject or zoom in so that the background does not compete with the subject.
Night photography (night view mode 2) Points: i Avoid camera shake. i Increase the ISO sensitivity. NOTE i Camera shutter speed during night photography is considerable slower, so there is a much greater chance that your photographed images will be blurry. Use a tripod whenever possible, or if a tripod is not available, you can lean against a wall or pillar to help stabilize the camera. i You can photograph your subject with the night scene in the background by using the flash.
SANYO Electric Co., Ltd.