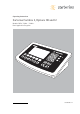
Operating Instructions Sartorius Combics 3, Options H0 and I2 Models CAIS.
Intended Use – – – – Combics 3 is a rugged, easy-to-use indicator for the complex quality control tasks you perform every day. It meets the highest requirements placed on the accuracy and reliability of weighing results in the following areas: The food industry The pharmaceutical industry The chemical industry The electronics and metal industries.
Application Programs Overview of Applications and Functions Keys Display Application Basic weighing Send print job/data record to peripheral device Label printer Connection option for a second and third weighing platform Counting Neutral measurement Averaging (animal weighing) Weighing in percent Checkweighing Classification Totalizing Batching/Counting to target value Function Zero Tare Date/time Internal battery (rechargeable) ID codes (6 codes, 40 characters each) Barcode Automatic printout Automati
Counting Z With the Counting application, you can determine the number of parts which each have approximately equal weight. Soft Key Functions Start Begin calculation of the reference sample weight “wRef.” * nRef Save the value entered as the reference weight Begin calculation of the reference sample weight “wRef.” * wRef Save the value entered as the reference sample weight n= Begin calculation of the reference sample weight “wRef.
Preparation § Select Setup: Press the H key § Select Application Parameters: Press the O soft key § Select the Counting application: Press the O soft key Application 1: Counting Minimum load for initialization o 1 digit 2 digits 5 digits 10 digits 20 digits 50 digits 100 digits 200 digits 500 digits 1000 digits Accuracy - avg. piece wt. calc.
Counting Z Average Piece Weight Updating In the Setup menu: Application 1: Counting: Average piece weight updating You can define whether or not the reference sample weight is updated automatically during weighing. The average piece weight is updated auto matically only when the following 6 criteria are met: 1. The Automatic setting is selected in the Setup menu 2. The current piece count exceeds the original piece count by at least two 3.
Example: You need to determine an unknown number of parts and the measurements should be logged. Configuration: The “Counting“ application is selected, and printout has been set up. t Place empty container on the scale. t Press the ) key to tare the scale. Note: If the automatic tare function is enabled (see chapter “Operation“ in the “Weighing“ section), you do not need to press the ) key. The tare weight is saved automatically when you place the container on the platform.
Neutral Measurement D With this application you can use your weighing platform to measure the length, surface and volume of parts that have roughly the same specific weight. The o symbol is displayed as the weight unit. Soft Key Functions Start Begin calculation of the reference weight “wRef.” * nRef Save the value entered as the calculation factor Begin calculation of the reference weight “wRef.
Preparation § Select Setup: Press the H key § Select Application Parameters: Press the O soft key § Select the Neutral Measurement application: Press the O soft key Application 1: Neutral Measurement Minimum load for initialization o 1 digit 2 digits 5 digits 10 digits 20 digits 50 digits 100 digits 200 digits 500 digits 1000 digits Accuracy f. reference val. calc.
Neutral Measurement D Neutral Measurement with Two Weighing Platforms You can use two weighing platforms simultaneously with the Neutral Measurement application.
t Place 1 m of cable into the container. t Press the 1 key to enter the measured value via the keypad (in this example, 1 m). t Press the “nRef“ soft key to apply the value and start the calculation of the reference weight. y The “wRef“ reference weight is displayed on the bottom left. t Place the desired amount of cable into the container (in this example, 25 m) y The result is displayed.
Averaging (Animal Weighing) V With the Averaging application, you can use your weighing platform for calculating weights as the average of a number of individual weighing operations. These individual operations are also known as “subweighing operations.” This function is used to determine weights under unstable ambient conditions or for weighing unstable samples (such as live animals). Characteristics – Averaging started manually or auto matically.
Preparation § Select Setup: Press the H key § Select Application Parameters: Press the O soft key § Select the Animal Weighing application: Press the O soft key Application 1: Animal weighing (averaging) Minimum load for starting o 1 digit 2 digits 5 digits 10 digits 20 digits 50 digits 100 digits 200 digits 500 digits 1000 digits Start o Manual Automatic Animal activity 0.1% of the animal/object o 0.2% of the animal/object 0.
Averaging (Animal Weighing) V Example: The weight of one mouse should be measured. Configuration: The “Animal weighing“ application is selected, and a printout has been set up. t Place empty container on the scale. t Press the ) key to tare the scale. Note: If the automatic tare function is enabled (see chapter “Operation“ in the “Weighing“ section), you do not need to press the ) key. The tare weight is saved automatically when you place the container on the platform.
Weighing in Percent L With the Weighing in Percent applica tion, you can use your weighing platform to obtain weight readouts in percent which are in proportion to a reference weight. L is displayed as the weight unit.
Weighing in PercentL Preparation § Select Setup: Press the H key § Select Application Parameters: Press the O soft key § Select the Weighing in Percent application: Press the O soft key Application 1: Weighing in percent Minimum load for initialization o 1 digit 2 digits 5 digits 10 digits 20 digits 50 digits 100 digits 200 digits 500 digits 1000 digits Accuracy for saving weights o Display accuracy Display accuracy + 1 decimal place Display accuracy +2 decimal places Number of decimals for percentages o N
Weighing in Percent with Two Weighing Platforms You can use two weighing platforms simultaneously with the Weighing in Percent application. When using two platforms, you can choose from the following operating modes: – Weighing in percent with two platforms of the same type – Weighing in percent with one reference platform and one weighing platform Weighing in percent with two platforms of the same type: Use this operating mode to measure different types of sample material with different weights.
Weighing in PercentL t E nter the reference percentage “pRef“ using the keypad. t Press the “pRef“ soft key to start the calculation of the reference weight “Wxx%.“ y T he calculation is based on the active net weight value and the reference percentage value entered. The reference weight “Wxx%“ is displayed in the bottom left. Note: If the weight is too light, an error code is shown in the main display “INF 29“. If this is the case, set the minimum load to a smaller number of digits.
Checkweighing O With the Checkweighing application, you can check whether the sample on the weighing platform matches a target value or lies within a given tolerance range. Checkweighing also makes it easy to fill sample materials to a specified target weight. Characteristics – Enter the nominal or target weight (set point) and the tolerance range delimiters either using the keypad or by saving the weight value of a load on the platform.
Checkweighing O Preparation § Select Setup: Press the H key § Select Application Parameters: Press the O soft key § Select the Checkweighing application: Press the O soft key Application 2: Checkweighing Checkweighing range o 30% to 170% 10% to max.
Digital Input/Output Interface The Checkweighing application supports the digital input/output-interface.
Checkweighing O Example 1: Checkweighing samples with a target weight of 64 g and a tolerance range from -1 g to +3 g. The tolerance values should be entered as absolute values (lower and upper tolerance limit). Configuration: The “Weighing“ application and the “Checkweighing“ application with the setting “…Type of checkweighing input: Target, min, max, weight“ is selected, a printout has been set up. t P lace a sample with the target weight (in this example, 64 g) on the platform.
Example 2: Checkweighing samples with a target weight of 64 g and a tolerance range from -1 g to +3 g. The tolerance values should be entered as a relative deviation from the target value. Configuration: The “Checkweighing“ application with the setting “…Type of checkweighing input: Target, min.-, max.-Tolerance“ is selected, a printout has been set up. t P lace a sample with the target weight (in this example, 64 g) on the platform. t Press the “Start“ soft key.
Checkweighing O Example 3: Checkweighing toward zero Y . Checkweighing samples with a target weight of 64 g and a tolerance range from -1 g to +3 g. The tolerance values should be entered as absolute values (lower and upper tolerance limit). Configuration: The “Checkweighing toward zero“ application with the setting “…Type of checkweighing input: Target, min, max, weight“ is selected, a printout has been set up. t P lace a sample with the target weight (in this example, 64 g) on the platform.
Classification W With the Classification application, you can determine whether the weight of a given sample lies within the limits of a defined weight class. Characteristics – Classification with 3 or 5 weight classes.
Classification W Preparation § Select Setup: Press the H key § Select Application Parameters: Press the O soft key § Select the Classification application: Press the O soft key Application 2: Classification Min.
Digital Input/Output Interface The Classification application supports the digital input/output-interface.
Classification W Example: There should be three classes. Configuration: The “Weighing“ application and the “Checkweighing“ application with the setting “…Number of classes:o3 classes“ is selected, a printout has been set up. t Press the “Param.“ soft key. y t t t The input window opens. nter the upper limit for Class 1 using the keypad (in this example, 63 g). E Enter the upper limit for Class 2 using the keypad (in this example, 67 g).
Totalizing s With the Totalizing application, you can add weight values to the totalizing memory. In addition to weight values, the number of separate values added to memory is also saved (transaction counter). Characteristics – Totalize up to 999 individual weights – Simultaneous saving of net values and calculated values (if available).
Totalizing s Preparation § Select Setup: Press the H key § Select Application Parameters: Press the O soft key § Select the Totalizing application: Press the O soft key Application 3: Totalizing Saved value o Net Calculated Net + calculated Autosave mode o Off On Minimum load for autosave o 1 digit 2 digits 5 digits 10 digits 20 digits 50 digits 100 digits 200 digits 500 digits 1000 digits Source of data for autosave o Application 1 Application 2 Printout when saved Off o Individual printout item Evaluatio
Example: Totalizing weight values. Configuration: The “Weighing“ and “Totalizing“ application is selected, and a printout has been set up. Component printout set under “…Printout when saved:oPrint one component on request“ Totalizing printout set under “…Evaluation mode, MR function:o Final evaluation, print“ t Place the first weight on the weighing platform. y T he weight value is displayed. t Press the “M+“ soft key to save the first weight to the totalizing memory. G# + 0.
Totalizing s y T he weight value is displayed. t Press the “M+“ soft key to save the second weight to the totalizing memory. G# + 0.064 kg T + 0.000 kg N + 0.064 kg n 2 G# + 0.128 kg T + 0.000 kg N + 0.128 kg n 2 ------------------ 32 y Item is printed automatically (component printout). t P ress the c key or “MR“ soft key (if previously selected in the menu) to exit Totalizing and delete the totalizing memory.
Net Total Formulation R With this application, you can weigh in different components up to a defined total. Each component is saved in the net total memory. Characteristics – Weigh in up to 999 components in series – Net total formulation cannot be combined with a level 1 or level 2 application – Current component number displayed in the text lines (indicating the component to be added) – Toggle the display between “component mode” and “additive mode” by pressing the A-mode and C-mode soft keys.
Net Total Formulation R Preparation § Select Setup: Press the H key § Select Application Parameters: Press the O soft key § Selecting the Net Total Formulation Application: Press the O soft key Application 3: Net total formulation Minimum load for saving values o 1 digit 2 digits 5 digits 10 digits 20 digits 50 digits 100 digits 200 digits 500 digits 1000 digits Printout when saved Off o Individual component printout Component printout Application parameters Autotare 1st weight Off o On Min. load f. auto.
Example: Example: Three components of a formula should be weighed. Three components of a formula should be weighed. Configuration: The “Net total formulation“ application is selected, and printout has been Configuration: The “Net total formulation" application is selected, and printout has been set up. set up. Set up component printout via “Device parameters:Config. Set up component printout via “Device parameters:Config. printout:e. g. Printer 1: Comp.: Printout after saving printout:e. g.
Net Total Formulation R t Place the first component into the container (in this example, 34.7 g). t t Place Place the the first first component component into into the the container container (in (in this this example, example, 34.7g). 34.7g). y y y t t t Cmp001+ 34.7 g Cmp001+ 34.7 Cmp001+ 34.7 g g TThe he weight the first component isis displayed. weight of of first component The of“the the first component is displayed. displayed. M+ soft key to save the weight of the first component.
y y y TThe he weighing weighing platform platform isis tared tared and andthe thecomponent componentcounter countervalue valueisisincreased increasedby byone. one. The prompt weighing platform is tared and the component counter value is increased by one. The to fill and save the third component is now displayed. The prompt to fill and save the third component is now displayed. The prompt to fill and save the third component is now displayed.
Product Data Memory Purpose Characteristics The product data memory stores initialization data and user data (product and tare values). – – – – – 38 he product data memory has capacity for a min. of 400 product values or a min. of T 3800 tare values. Each memory cell is uniquely identified by a name made up of alphanumeric characters.
Saving Product Data (in this example in the “Counting“ application) 1st option: t Start the “Counting“ application. t Enter a name and press and hold the R key (min 2 seconds). 2nd option: t Press the R key. y The “Memory“ menu will open and the first menu item is selected. t Press the “O“ soft key. y The overview will open. t Press the “New“ soft key. t Enter the name via the keypad and confirm using the “l“ soft key. y The input window will open.
Copying Product Data t Press the R key. y The “Memory“ menu will open and the first menu item is selected. t Press the “O“ soft key. y The overview will open. t Press the “q“ soft key to select the desired product memory name. t Press the “Copy“ soft key. t Enter the new name via the keypad and confirm using the “l“ soft key. t Enter the product info via the keypad and confirm using the “l“ soft key. t Press the “o“ soft key to return to the overview.
Deleting Specific Memory Numbers t Press the R key. y The “Memory“ menu will open and the first menu item is selected. t Press the “q“ soft key twice to select the third line. t Press the “O“ soft key. y The overview will open. t Press the “q“ soft key to select the desired product memory name. t Press the “Delete“ soft key. y t t t y t t The query window will open. Press the “No“ soft key to not delete the memory name. Press the “Yes“ soft key to delete the memory name.
Example: Using the Counting application with a stored average piece weight. Configuration: Application: Counting (COUNT.) Saving the Average Piece Weight t Start the application. t Determine and save the average piece weight (wRef), see “Saving Product Data.“ Loading the Average Piece Weight or Reference Sample Quantity t Enter the memory name and press the R key. t Press and hold the k key (min 2 seconds) to display wRef (average piece weight) and nRef (quantity) in Info mode. or t Press the R key.
Option I2: Combining Applications The following table shows how the applications described can be combined. Each row represents one combination. The basic weighing function is available at all times; it does not need to be combined with a computational function.
Option I2: Examples of Application Combinations Example: “Portioning“ (counting z, checkweighing O with totalizing s) Configuration: Application 1: Counting “Counting“ Application 2: Checkweighing “Checkweighing“ Application 3: Totalizing “Totalizing“ Application 2 settings: “…Type of checkweighing input: Target, min, max, weight“ Application 3 settings: – “Save value:Net + calculated“ – “Autosave mode:oyes“ – „Source of data for autosave: oApplication 2“ – “Printout when saved:oNo“ Setup menu settings: –
t Place Place empty empty container container on on the the scale. scale. t t Press Press the the ) ) key key to to tare tarethe thescale. scale. t theautomatic automatictare tarefunction functionisisenabled enabled(see (seechapter chapter“Operation“ “Operation"inin “Weighing" Note: N ote: IfIf the thethe “Weighing“ section), you you do donot notneed needtotopress pressthe the) ) key. key.
the D D key to toggle to “Totalizing.“ t Use “Totalizing." the “s" “s“ symbol is selected in the top line. y the t Add desired number of pieces. y The number of pieces is saved automatically. t Unload the scale: Remove Remove the the samples. samples. t Perform further counting operations as desired. Press the “M+"“ soft key after t Press after each each counting countingoperation operationto tosave savethe thepartial partialamounts amountstotothe the totalizing memory.
Configuring Printouts Purpose You can configure individual printout formats for each application. Using the total data record for Totalizing and Net total formulation applications, you can define which parameters are printed using the c key. In the “Config. printout“ Setup menu, single, component and total data records can be configured, which contain the available print items for the respective applications.
Example: Example: Standard printout for data output from the “Counting“ application Standard printout for data output from the “Counting" application Configuration: -Configuration: Set the “Counting“ application. thethe “Counting" application. -- SSet et up printout for printer 1: “Indiv.: Printout f. app./weighing.“ - ISet up Setup the printout for printer 1: “Indiv.: Printout f. app./weighing." t n the menu, select “Device parameters:Config.
Example: Total data record for printout of the Counting, Checkweighing and Totalizing programs. Settings (different from the factory settings): Setup: Application parameters: Application 1: Counting (Application 2): Checkweighing (Application 3): Totalizing To exit setup: oo soft key Then access Setup again: Device Parameters: Config.
“O“ soft key, “q“ soft key, „“l“ soft key Select dotted line Press the “q“ soft key several times, “O“ soft key, “l“ soft key Select various printout items “O“ soft key 2x, “oo“ soft key Exit printout c Carry out several weighings and then print the results -------------------nRef + 10 pcs wRef + 0.000995 kg Setp + 100 pcs Min + 100 pcs Max + 102 pcs n 6 *N + 0.
Setup: Overview of Application Parameters o = Factory setting W = User-defined setting Setup: Application parameters Application 1 (Basic application) 1) o Weighing: Menu item for option H0 only Minimum load for automatic taring and automatic printing 2) 1 digit 2 digits 5 digits 10 digits 20 digits 50 digits 100 digits 200 digits 500 digits 1000 digits Automatic taring: first weight tared 2) Off On Tare function 2) Standard: Can add a preset tare if tare value is available; however no tare func
Setup: Overview of Application Parameters Application 1 (Basic application) Weighing in percent 1) Minimum load for automatic taring and automatic printing 2) Menu similar to Counting Minimum load for initialization o 1 digit 2 digits 5 digits 10 digits 20 digits 50 digits 100 digits 200 digits 500 digits 1000 digits Automatic taring: first weight tared 2) Menu similar to Counting Automatic start of applications when you switch on the device with most recently saved application data 2) Menu simila
Application 3 (data records) 1) o Off Net total formulation Minimum load for automatic taring and automatic printing 2) Menu similar to Counting Minimum load for autosave o 1 digit 2 digits 5 digits 10 digits 20 digits 50 digits 100 digits 200 digits 500 digits 1000 digits Automatic taring: first weight tared 2) Menu similar to Counting Printout when saved Off o Individual printout of components Component printout Tare function 2) Menu similar to Counting Factory settings for all application progra
Sartorius Industrial Scales GmbH & Co. KG Leinetal 2 37120 Bovenden Telefon 0551.308.0 Fax 0551.309.83.190 www.sartorius.com Copyright by Sartorius, Goettingen, Germany. All rights reserved. No part of this publication may be reprinted or translated in any form or by any means without the prior written permission of Sartorius. The status of the information, specifications and illustrations in this manual is indicated by the date given below.