
Owner's manual


- 1 -
80/8 B ,VER 30491 N/P
INSTRUCTIONS
High Tech II Upgrade / Flush Unit Assembly
The following instruction is a guideline, illustrating suggested methods, assembly sequence, and
tool selection. Actual assembly may vary by each situation. Careful thought must be given to
minimize total body movement.
Tool Selection
QTY Description QTY Description
1 Flat blade screw driver 1 1-3/4” hole saw
llirD sseldroC / cirtcelE 1 tiB llirD 01# 1
tib revirD spillihP 2 # 1 nuG teviR 1
1 Small tip marker 1 5/16” Hex nut driver
hcnerW ”61/7 1 tiB llirD ”61/7 1
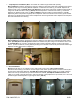
1. Read all instructions carefully before starting assembly. All orientation and descriptions are
facing the front of completed unit.
2. Open kit bags and sort items into small piles. Ensure all unit components and
fasteners are present before starting to assemble unit.
3. To assure proper alignment, the front, walls and base must be assembled in said sequence.
4. Assembly of other components may vary to suit the situation; however careful thought must be
given to minimize total body movement.
2530 Xenium Lane North, Minneapolis, MN 55441
Telephone: 763-553-1900 / Fax: 763-553-1905
800-328-3332/ www.satelliteindustries.com