
Printer User Manual


Page 2-14
Section 2. Configuration
SATO CL408e/CL412e Service Manual
PN 9001078
Rev. B
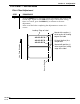
Since the printer moves the label in discrete steps equal to the size of the print dot, the
units of measure for Vertical and Horizontal Offset distance is dots.
Vertical Offset is the distance down from the leading edge in dots (the edge of the
label that comes out of the printer first) to the first vertical print position. A positive
setting moves the first print position down the length of the label while making it
negative moves it up the length of the label. The maximum value that can be set is 823
dots.
Horizontal Offset is the distance that the label image is shifted either to the right or
left on the label. For a positive setting the image is shifted to the left (towards the inside
edge of the label). For a negative setting the image the image is shifted to the right
(towards the outside edge of the label). This setting changes the base reference point for
all subsequent label jobs. The effect is identical to the <ESC>A3 Base Reference point
command. The maximum value that can be set is 1424 dots.
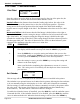
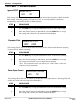
set calendar
YES NO
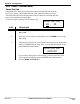
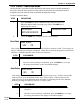
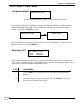
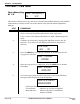
Print Offset
STEP PROCEDURE
1. Use the LINE key to step the first digit of the counter to the desired setting.
The display will increment one step each time the LINE key is pressed.
2. Press the FEED key to accept the setting and advance the cursor to the
second digit. Again use the LINE key to step to the desired setting. Once it
is correct, press the FEED key to advance to the next adjustment.
3. Once the setting is correct, press the FEED key to accept the setting and
advance to the next display.
Print a test label after completing the adjustments to ensure it is correct.
Note: This setting can be overridden by the Base Reference Point Command in
your software.
This message will only be displayed if the Calendar Option is installed in the printer.
The Calendar is an optional feature in CL408e/CL412e printers allowing the date and time
to be set manually using the LCD Display or via the <ESC>WT Calendar Set command.
The last setting, set either manually via software command, received by the printer will be
the value used. The format of the display is YY/MM/DD hh:mm (Year/Month/Day/
hours:minutes). The date format is fixed and cannot be changed.
To enable the Calendar feature (if installed), press the LINE key until the underline cursor
is beneath the YES. If the Calendar feature is to be disabled, press the LINE key until the
cursor is underneath the NO. When the desired setting is selected, Press the FEED key.
Print offset
v:+0000 H:+000
Set Calendar
LCD Panel — Advanced Mode