CT4 0 0 / CT4 1 0 ( Japan – H Q ) ( Si ngapore) ( M al ay si a) ( T hai l and) ( Chi na) ( U SA ) ( Bel gi um) ( UK ) ( Germany ) ( Pol and) ( Hol l and) SA T O Cor por at i on Bar Code SA T O El ectroni cs ( S) Pte L td SA T O Bar Code & L abel l i ng Sdn Bhd Barcode SA T O ( T hai l and) Co., L td SA T O Shanghai Co., L td SA T O A meri ca, I nc. SA T O Europe N.V . SA T O U K L td SA T O D eutschl and GmbH SA T O Pol ska SP Z O.
CT4xx Series Quick Guide Pg 13 Options Label Cutter Bar Code SATO Electronics (S) Pte Ltd 438A Alexandra Road #05-01/02 Alexandra Technopark Singapore 119967 Tel : (65) 6271 5300 Fax : (65) 6273 6011 Service Hotline : (65) 6273 6455 Email : sales@satosingapore.com Website : www.satosingapore.com © Copyright 2001 Bar Code SATO Electronics (S) Pte Ltd This is an internal option allowing labels to be cut at specified intervals. Controlled through programming. Factory installed only.
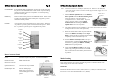
CT4xx Series Quick Guide Pg 12 Printer Specifications SPECIFICATION PRINT Method Speed (User Selectable) Processor Resolution Maximum Print Length Maximum Print Width MEDIA Width Minimum Length Roll OD (Maximum) Label Sensing RIBBON Length Maximum Width PRINT-OUTS Text Fonts Graphics Bar Codes Rotation PHYSICAL Dimension CT4xx Series Quick Guide Pg 1 Table of Contents CT400 CT410 Thermal Transfer or Direct Thermal 2 – 6 ips 2 – 4 ips 50 – 150 mm/s 50 – 100 mm/s 32-Bit RISC, 80MHz 203dpi (8 dpmm) 305
CT4xx Series Quick Guide Pg 2 CT4xx Series Quick Guide Pg 11 What You Get 6. The CT Series Thermal Transfer printer comes packed in a protective carton. Included in the carton are the following items : If you are still unable to get printer output, try the Hex Dump as described in Step 5 under the Parallel Interface troubleshooting. In this case, the printer monitors its RS232C interface for incoming data. 7.
CT4xx Series Quick Guide 6. 7. Pg 10 When you send the print job to the printer and it does not respond, and there is no error message on the PC : a. Check your data stream for some of the basics. Is your job framed as follows : A--DATA--Z b. Verify that you have included all required parameters in the data stream. c. Verify the following : i. You have not typed a ‘0’ (zero) for an ‘O’ (letter) or vice-versa. ii. You have not missed any characters where they are needed. iii.
CT4xx Series Quick Guide 9. Pg 4 Apply power to the printer by placing the AC Power switch in the ON (1) position. 10. Print a test label to verify the printer is set up and operating correctly. Ribbon Loading (CT4xxTT only) The SATO CT Series ribbons come shrink-wrapped with a 12” (305mm) leader pre-attached to a take-up core. There are 3 widths of ribbon available for the CT Series printers : 4.3” (110mm), 3” (76mm) & 1.75” (45mm). CT4xx Series Quick Guide Pg 9 Troubleshooting Initial Checklist 1.
CT4xx Series Quick Guide CT4xx Series Quick Guide Pg 8 Note: CT Series ribbons are wound face (ink side) out. Make sure the dull (ink) side of the ribbon will be in contact with the paper and the supply core is on the rear spindle. ON LINE KEY If the ONLINE LED is illuminated, pressing this switch will place the printer in the OFFLINE mode. If this switch is pressed during printing, the printing process is suspended. To resume printing, press this switch again.
CT4xx Series Quick Guide Pg 6 CT4xx Series Quick Guide Pg 7 Fanfold Media 1. 2. 3. 4. 5. 6. 7. Remove power from the printer by placing the Power Switch in the OFF (0) position. Open the Top Cover by pressing on cover release points located on each side of the printer. Paper Sensor Release the Print Head Assembly by pressing the Head Latch to the rear. This allows the assembly to rotate upwards to the left allowing easy access for media routing. Rotate the assembly until it is vertical.