Quick Guide For printer model: GY412 PN: 9001246(B) Read this Quick Guide before using this product. Keep this document available for future reference.
SATO America, Inc. 10350A Nations Ford Road Charlotte, NC 28273 Main Phone: (704) 644.1650 Technical Support: (704) 644.1660 Technical Support Fax: (704) 644.1661 E-Mail: satosales@satoamerica.com techsupport@satoamerica.com www.satoamerica.com © Copyright 2011 SATO America, Inc. All rights reserved. Reproduction in any manner of all or part of this document is prohibited. The content of this document may be changed without prior notice. Great care has been taken in the preparation of this document.
Safety Precautions Safety Precautions Please read the following information carefully before installing and using the printer. Pictographic Symbols This instruction manual and the printer labels use a variety of pictographic symbols to facilitate safe and correct use of the printer and to prevent injury to others and property damage. The symbols and meanings for them are given below. Be sure to understand these symbols well before reading the main text.
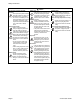
Safety Precautions Caution Power cord Do not place in areas with high • Keep the power cord away from humidity hot devices. Getting the power • Do not place the printer in areas cord close to hot devices could with high humidity or where concause the cord’s covering to densation forms. If condensamelt and cause a fire or electrition forms, immediately turn off cal shock. the power switch and do not use • When unplugging the power the printer until it dries.
Safety Precautions Precautions for Installation and Handling Printer operation can be affected by the printer environment. Refer to the following instructions for installation and handling of the printer. Select a Safe Location Place the printer on a surface that is flat and level. If the surface is not flat and level, this may result in poor print quality. This may also cause malfunction and shorten the life span of the printer. Do not place the printer on a location that produces vibration.
Safety Precautions Page iv GY412 Quick Guide
Table of Contents Table of Contents Accessories................................................................................................................ 1-1 About the Box ...................................................................................................................... 1-1 Names of Parts........................................................................................................... 1-2 Operator panel ....................................................................
Table of Contents Page 2 GY412 Quick Guide
Section 1: Accessories and Names of Parts ACCESSORIES Make sure that you have received all of the following items in the package. If there are any accessories missing, contact your SATO reseller or technical support center. ABOUT THE BOX Please retain both the box in which the printer was packed, and the cushioning material (cushions that hold the printer in place). If you ever need to send in the printer for repair, repack it in this box.
Section 1: Accessories and Names of Parts NAMES OF PARTS Front side of the printer Cover opening button Operator panel Consists of LCD for displaying messages, nine operation buttons, and two LEDs for indicating printer status. Power ON/OFF switch Turns power ON or OFF. “ | ” is ON “ ” is OFF. Top cover Label discharge outlet Discharges the printed label.
Section 1: Accessories and Names of Parts Back side of the printer Feed Roller Label feed entrance Label guide lock lever LAN interface Label guide USB interface RS-232C interface AC input connector SD Connect card slot the power cord and apply the current to the printer GY412 Quick Guide Page 1-3
Section 1: Accessories and Names of Parts AC input connector Connect the power cord to the printer here and plug its opposite end into the appropriate power receptacle.
Section 1: Accessories and Names of Parts OPERATOR PANEL Icons, instructions, and error messages are displayed here. Display panel Displays icons, instructions and error messages. STATUS LED ERROR LED Green: The printer is in operation. OFF: The printer operation is paused. Red light turns on or blinks when an error has occurred. ENTER button Registers set contents. LINE button Acts as the print start/stop toggle button. Acts as the data transmission ON/OFF toggle button.
Section 1: Accessories and Names of Parts This page is intentionally left blank.
Section 2: Turning On the Power TURNING ON THE POWER After installing the printer, connect the power cord as shown below. CAUTION • • The power cord set supplied with this printer is only for use with this printer. Do not use it for other electrical products. Do not operate the POWER button or plug in/unplug the power cord with wet hands or wet fingers. Doing so could result in electric shock. 1. To connect the power cord to the printer, be sure to confirm the correct orientation of the plug.
Section 2: Turning On the Power 3. Press the power switch to the direction of [ | ]. OFF TURNING OFF THE POWER CAUTION • Do not operate the POWER button or plug in/unplug the power cord with wet hands. Doing so could result in electric shock. 1. Ensure that the printer is in offline mode before you turn off the power. If the printer is in online mode, press the LINE button to go offline. 2. After an [OFFLINE] message is displayed on the LCD screen, press the power switch toward [ o ].
Section 3: Basic Specifications BASIC SPECIFICATIONS Model name GY412 Printing method Direct Thermal Head density (resolution) 305 dpi (12 dots/mm) Printable area 4.09” wide x 11.81” pitch (104 mm wide x 300 mm pitch) Unprintable area Length direction: Upper: 0.05” (1.5 mm) Lower: 0.05” (1.5 mm) Width direction: Left: 0.05” (1.5 mm) Right 0.05” (1.5 mm) These measurements do not include backing paper.
Section 3: Basic Specifications Model name Label size GY412 Label size Continuous type Pitch: 1.18 to 11.81 in./30 to 300 mm. (Backing paper 1.29 to 11.9 in./33 to 303 mm) Width: 1.96 to 5.15 in./50 to 131 mm.(Backing paper 2.04 to 5.19 in./ 50 to 132 mm.) 22 to 107 mm (Backing paper 25 to 110 mm) Tear-off type Pitch: 1.18 to 11.81 in./30 to 300 mm. (Backing paper 1.29 to 11.9 in./33 to 303 mm. Width: 1.96 to 5.15 in. / 50 to 131 mm. (Backing paper 2.04 to 5.19 in./ 50 to 132 mm. Cutter type Pitch: 1.
Section 3: Basic Specifications Model name GY412 Interface Select one of the following (The factory will provide the unit with the selected interface.) 1. USB interface 2. LAN interface 3. RS-232C interface 4.
Section 3: Basic Specifications Model name Bitmap font GY412 X20 5x9 dots (alphanumeric, symbols, Katakana) X21 17 x 17 dots (alphanumeric, symbols, Katakana) X22 24 x 24 dots (alphanumeric, symbols, Katakana) X23 48 x 48 dots (alphanumeric, symbols, Katakana) X24 48 x 48 dots (alphanumeric, symbols, Katakana) OCR-A 22 x 33 dots (alphanumeric and symbols) OCR-B 30 x 36 dots (alphanumeric and symbols) Kanji 16 x 16 dots (JIS level 1&2) Gothic-pointed /Mincho type Kanji 22 x 22 dots (JIS level 1&2) Gothic-po
Section 3: Basic Specifications Model name GY412 Standard functions 1. Status return function 2. Graphic function 3. Sequential number function 4. Form overlay function 5. Custom character registration function 6. Character adjustment function 7. Black/white inversion function 8. Ruled line function 9. Dump list function 10. Format registration function 11. Outline function 12. Outline modification function 13. Label skip function 14. Zero slash switching function 15. JIS/Shift JIS switching function 16.
Section 3: Basic Specifications This page is intentionally left blank.
Section 4: SATO Group of Companies SATO GROUP OF COMPANIES GY412 Quick Guide Page 4-1
Extensive contact information of worldwide SATO operations can be found on the Internet at www.satoworldwide.