
Service manual

Page 6-32
Section 6. Replacement Procedures
PN 9001080
Rev. A
SATO M-8485Se Standard Print Engine
Service Manual
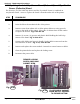
6.14 Replacing the Label Gap Sensor Board (Bottom 1/2) and “Eye-Mark”
Sensor (Reflective) Board
STEP PROCEDURE
1. Switch the printer OFF and disconnect the power cable.
2. Raise the lid on the mechanical side of the printer.
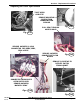
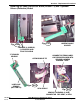
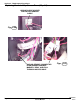
3. Remove screw from cabinet side to allow printer halves to swing open for
access to the inside of the printer. Place side of cabinet down on flat surface
to expose the bottom. Fig. 6-48 & 6-49
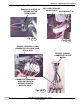
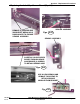
4. Remove (2) screws, (2) spacers and plasitic shield holding the Label Gap
Sensor to the frame. Fig. 6-50 & 6-51
5. Unsnap cable holder and open tie bundle. Unplug SEN1 connector from the
sensor harness at SEN1. Fig. 6-51, 6-52 & 6-53
6. Remove and replace the sensor module. Reattach to sensor harness at SEN1.
7. Close the printer halves and replace the locking screw.
8. Reconnect the power cable.
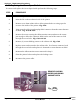
The bottom 1/2 of the Label Gap Sensor and the Eye-Mark Sensor is combined on
one phenolic board. Access to replace the board is from the under side of the printer.
REMOVE LOCKING
SCREW AND SWING
CABINET OPEN
PLACE SIDE OF CABINET
DOWN ON FLAT SURFACE
TO EXPOSE BOTTOM
6-48
Fig.
6-49
Fig.