
User guide
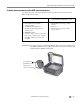


Table Of Contents
- Printer Overview
- Networking Your Printer
- Connecting to a wireless network
- Adding a wireless network connection to a USB-connected computer
- Online Printer Management Tool
- Handling Paper
- Printing
- Mobile Printing
- Copying
- Scanning
- Faxing
- Maintaining Your Printer
- Troubleshooting
- Product and Safety Specifications
- Features and Specifications
- Print performance
- Photo printing features
- Copy document features
- Copy photo features
- Scanning features
- Faxing features and specifications
- Input paper tray
- Output paper tray
- Automatic Document Feeder (ADF) for originals
- Ink cartridges
- Connectivity
- Software support
- Physical specifications
- Warranty
- Minimum System requirements
- Safety information
- Regulatory compliance
- ENERGY STAR® Qualified
- Warranty Information
- Declaration of Conformity
- Features and Specifications

Printing
50 www.kodak.com/go/aiosupport
NOTE: You can also adjust the print photo options using the Online Printer
Management Tool. When viewing the tool in your browser (see Accessing
the Online Printer Management Tool, page 15), select the
Settings tab, then
select
Copy & Print > Print Photo.
6. When you have finished changing settings, press
Start Black to print a
black-and-white picture, or
Start Color to print a color picture.
IMPORTANT: To prevent loss of data from your memory card, camera, or USB flash drive,
do not remove it from the printer while printing.
Tra ns fe r A ll to P C - -
Your printer and computer must be
connected with a USB cable. To transfer all
the pictures on the memory card to your
computer, press OK then press Start Black
or Start Color. (It does not matter which
Start button you press.)
Quantity 1 (default) to 99 The number of copies that print.
Print Size 2 x 3
3.5 x 5
4 x 6 (default)
4 x 7
4 x 8
5 x 7
4 x 12
8 x 10
8.5 x 11 or A4
If the selected print size is smaller than the
paper in the paper input tray, the printer
automatically arranges the pictures to best fit
the paper size.
Plain Paper Quality Normal (default) Good quality output; prints faster than Best.
Best The highest quality, but the slowest print
speed.
Draft The fastest print speed, but the lowest
quality.
Photo Paper Quality Auto.
(default)
The printer detects when you load photo
paper and sets Best quality automatically.
Scene Balance On (default)
Off
Adjusts the image brightness to correct for
underexposure and reduces the variation in
contrast in different areas of the picture.
Add Date to Prints No (default)
Ye s
Prints the date the picture was taken or last
edited in a corner of the print.
Save as Defaults No / Yes To save the settings as the new default, press
OK. With Ye s selected, press OK.
Print Photos Option Settings Description