
User guide
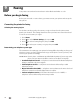
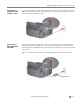
Table Of Contents
- Printer Overview
- Networking Your Printer
- Connecting to a wireless network
- Adding a wireless network connection to a USB-connected computer
- Online Printer Management Tool
- Handling Paper
- Printing
- Mobile Printing
- Copying
- Scanning
- Faxing
- Maintaining Your Printer
- Troubleshooting
- Product and Safety Specifications
- Features and Specifications
- Print performance
- Photo printing features
- Copy document features
- Copy photo features
- Scanning features
- Faxing features and specifications
- Input paper tray
- Output paper tray
- Automatic Document Feeder (ADF) for originals
- Ink cartridges
- Connectivity
- Software support
- Physical specifications
- Warranty
- Minimum System requirements
- Safety information
- Regulatory compliance
- ENERGY STAR® Qualified
- Warranty Information
- Declaration of Conformity
- Features and Specifications
Faxing
80 www.kodak.com/go/aiosupport
Connecting to
Internet telephone
service
(Voice-Over-Internet
Protocol or VOIP)
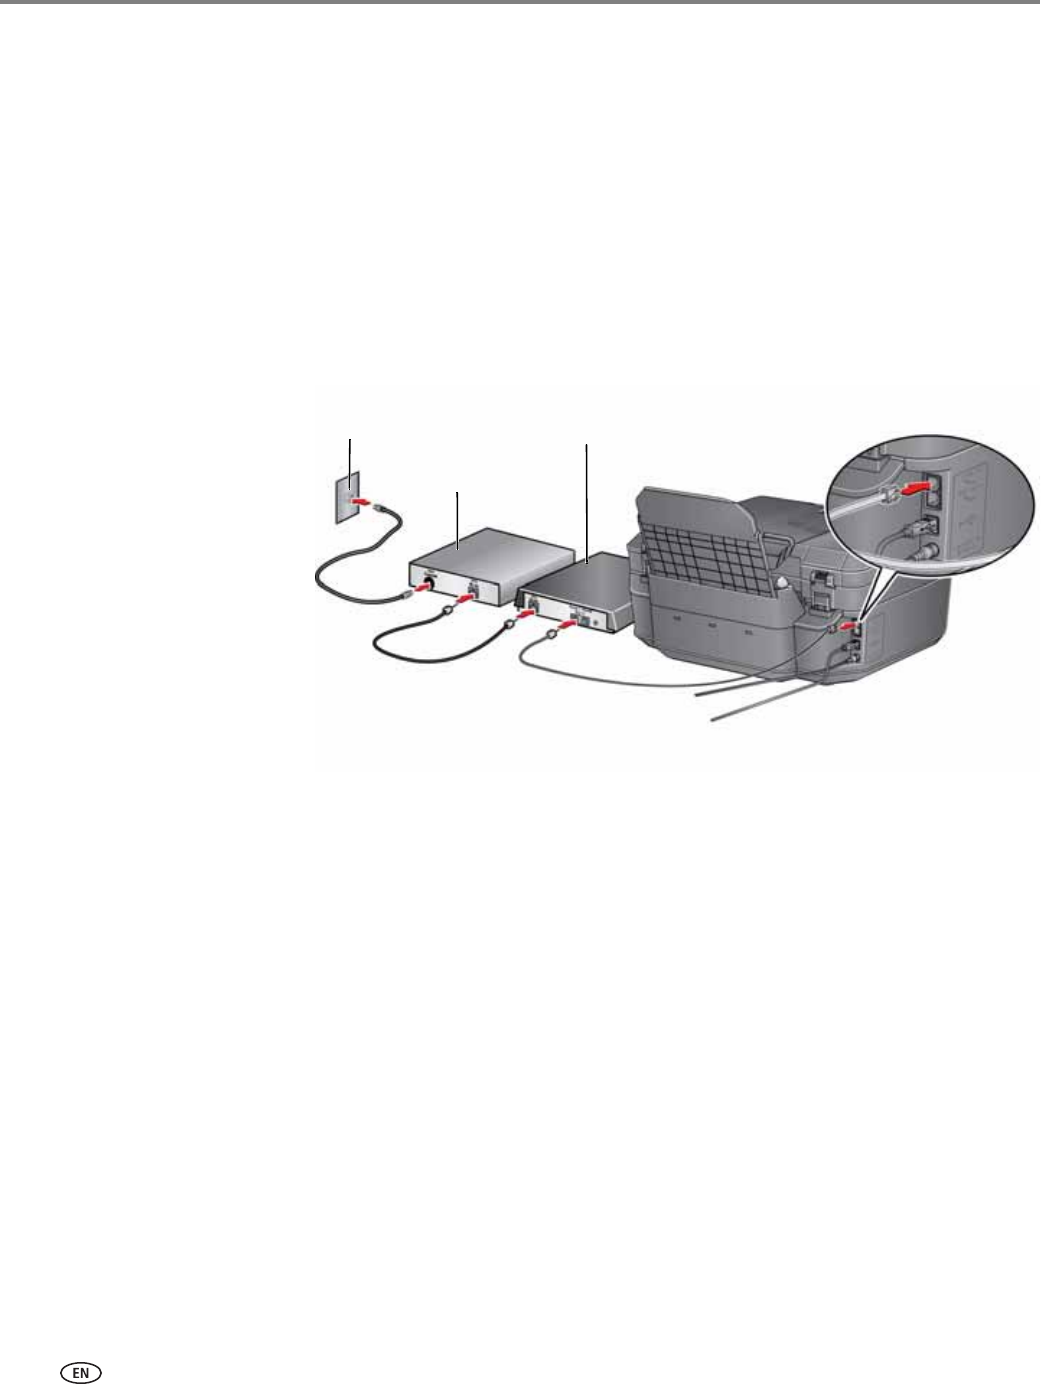
If you have Internet telephone service, you should already have a cable
modem/router connected to the cable outlet with a coaxial cable. You will also need
an Analog Telephone Adapter (ATA) to connect your printer for faxing.
NOTE: Sometimes the cable modem/router has a built-in ATA. Contact your cable
telephone service provider for more information.
1. Connect an RJ-45 (also called CAT 5) cable from the cable modem/router to the
WAN port on the Analog Telephone Adapter (ATA).
2. Connect one end of the phone cord that came with the printer (RJ-11 telephone
cord) to one of the phone input ports on the ATA and the other end to the LINE
IN port on the back of your printer.
Coaxial
RJ-45 cable
RJ-11
Cable outlet
Cable
Analog Telephone
modem/router
Adapter (ATA)
(CAT 5 cable)
telephone cord
cable