Quick Setup Guide SP 1200SF Before you can use the machine, you must set up the hardware and install the driver. Please read this ‘Quick Setup Guide’ for proper set up and installation instructions. STEP 1 Setting Up the Machine STEP 2 Installing the Driver & Software Setup is Complete! Keep this ‘Quick Setup Guide’ and the supplied CD-ROM in a convenient place for quick and easy reference at all times.
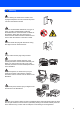
1 Symbols used in this guide Warning Warnings tell you what to do to prevent possible personal injury. Caution Improper Setup Improper Setup icons alert you to Cautions specify procedures you must devices and operations that are not follow or avoid to prevent possible damage to the machine or other objects. compatible with the machine.
Table of Contents Safety Precautions To use the machine safely ...................................................................................................................... 2 Symbols for the main power switch ........................................................................................................ 4 Important safety instructions ................................................................................................................... 5 Regulations ...........................
To use the machine safely Please keep these instructions for later reference and read them before attempting any maintenance. Choosing a location Place your machine on a flat, stable surface that is free of vibration and shocks. Put the machine near a telephone wall jack and a standard, grounded AC power outlet. Choose a location where the temperature remains between 50 F and 90.5 F (10 C and 32.5 C) and the humidity is between 20% to 80% (without condensation).
Warning Before cleaning the inside of the machine, first unplug the telephone line cord, and then the power cord from the electrical socket. DO NOT use flammable substances, any type of spray or organic solvent/liquids containing alcohol/ammonia to clean the inside or outside of the machine. Doing this may cause a fire or electrical shock. Refer to Routine maintenance for how to clean the machine in the User’s Guide. DO NOT handle the plug with wet hands. Doing this might cause an electrical shock.
If moving your machine, use the handholds provided. First making sure to disconnect any cables. Plastic bags are used in the packaging of your machine. To avoid danger of suffocation, keep these bags away from babies and children. Note The fuser unit is marked with a caution label. DO NOT remove or damage the label. Caution Be sure to disconnect the plug from the wall outlet and clean the prongs and the area around the prongs at least once a year.
Important safety instructions 1 Read all of these instructions. 2 Save them for later reference. 3 Follow all warnings and instructions marked on the product. 4 Unplug this product from the wall socket before cleaning inside of the machine. DO NOT use liquid or aerosol cleaners. Use a damp cloth for cleaning. 5 DO NOT place this product on an unstable cart, stand, or table. The product may fall, causing serious damage to the product.
19 To reduce the risk of fire, electric shock and injury to people, note the following: DO NOT use this product near appliances that use water, a swimming pool or in a wet basement. DO NOT use the machine during an electrical storm (there is the remote possibility of an electrical shock) or to report a gas leak in the vicinity of the leak. Regulations IEC 60825-1:2007 Specification This machine is a Class 1 laser product as defined in IEC 60825-1:2007 specifications.
Recycling information in accordance with the WEEE (2002/96/EC) and Battery (2006/66/EC) Directives Important Information for Australia IMPORTANT-For Your Safety Product mark Battery mark European Union only The product/battery is marked with one of the above recycling symbols. It indicates that at the end of the life of the product/battery, you should dispose of it separately at an appropriate collection point and not place it in the normal domestic waste stream.
Standard telephone and FCC Notices These notices are in effect on models sold and used in the United States only When programming emergency numbers or making test calls to emergency numbers: Remain on the line and briefly explain to the dispatcher the reason for the call before hanging up. Perform these activities in the off-peak hours, such as early morning or late evening. This equipment complies with Part 68 of the FCC rules and the requirements adopted by the ACTA.
Federal Communications Commission (FCC) Declaration of Conformity (USA only) Responsible Party: Ricoh Americas Corporation Address: 5 Dedrick Place, West Caldwell, NJ 07006 Telephone number: 973-882-2000 declares, that the products Product Name: Laser Multi Function Model Number: SP 1200SF comply with Part 15 of the FCC Rules.
Disconnect device This product must be installed near an AC power outletelectrical socket that is easily accessible. In case of emergencies, you must disconnect the power cord from the electrical socketAC power outlet to shut off power completely. Laser safety This machine complies with the requirements of IEC60825-1+A2:2001 for class 1 laser product. This equipment is certified as a Class 1 laser product under the U.S.
Getting Started 1 1 Carton components for EU Carton components may vary from one country to another. Save all packing materials and the carton in case for any reason you must ship your machine. Warning Plastic bags are used in the packaging of your machine. To avoid danger of suffocation, please keep these bags away from babies and children. 9 1 8 CD-ROMs For Drivers For User Guide and Paper Port™ 2 3 4 7 6 5 Quick Install Guide 1. Automatic Document Feeder (ADF) 2. Control panel 3.
Getting Started 2 Carton components for USA, Canada and Asia/Oceania Carton components may vary from one country to another. Save all packing materials and the carton in case for any reason you must ship your machine. Warning Plastic bags are used in the packaging of your machine. To avoid danger of suffocation, please keep these bags away from babies and children. 9 1 8 CD-ROMs For Drivers For User Guide and Paper Port™ 2 3 4 7 6 5 Quick Setup Guide 1. Automatic Document Feeder (ADF) 2.
Getting Started Control panel (For EU model) 3 1 10 2 9 3 4 5 8 6 7 For the details of the control panel, see Control panel overview in Chapter 1 of the User’s Guide. 1 Fax and telephone keys: Hook Press before dialing if you want to make sure a fax machine will answer, and then press Start. Also, press this key after you pick up the handset of an external telephone during the F/T ring (fast doublerings).
Getting Started Control panel (For USA, Canada and Asia/Oceania model) 4 1 10 2 9 3 4 8 5 6 7 For the details of the control panel, see Control panel overview in Chapter 1 of the User’s Guide. 1 2 Fax and telephone keys: Hook Press before dialing if you want to make sure a fax machine will answer, and then press Start. Also, press this key after you pick up the handset of an external telephone during the F/T ring (fast doublerings). Resolution Sets the resolution when sending a fax.
STEP 1 Setting Up the Machine 1 1 Installing the drum unit and toner cartridge assembly 4 Put the drum unit and toner cartridge assembly into the machine. Improper Setup DO NOT connect the interface cable. Connecting the interface cable is done when installing the driver. 1 2 3 Open the front cover. 5 Close the front cover of the machine. Unpack the drum unit and toner cartridge assembly. Gently shake it from side to side several times to distribute the toner evenly inside the assembly.
STEP 1 2 1 Setting Up the Machine Loading paper in the paper tray 3 Fan the stack of paper well to avoid paper jams and misfeeds. Pull the paper tray completely out of the machine. 4 Put paper in the paper tray. Make sure that the paper is flat in the tray and below the maximum paper mark (1). 1 2 While pressing the green paper-guide release lever, slide the paper guides to fit the paper size you are using. Make sure that the guides are firmly in the slots.
Setting Up the Machine 3 1 2 Install the power cord and phone line Make sure that the machine’s power switch is off. Connect the AC power cord to the machine. Note If you are sharing one phone line with an external telephone, connect it as shown below. Type A For the countries such as Spain, Netherlands, Portugal,Poland, Hungary,Czech, Norway, USA, Canada and Asia/Oceania. Plug the AC power cord into an AC outlet. Turn the power switch on.
STEP 1 Setting Up the Machine Type D For Switzerland Type C For Germany Type D For Switzerland Note If you are sharing one phone line with an external telephone answering device, connect it as shown below. Type A For the countries such as Spain, Netherlands, Portugal,Poland, Hungary,Czech, Norway, USA, Canada and Asia/Oceania. Please set the receive mode to External TAD. For more details, see Selecting a receive mode on page 22 and Connecting an external TAD in Chapter 7 of the User’s Guide.
Setting Up the Machine 4 Set Your Country You must set your country so that the machine works correctly on local telecommunication lines in each country. 1 Check that the power is turned on by plugging in the power cord and turn the power switch on. Press OK. Set Country Press OK Key 2 Press or to choose the country Country names displayed on the LCD depend on the modes. 5 1 2 3 4 Selecting your language (For EU, USA, Canada and Asia) Press Menu. Press 0. Press 0.
STEP 1 6 Setting Up the Machine Setting the date and time 7 The machine displays the date and time, and if you set up the station ID, it will add it to each fax you send. You should store your name and fax number to be added on all fax pages that you send. 1 2 3 4 1 2 3 4 Press Menu. Press 0. Press 2. Enter the last two digits of the year on the dial pad, and then press OK. Date&Time Year:2008 5 Enter the two digits for the month on the dial pad, and then press OK. (e.g. Enter 0, 3 for March.
Setting Up the Machine 6 Use the dial pad to enter your name (up to 20 characters), and then press OK. Station ID Name: 8 Tone and pulse dialling mode Your machine comes set for Tone dialling service. If you have Pulse dialling service (rotary), you need to change the dialling mode. Note key as the previous character, press to move the cursor to the right.
STEP 1 9 Setting Up the Machine Selecting a receive mode There are four possible receive modes: Fax Only, Fax/Tel, Manual and External TAD. Choose the Receive Mode which best suits your needs.
Setting Up the Machine Note PBX and TRANSFER The machine is initially set to Normal, which lets the machine connect to a standard PSTN (Public Switched Telephone Network) line. However, many offices use a central telephone system or Private Automatic Branch Exchange (PABX). Your machine can be connected to most types of PABX (PBX). The machine’s recall feature supports timed break recall only (TBR).
STEP 1 Setting Up the Machine 12 Changing the prefix number 1 2 3 4 Press Menu, 0, 6. Do one of the following: To change the prefix number, press 1. To exit without making a change, press 2 and go to 4. Enter a new prefix number using the dial pad (up to 5 digits), press OK. 13 Setting the LCD contrast You can change the contrast to help the LCD look lighter or darker. 1 2 3 4 Press Menu. Press 1. Press 7. Press to increase the contrast. —OR— Press Stop/Exit.
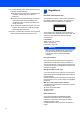
Supplied CD-ROM 1 1 Supplied CD-ROMs for ‘SP 1200SF’ Drivers and Utilities for SP 1200SF Install Multi-Function Suite You can install the Multi-Function Suite software and multifunction drivers. Repair Multi-Function Suite (For USB users only) If an error occurred during the installation of the Multi-Function Suite, use this selection to automatically repair and re-install the Multi-Function Suite. Note Install Multi-Function Suite includes the Printer Driver, Scanner Driver, ControlCenter3.
Supplied CD-ROM 26
STEP 2 Installing the Driver & Software For USB Interface Cable Users Installing the TYPE 1200SF Drivers and Utilities ........................................................ 28 Installing ScanSoft™ PaperPort™ 11SE for Windows® ............................................. 30 View and Installing the documentation ........................................................................ 31 The screens for Windows® in this Quick Setup Guide are based on Windows® XP.
STEP 2 Installing the Driver & Software For USB Interface Cable Users (For Windows® 2000 Professional/XP/7/XP Professional x64 Edition/ Windows Vista®) 1 Installing the TYPE 1200SF Drivers and Utilities Important 4 The CD-ROM main menu will appear. Click Install Multi-Function Suite. Make sure that you have finished the instructions from step 1 Setting Up the Machine on pages 15 through 24. Note • Please close any applications running before installing the Multi-Function Suite.
Installing the Driver & Software 6 Choose Standard and then click Next. The installation will continue. Improper Setup DO NOT try to cancel any of the screens during this installation. 9 7 Click Finish to restart your computer. (After restarting the computer, you must be logged on with Administrator rights.) When this screen appears, connect the USB interface cable to your PC, and then connect it to the machine. Note After restarting the computer, the Installation Diagnostics will run automatically.
STEP 2 1 Installing the Driver & Software Installing ScanSoft™ PaperPort™ 11SE for Windows® Important Note • If this window does not appear, use Windows® Explorer to run the start.exe program from the root folder of the CD-ROM. • For Windows Vista®, when the User Account Control screen appears, click Allow. Make sure that you have finished the instructions for installing TYPE 1200SF Drivers and Utilities on pages 28 through 29.
Installing the Driver & Software 1 View and Installing the documentation Important Make sure that you have finished the instructions for installing TYPE 1200SF Drivers and Utilities on pages 28 through 29. Note • If this window does not appear, use Windows® Explorer to run the start.exe program from the root folder of the CD-ROM. • For Windows Vista®, when the User Account Control screen appears, click Allow.
Consumables and Options 1 1 Consumables When the time comes to replace consumable items, an error message will be indicated on the LCD. For more information about the consumables for your printer,contact your sales or service representative. 1 32 Toner Cartridge Drum Unit Print Cartridge SP 1200E (for Europe) Print Cartridge SP 1200A (USA and Canada) Print Cartridge SP 1200S (For Asia) Drum Unit SP 1200 (Approx. 12,000 pages A4/Letter pages) Approx.
Trademarks All brand and product names mentioned in this manual are registered trademarks of their respective companies. Copyright © 2011 Ricoh Co., Ltd. All Rights Reserved.
M085-6140 GB