
User manual


Program Operation – ID Card Authentication 31
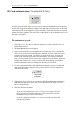
ID Card authentication (*ScanShellOCR Only)
Use this option to check if the card you scan is genuine. ScanShell will scan the data
on the card using OCR, and then compare it to data from a second source on the card,
either the barcode or the magnetic strip (if available). If the data from the two sources
match, the card is genuine. Else, the card is either faked, or one of the data sources on
the card is corrupted.
To authenticate a card:
1. Select Record -> New Record from the menu bar or click on the New Record
button from tool bar.
2. The New Record Screen will appear.
3. Select a state from the State dropdown list or use the State Detect option (for
OCR). You are advised to select the state manually, because if the state is not
recognized for some reason, you’ll have to repeat the process. You can also
select a state from the quick state selection buttons, if you have predefined
them. (To set a button for the desired state, right-click on the button. Select the
desired state from the list. After you release the mouse button, you’ll notice
that the button name has been changed to the state you selected).
4. Use the popup menu of the card authentication button to select a second card
data source (barcode or magnetic strip), which will be used for comparison
with the OCR results.
5. Click on the Card Authentication button to start the authentication (When the
authentication process is active, the icon on the button will flash, if it’s not
active it will be black)
6. Place the ID card in scanner.
If you are not using the Auto detect card insertion option: Click on
the Scan button to scan the data source (This scan will be saved to
the database if you will save the record).
If you are using the AutoDetect card insertion mode, just insert the
card into the scanner