INSTALLATION MANUAL Scantech ID Scan Kiosk SK-40 SK-50
Installation Manual Scantech-ID ScanKiosk SK-40 / SK-50
Copyright © 2013, Scantech-ID BV. This manual is copyrighted, with all rights reserved. Under the copyright laws, this manual may not, in whole or in part, be copied, photocopied, reproduced, translated or converted to any electronic medium or machine readable form without prior written consent of Scantech-ID BV. Limited Warranty Under all circumstances this manual should be read attentively, before installing and/or using the product.
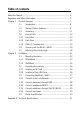
Table of contents About this Manual....................................................................................... 3 Regulatory and Safety Information .............................................................. 4 Chapter 1 Chapter 2 Appendix A Product Overview .................................................................. 7 1.1 Introduction............................................................... 8 1.2 General Product Features............................................ 9 1.
2
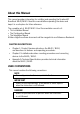
3 About this Manual This manual provides information for installing and operating the Scantech-ID ScanKiosk SK-40/SK-50. Read this manual before operating the device and keep it in a safe place for future reference. The complete set of SK-40 SK-50 User Documentation consists of: • This Installation Manual • The Configuration Manual • The Integration Manual At later stage these three documents will be merged into one Reference Bookwork.
4 LASER SAFETY IMPORTANT During installing, always follow the instructions. DANGER! Avoid long term viewing of direct laser light. This product is in conformity with IEC 825 Class 1 and 21CFR1040 Class IIa. German: Der SK-40/50 entspricht den Sicherheitsvorschriften nach IEC 825-1 (1993) für ein Laserprodukt der Klasse I. Er entspricht auch U.S. 21CFR1040, anwendbar auf ein Laserprodukt der Klasse IIa. Vermeiden Sie langzeitiges Hineinblicken in direktes Laserlicht.
6 5 Spanish: El SK-40/50 reune las normas de seguridad IEC 825-1 (1993) para un producto laser de Clase 1. Y también reune las normas U.S. 21CFR1040 que se aplican a un producto laser de Clase IIa. Se debe evitar mirar muy fijo en luz lasérica directa. English: The SK-40/50 complies with safety standard IEC 825-1 (1993) for a Class I laser product. It also complies with U.S. 21CFR1040 as applicable to a Class IIa laser product. Avoid long term viewing of direct laser light.
6 DECLARATION OF CONFORMITY The SK-40 and SK-50 comply with the following product specifications: Laser safety: IEC825 Class 1 and CDRH 21 CFR 1040 Electrical safety: UL 60950-1 EN 60950-1:2006+A11:2009+A1:2010+A12:2011 EMC: As set out in the Council Directive of the Laws of the Member States relating to Electromagnetic Compatibility (2004/108/EC) and (2006/95/EC) for the evaluation regarding electromagnetic compatibility.
7 Chapter 1 Product Overview
8 1.1 INTRODUCTION The SK-40 / SK-50 is a powerful Scan Kiosk that combines the conventional Price Checker with the functionality of a 2D imager or omni-directional laser scanner topped with multimedia capabilities supporting audio and video streaming. The SK-40 / SK-50 features the latest technology. Interfacing is done either through wired Ethernet or Wireless RF. The big full color display can be used to play slideshows or product promotion videos.
9 1.2 GENERAL PRODUCT FEATURES • Self-service SCAN KIOSK with touch screen and media display function (SK-50) • Color-screen Price Verifier (SK-40) • Multimedia support with High Quality speakers and headphone jack support • Compact dimension for easy to deploy virtually anywhere in the store • Easy to deploy and map out digital promotion image/video media • The rotatable scanner can be tilted upward and downward within a 30° range for the best user convenience.
10
11 1.3 1. UNPACKING Remove the device from the box and inspect it for damage. 2. Remove other items from the box and check if all accessories are complete. The following items should be present: • Power adapter • Installation Manual • Configuration Manual 3. Keep the packaging material in a safe place. The packaging box may needed when the device needs to be transported at later stage. NOTE If anything is missing or appears damaged, please contact your dealer immediately.
12 1.4 1.4.
13 Item Description Touch screen (SK-50) Displays product information on the 5.7” fullcolor screen ideal for multimedia applications Display screen (SK-40) Displays product and price information on the 4.
14 1.4.2 Back View All Data I/O connectors are protected by the back compartment cover. Before making any connections, remove the back compartment cover. Press the tab then pull back to detach the back compartment cover. Figure 3: Back View NOTE The connectors may vary depending on the device model. Some connectors shown above may not be on your device.
15 1.4.
16 1.5 SCANNING WITH SK-40 / SK-50 To scan barcodes, move the barcode towards the scanner window. The device beeps to indicate a successful scan.
17
18 1.6 ADJUSTING THE SCANNER ANGLE For the best user convenience, the scanner can be adjusted over a 30° angle and locked with steps of 5°. To adjust the tilt: 1. Open the back compartment cover. 2. Press and hold the scanner window lock and adjust the scanner to desired tilt. 3. Release the lock to secure the scanner in place. 4. Close the back compartment cover.
19 Scanner Angle and Envelope Product profile showing the scan area at the two extreme scanner positions.
20
21 CHAPTER 2 INSTALLATION
22 2.1 MOUNTING THE DEVICE Before mounting the device, consider the following to ensure proper mounting and the safety of installation: • Wall is thick enough to sustain the mounted device • The mounted height should be convenient enough for everybody to easily scan the article and to comfortably read the display. The SK-40 / SK-50 provides two mounting options: • VESA mounting • Wall mount with 2 screws, compatible with the Scantech-ID SG-15 2.1.
23
24 2.1.2 Wall Mount with 2 screws 1. Select a suitable location to mount the device. 2. See the next page for a Drilling Template, mark the location for the mounting screws and drill two holes in the wall. 3. Plug the wall-plugs into the holes. 4. Screw the mounting screws into the wall. 5. Connect the power adapter, cables and other accessories to the device. See the following pages for connection instructions. 6.
25 SK-40 SK-50 Wall Mount Drilling Template: 70 mm Scaling Reference: 100 mm Enlarge this page to the real product sizes. Make sure the scaling reference of 100 mm is respected.
26 2.2 EXPANDING THE MEMORY The SK-40 and SK-50 have standard a built-in flash memory of 256 MB. The flash memory is non-volatile and contains the system firmware, user applications, data, promotion and media files. If necessary the flash memory can be expended in two ways: use an SD card or a USB flash drive. 2.2.1 1. Installing an SD Card Remove the screw securing the SD card compartment cover. 2. Insert the SD card. 3. Attach the screw back to close the SD card compartment cover. 2.2.
27 2.3 CONNECTING THE SK-40 SK-50 Remove the back cover from the I/O compartment. Ref Chapter 1.4.2 2.3.1 CONNECT TO THE LOCAL NETWORK Wired Ethernet Connect the Ethernet cable into the LAN port in the Data I/O compartment to obtain network access. Apply the (6) cable strain relief pins. NOTE The LAN port contains two network LED indicators. Wireless connection A Wi-Fi stick must be present in one of the USB ports in the side compartment or in the Data I/O compartment for wireless connection.
28 2.3.2 Connect peripherals through USB (if applicable) Connect peripheral devices such as a handheld scanner or Wi-Fi stick to the USB port on the back of the device or in the side compartment. NOTE The number of USB ports may vary depending on model. 2.3.3 Connect headphone (if applicable) (SK-50) Connect the headphone to the audio port on the back of the device. Apply the (6) cable strain relief pins.
29 2.3.4 Connect peripherals through RS-232 (if applicable) (SK-50) To connect other accessories, such as a handheld scanner, connect the RJ-11/14 6pin connector to the RS-232 port on the back of the device. Apply the (6) cable strain relief pins. 2.3.5 Connect the Power Connect the power adapter to the power jack on the back of the device.
30 2.4 POWER OVER ETHERNET The exceptional low power consumption of SK series enables us to offer the ScanKiosks Powered-over-Ethernet (POE). This is the alternative for powering the SK-40/50 through an external PSU adapter. In this way the device gets its DC power directly from the powered (IEEE 802.3af compliant) Ethernet. There is no need to install a (230/110VAC) mains socket in the middle of the store. This SK-40/50 feature reduces the total installation costs.
31 Appendix A. Technical Specifications SK-40 SK-50 SK-50 SK-40 System Architecture Processor Super RISC Processor 400MHz Operating Platform Standard Linux 2.6 Kernel or WinCE 6.0 Memory Flash 256 MB, expandable with USB flash drive and SD card Memory RAM 128 MB Output Media Display Size 5.7” diagonal 4.3” diagonal Brightness 400 nits 350 nits Resolution 640 x 480 pixels (65.535 colours) 480 x 272 pixels (65.535 colours) Touch Screen Resistive type n.a.
32 Network Interface Wired LAN • Ethernet: 100MB Base-TX/10MB Base-T (802.3) standard on board • Power over Ethernet IEEE 802.af optional • Two network LED indicators in the LAN connector Wireless LAN Through USB Wi-Fi stick (ex factory or Scantech validated) 802.11 B/G/N 2.
33 Power Requirements Power Supply Voltage +12 VDC ± 10% / 1.5A Power Consumption Nominal: less than 1000mA @ 12VDC (standard configuration) Physical Dimensions (H x W x D) 193 x 176 x 85 mm (7.6” x 6.9” x 3.3”) Weight 0.
34
35
36 Scantech-ID BV Vanadiumweg 22 3812 PZ Amersfoort The Netherlands Phone: +31 (0)33 469 84 00 Fax: E-mail: Internet: +31 (0)33 465 06 15 info@scantech-id.com www.Scantech-ID.com www.Champtek.