CONTENTS ver 4.0 Getting Started ............................................................... 3 Specifications ........................................................................................................... 5 Opening the Package ................................................................................................ 9 Installation................................................................................................................ 9 Important Safety Guidelines.............
Connecting Headphone Out Port .................................................................. 36 For Analog Cable and Antenna Users..................................................................... 37 For Set-top Box Users (including Digital Cable, Satellite, other video displaying devices) .................................................................................................................. 37 For HDTV Antenna ATSC Tuner Users ..............................................................
Getting Started Congratulations on your SCEPTRE X42 42” LCD Television purchase. Thank you for your support of SCEPTRE and its LCD Television product line. The X42 is a precise electronic product and you should read the following instructions carefully to maximize its performance. It has passed regulatory safety certifications and you can be assured of the highest quality display with the utmost reliability.
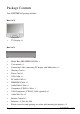
Package Contents Your SCEPTRE X42 package includes: Box 1 of 2 TV Display x 1 Box 2 of 2 Media Box (SKU#XHD1920-1H)x 1 User manual x 1 Connecting Cable (connecting TV display with Media box) x 1 Warranty Card x 1 Power Cord x 1 VGA Cable x 1 PC Audio Cable x 1 HDMI/DVI Cable x 1 Audio/Video Cable x 1 Component (Y Pb Pr) Cable x 1 VGA/Component (Y Pb Pr2) Cable (optional) x 1 Audio Wire Set x 2 Remote Control x 1 Batteries x 2 (Size AA, R6) Pl
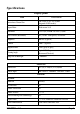
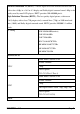
Specifications Display panel Illustration Item Active Area / Screen Size 930.24 (H) x 523.26 (V)mm (diagonal 42.02 inches) Aspect Ratio Widescreen 16:9 Pixel Pitch 0.1615 (H) x RGB x 0.4845 (V)mm Max. of Pixels (Resolution) HD (1920 x 1080 pixels) resolution Brightness 500 nits (Typical) Contrast 1200:1 (Typical) Response Time 6.5ms (gray to gray) Viewing Angle Typical 176 Degree (Horizontal/Vertical) Lamp Life of Backlight > 50000hrs Media box Dimension 362.
Dynamic contrast Yes( Tuner/Video decoder ) Sharpness DLTI/DCTI Gamma 10bit / 5 curves Lamp adjust Yes Picture mode User mode / Standard / Nature / Game/ Cinema Video adjust Contrast / Brightness / Color / Hue 3 levels of color Temp.
Enhanced Definition TV (EDTV): A better digital television transmission than SDTV with at least 480p, in a 16:9 or 4:3 display and Dolby digital surround sound. 480p is the quality used by most DVD players. EDTV provides 300-400,000 pixels. High-Definition Television (HDTV): The best quality digital picture, widescreen (16:9) display with at least 720 progressively scanned lines (720p) or 1080 interlaced lines (1080i) and Dolby digital surround sound. HDTV provides 900,000-2.1 million pixels.
AV1, AV2, YPbPr1, VGA- YPbPr2 NTSC(ASIA / Japan) HDMI-1/HDCP-1(option), HDMI-2/HDCP-2(option), AV Line out Sub woofer out, Head phone Page8 SCEPTRE X42
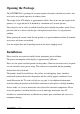
Opening the Package The SCEPTRE X42 is packaged in a carton together with other standard accessories. Any accessories are packed separately in another carton. The weight of the LCD display is approximately 80 lbs. Due to the size and weight of the product, it is suggested that it be handled by a minimum of 2 or more persons. Since the glass can be easily scratched or broken, please handle the product gently.
Important Safety Guidelines This product is designed and manufactured to operate within defined design limits, and misuse may result in electric shock or fire. To prevent the product from being damaged, the following rules should be observed for the installation, use and maintenance of the product. Read the following safety instructions before operating the display. Keep these instructions in a safe place for future reference.
• Slots and openings in the back and bottom of the cabinet are provided for ventilation. To ensure reliable operation of the X42 LCD TV and Media Box and to protect it from overheating, be sure these openings are not blocked or covered. Do not place the X42 LCD TV and Media Box in a bookcase or cabinet unless proper ventilation is provided. • Never push any object into the slot on the X42 LCD TV and Media Box cabinet. Do not place any objects on the top of the product.
• Unplug the unit during a lightening storm or when it will not be used for long period of time. This will protect the X42 LCD TV and Media Box from damage due to power surges. • Do not attempt to repair or service the product yourself. Opening or removing the back cover may expose you to high voltages, the risk of electric shock, and other hazards. If repair is required, please contact your dealer and refer all servicing to qualified service personnel. • Keep the product away from moisture.
• o Liquid sprays or any object drops into the X42 LCD TV and Media Box. o The Display is exposed to rain or other moisture. o The Display is dropped or damaged in any way. o The performance of the Display changes substantially. Operating environment: Temperature: 5°C ~ 35°C, Humidity: 10% to 90% non-condensing, Altitude: 0~10,000 ft.
Lightning Protection For added protection of the LCD TV during a lightning storm or when it is left unattended or unused for long periods of time, unplug the LCD TV from the wall outlet and disconnect the antenna or cable system. Power Lines Do not locate the antenna near overhead light or power circuits, or where it could fall into such power lines or circuits.
Product Browse Display Top View Front View Note: Power indicator: If light is blue, the TV is turned on. If the light is red, the TV is turned off and in standby mode. If the light is off, the inverter connector is not connected and no power is provided to the display panel. IR sensor: Remote Control Sensor – This is the sensor that passes all of the remote signals to the media box. Point the remote control directly at this sensor for the best response to the remote signal.
Rear View Note: wall-mounted Page16 SCEPTRE X42
Wall-mounted 1. Unplug all the cables and cords from the LCD TV. 2. Place the LCD TV face down on a soft and flat surface (blanket, foam, cloth, etc) to prevent any damage to the display. 3. Remove the 6 screws on the back panel of the TV located near the bottom so that the base stand can be removed (see Picture 1). 4. Gently pull the stand away from the display by grasping firmly to the base. 5.
Side View About control keys Press CH buttons to switch between preprogrammed channels. If you are using DTV to view your television you can also use EPG button to navigate your channels. Press VOL buttons to adjust the audio volume. Press this button to select among the following PC or DTV inputs – DTV, HDMI-1 (HDMI, HDCP, DVI), HDMI-2 (HDMI, HDCP, DVI), VGA-PC, VGA-YPbPr2. Please note HDMI, HDCP, and DVI are physically shared under the same HDMI port.
TV Info Explained Non DTV On the upper left hand corner there’s always an “M: “and an “S:”. “M: “ represents the main display while “S: “represents the sub-display also known as PIP window. “S: “is usually off because a PIP window is not present. On the top 1/3rd of the screen a information bar would appear, the information DTV displayed would include what program you’re watching, what time slot is the program playing in and what format is the program being displayed in.
of any video more accurately and vividly. This interface can be used by both PC and video displaying devices such as DVD player, satellite box, or digital cable box…etc. Please note to get sound out of DVI mode you must connect an audio cable from your audio video device to the audio port labeled “PC Audio In”. VGA-PC VGA stands for Video Graphics Array. This type of connection is designed so people can use their PCs on the 42” LCD/TV. primarily used by personal computers.
Media Box Front View Note: Power indicator: If light is blue, the TV is turned on. If the light is red, the TV is turned off and in standby mode. If the light is off, the inverter connector is not connected and no power is provided to the display panel.
Media Box Rear View Connector Definitions 1. Signal Connector This connector provides video signals to the display panel and has to be permanently connected. 2. This connection uses propriety cable. Inverter Connector This connector provides power to the display panel and has to be permanently connected. 3. This connection uses propriety cable. TV Speaker This connection port is for connecting the TV’s speakers and provides sound signals to the TV’s speakers. 4. This connection uses speaker wires.
to DVI conversion cable. You can connect an up conversion DVD player, computer (via DVI source), or set-top box through this cable. If you are using DVI or HDCP you will need to connect an audio connection to the PC Audio In connection port to provide audio. This connection uses a HDMI cable or a HDMI to DVI cable. 9. Service Port This is used for factory service by SCEPTRE’s technicians (do not tamper with this port). 10.
video, and a subwoofer cable for bass. 13. AV1 & AV2 These connection ports are used for connecting composite devices, such as VCR, DVD player, game console, or set-top box via AV1 or AV2 source. Use the connectors white (L) and red (R) for audio and the yellow (AV) for video. You can also substitute the yellow (AV) by using the black connector (S-VIDEO) for a better picture. time.
2. AV1 & AV2 (Basic) Analog Video - 480i. 3. The yellow connector provides all the video information. S-VIDEO (Fair) Analog Video - 480i. The black connector separates between black and white information and color information therefore displaying sharper text and video. 4. Component (Good) Analog HD Capable Video - 480i, 480p, 720p, 1080i. The video signal is separated into three different cables each carrying different video data thus providing a superior picture over S-Video. 5.
Quick Installation Installation batteries of remote control (1). Insert two AA (or R6) batteries into the remote control. Make sure + and – are facing the proper direction. (2). Replace the cover. If the remote control is not to be used for a long time, remove the batteries. Keep the remote control away from moisture, sunlight, and high temperatures.
Connecting the Display with Media Box Connect Cable Please note: The cables are color coded, when connecting them, please color match the connectors. The color side always faces up or outward.
Connecting Signal Connecting Inverter & AC Power Page28 SCEPTRE X42
Connecting the AC Power Cord Connect AC power from the rear of media box to the power source. Power Switch After you have connected AC power, turn the power switch to Power On position on the media box. Make sure light of power indicator is blue. Please note, this power switch is an active power switch which physically cuts power off the TV set. If you have cut the power off please let the TV rest for 10~20 minutes before cutting the power back on.
Connecting TV Tuner TV tuner is for over the airwave television via UHF and VHF. Analog cable is cable hooked directly into the TV to the TV tuner connectors. Connecting AV1 / AV2 Port AV1, and AV2 is for connecting VCR, Analog Cable Set-top Boxes or other device that uses composite or S-Video for video and RCA red/white wires for audio.
Connecting Component HD Port Component is for connecting DVD Player, HD Satellite/Cable Set-top Boxes or other device that uses component wires (red, green, blue wires) for video and RCA red/white wires for audio. Note: Refer to your DVD player, HD Satellite/Cable Set-top Boxes or other device with component HD port user manual for more information about the video output requirements of the product.
Connecting HDMI-1, HDMI-2 Port HDMI is for connecting HD Satellite, HD Digital Cable Set-top Boxes or other device with HDMI port. The HDMI port also doubles as HDCP/DVI port. If your HD set-top box does not have HDMI but DVI instead, please use the HDMI to DVI conversion cable that is included in the box. When using HDMI to DVI conversion cable please also plug audio wires into PC AUDIO IN port for sound. Note: PC Audio In is for sound on HDCP/DVI. A.HDMI B.
C.HDCP NOTE: 1. The HDMI input on your LCD TV supports High-bandwidth Digital Content Protection (HDCP ). HDCP encrypts the transmission between the video source and the digital display for added security and protection. 2. Refer to your HDTV Set-top Box or other device with HDMI port user manual for more information about the video output requirements of the product or consult your satellite or cable operator.
Connecting ATSC Tuner The ATSC Tuner is for connecting digital cable or high definition antennas. The tuner will tune to unscrambled digital cable channels or over the air wave high definition local channels. This connection port uses coaxial cable. Connecting Line Out Port If you have better speakers, which you would like to connect directly to the TV, you can do so via the Line Out port. You can also connect a subwoofer to the TV’s direct Subwoofer Out port for better bass.
Connecting VGA Port VGA port is for connecting PC system. Please use a VGA cable to connect from the PC to the 42” LCD’s VGA port. The other cable from PC Audio In to the PC is for audio. If you have separate PC speakers, please disregard the cable. It also doubles as an optional YPbPr (component) port via VGA-YPbPr2 source, if you have the optional VGA to component conversion cable. With the optional cable you can connect to DVD players, game consoles, or set-top boxes.
Connecting to TV Speaker Media box communicates with the TV display. The 4 wire connectors labeled TV SPEAKER is for connection to the TV’s speaker. Connecting Headphone Out Port The headphone out port is for connecting to a headphone.
For Analog Cable and Antenna Users Note: The following instruction set is for TV tuner antenna, analog cable users only. When using the TV for the first time, you must perform the channel scan to get all correct channels by doing the following: Press the “SOURCE AV” button on the remote controller to select the TV input signal labeled either “Cable ###” or “Air ###”. # represents numbers. 1. Press MENU button to activate the On Screen Display (OSD) menu 2.
For HDTV Antenna ATSC Tuner Users Note: The following instruction set is for ATSC Tuner HD antenna users only. Only perform the following instruction set when you have connected a HD antenna to the ATSC tuner. ATSC tuner does not guarantee HD picture quality. HD picture still depends on the method which your local channels broadcast their TV signal. 1. Make sure your HDTV antenna is connected to the ATSC Tuner port NOT the tuner labeled TV Tuner. 2.
Using the X42 Remote Control SCEPTRE X42 Page39
Universal Remote Code and Support Sceptre’s X42 LCD supports SONY’s universal remote code. Please look up SONY’s codes in your handbook of remote codes to setup your universal remote. Please note : Due to the variety of universal remotes manufactured, not all universal remotes will fully function with the code. If you have trouble getting channel or volume buttons to work, please try the directional buttons on your universal remote rather than your regularly used volume buttons.
Aspect Explained 1. Auto This aspect ratio automatically adjust to the picture’s original format. full screen will be used. 2. If 16:9 the If 4:3, black bars will be added on the side. 16:9 When watching a standard broadcast or full-frame movie in this mode, the display image is stretched horizontally to fill the TV screen. When watching a widescreen (1.76:1 source) program or movie, the display image fills the TV screen. If you are watching a widescreen (1.85:1 or 2.
4. Zoom Full When watching a 4:3 aspect ratio TV or movie, this mode zooms in to cut off most of the black bars on the side while preserving the 16:9 ratio. the top and bottom are cut off as well. Because of the zoom, Note : When in HD mode or connected to a HD set-top box that controls the resolution you will not be able to choose your aspect ratio. 5. Zoom Subtitle This mode is primarily used when you’re watching a movie where the widescreen aspect ratio is not 16:9 but rather 1.85:1 or 2.35:1.
Picture In Picture AUDIO (PIP SWAP) Listen to the audio from the sub-picture. VIDEO (PIP SWAP) Swap between main picture and the sub-picture. SOURCE Select the input source for the sub-picture. SIZE Select the window size for the sub-picture (1/4, 1/9, or 1/16 of the entire screen size). POS Select the position for the sub-picture window (four corners of the screen).
FAVORITE (Channels) Chooses the pre-selected favorite channels. Total of nine channels can be stored as the Favorite channels list in TV source and an unlimited storage of channels in DTV source. Note: Before the Favorite (channels) can be used, one must pre-select the channels and store into the Favorite channel list.
SOURCE PC Selects different PC/DTV input sources – DTV, HDMI-1 (HDMI, HDCP, DVI), HDMI-2(HDMI, HDCP, DVI), VGA-PC, and VGA-YPbPr2. SOURCE AV Selects different video input signal sources – TV Tuner, AV1, AV2, and YPbPr1 (Component). SOUND Select different Sound Effect modes – User mode, Pop, Soft, Dialogue, and Cinema. PICTURE Select different preset picture modes – User mode, Standard, Nature, Game, and Cinema.
MENU Press the MENU button to activate the OSD (On Screen Display) main menu. Press again to quit the main menu. MTS To select STEREO, MONO, or SAP. When OSD menu is shown, press this button to enter (confirm) the sub-menu. CH +/Press these two buttons to scroll through the channels. If the OSD Menu is shown on the screen, press these buttons to scroll through the menu items vertically.
VOL -/+ Press these two buttons to adjust the speaker volume level. If the OSD Menu is shown on the screen, press these buttons to scroll through the menu items horizontally. EXIT Press this button to exit from the sub-menu to the previous menu. EPG When DTV program (channel) is selected, press this button to display the Electronic Program Guide (EPG).
0 – 9, 100/- channel number Select channels from 1 to 99, press the desired channel numbers. If the channel number is 100 or greater, first press the button “100/-“ CCD Press CCD to display closed caption information. Press repeatedly to scroll through OFF, CC1, CC2, CC3, CC4, TT1, TT2, TT3, and TT4 R / Return Press this button to return to previous channel.
SLEEP Press repeatedly to cycle through the available sleep timer options – Off/30/60/90/120 minutes. INFO Display related information on current channels or PC modes. Picture In Picture Explained Picture In Picture is a display mode where 1 TV can display 2 different types of video sources simultaneously. This is done with 1 small window at a corner of the TV displaying 1 video source while the other video source is displayed on the entire screen.
Port combination for PIP Main TV (NTSC) AV1 AV2 SV1 (S-video) SV2 (S-video) TV (ATSC) YPbPr1 YPbPr2 TV (NTSC) NA NA NA NA NA √ √ √ AV1 NA NA NA NA NA √ √ √ AV2 NA NA NA NA NA √ √ √ SV1 (S-video) NA NA NA NA NA √ √ √ SV2 (S-video) NA NA NA NA NA √ √ √ TV (ATSC) √ √ √ √ √ NA NA NA YPbPr1 √ √ √ √ √ NA NA NA YPbPr2 √ √ √ √ √ NA NA NA VGA(PC) √ √ √ √ √ NA NA NA HDMI 1 √ √ √ √ √ NA NA NA HDCP 1 √ √ √ √ √ NA N
Main VGA (PC) HDMI 1 HDCP 1 DVI 1 (PC) HDMI 2 HDCP 2 DVI 2 (PC) TV (NTSC) √ √ √ √ √ √ √ AV1 √ √ √ √ √ √ √ AV2 √ √ √ √ √ √ √ SV1 (S-video) √ √ √ √ √ √ √ SV2 (S-video) √ √ √ √ √ √ √ TV (ATSC) NA NA NA NA NA NA NA YPbPr1 NA NA NA NA NA NA NA YPbPr2 NA NA NA NA NA NA NA VGA(PC) NA NA NA NA NA NA NA HDMI 1 NA NA NA NA NA NA NA HDCP 1 NA NA NA NA NA NA NA DVI 1(PC) NA NA NA NA NA NA NA HDMI 2 NA NA NA NA N
OSD (On Screen Display Menu) The OSD Menu varies based on different input signal sources. The OSD menus provide different control functions, which allow users to optimize the picture/audio performances for each of the input signal sources. How to operate the OSD Menu: 1. Press the MENU button on the remote controller to pop up the OSD menu. Press the MENU button again to quit the OSD menu. 2. Press to select the GROUP items which listed horizontally on the OSD menu. 3. Press 4. Press 5.
OSD screen instruction: Group icon descriptions: 1. GEOMETRY / VIDEO (user mode only) 2. PICTURE / ADVANCED (user mode only) 3. AUDIO (user mode & none-user mode) 4. SYSTEM (user mode & none-user mode) 5. TV SETUP / DTV (user mode & none-user mode) Note: I. The follow chapter will introduce the operations for different input signal. (Press the button “Picture” on the remote controller to switch to “user” mode) II. None-user mode include Standard, Nature, Game and Cinema.
TV input When TV (NTSC) input is selected, the following OSD menu will be displayed when the MENU button is pressed. 1. VIDEO (User mode) CONTRAST Adjusts the contrast between bright / dark graphics and text. BRIGHTNESS Adjust brightness of the screen. SHARPNESS Make the picture sharper. COLOR Adjust Picture Chrominance Gain/Ratio. TINT Adjust Picture Chrominance angle(or skin color). RECALL Reset the parameters to original factory settings. 2.
SKIN TONE Make the skin color brighter without affecting other colors. GREEN Strengthen Green (grass color) color without affecting other colors. BLUE Strengthen Blue (sky color) color without affecting other colors. NOISE Adjust abatement of signal noise. Select different option – Off, -1, -2, -3, -4. GAMMA Adjust screen visual transformation. RECALL Reset the parameters to original factory settings. 3. AUDIO BASS Adjusts the bass level of your TV speakers.
sure to adjust the volume to below 40 when the popping occurs. AVC Suppress a pop sound resulted from changing TV program. SURROUND Select sound field from Off, Narrow, or Wide. RECALL Reset the parameters to original factory settings. 4. SYSTEM LANGUAGE Choose the language between English and French for the OSD menu. LAMP Adjusts how bright you want the LCD to display it’s images. DCI The dynamic contrast improvement option is similar to AVC but deals with video.
FAVORITE CH Select channels and store into the favorite channel list. Note: To block or unblock the TV program, enter the “Rating” sub-menu, and then press “0000” to access the menu. Press (enter) to toggle between “B”(blocked, not allowed to watch this program) and “U”(unblocked, allowed to watch this program). MPAA blocks filters movies, while USTV filters TV sitcoms, and TV series. To use the “Favorite CH” function, turn to the desired channel first, and then enter the “Favorite CH” sub-menu.
COLOR Adjust Picture Chrominance Gain/Ratio. TINT Adjust Picture Chrominance angle(or skin color). RECALL Reset the parameters to original factory settings. 2. ADVANCED (User mode) VIVID COLOR Make color brighter without over-saturation. SKIN TONE Make the skin color brighter without affecting other colors. GREEN Strengthen Green (grass color) color without affecting other colors. BLUE Strengthen Blue (sky color) color without affecting other colors.
BALANCE Adjusts the balance (left to right) of your TV speakers. LOUDNESS Enhanced Bass and Treble strength. Loudness Caution : Because the loudness option enhances bass sound effects, the possibility of X42’s speaker popping increases greatly because of different sound signals received. Our standard signal to the X42’s speaker is 500mVrms but with different channels browsed or different sound cards, the output might send out 1Vrms, therefore increases the possibility of popping the X42’s speaker.
RATING Program lock according to MPAA or TV Guide Line. Y Pb Pr1 (Component), VGA-Y Pb Pr2, HDMI-1, HDMI-2, HDCP-1, HDCP-2 inputs 1. VIDEO (User mode) CONTRAST Adjusts the contrast between bright / dark graphics and text. BRIGHTNESS Adjust brightness of the screen. SHARPNESS Make the picture sharper. COLOR Adjust Picture Chrominance Gain/Ratio. TINT Adjust Picture Chrominance angle(or skin color). RECALL Reset the parameters to original factory settings. 2.
VIVID COLOR Make color brighter without over-saturation. SKIN TONE Make the skin color brighter without affecting other colors. GREEN Strengthen Green (grass color) color without affecting other colors. BLUE Strengthen Blue (sky color) color without affecting other colors. NOISE Not available under these inputs. GAMMA Adjust screen visual transformation. RECALL Reset the parameters to original factory settings. 3. AUDIO BASS Adjusts the bass level of your TV speakers.
increases the possibility of popping the X42’s speaker. Please make sure to adjust the volume to below 40 when the popping occurs. AVC Suppress a pop sound resulted from changing TV program. SURROUND Select sound field from Off, Narrow, or Wide. RECALL Reset the parameters to original factory settings. 4. SYSTEM LANGUAGE Choose the language between English and French for the OSD menu. LAMP Adjusts how bright you want the LCD to display it’s images.
1. GEOMETRY AUTO Auto fine tuning picture clock and position. H-POSITION Adjusts the display position left or right. Normally use Auto Adjust. V-POSITION Adjusts the display position up or down. Normally use Auto Adjust. CLOCK Adjusts the clock frequency to match video card / Normally use Auto Adjust. PHASE Adjusts the phase frequency to match video card. Normally use Auto Adjust.
G GAIN Adjusts how much green color is in the display. B GAIN Adjusts how much blue color is in the display. RECALL Reset the parameters to original factory settings. 3. AUDIO BASS Adjusts the bass level of your TV speakers. TREBLE Adjusts the treble level of your TV speakers. BALANCE Adjusts the balance (left to right) of your TV speakers. LOUDNESS Enhanced Bass and Treble strength.
4. SYSTEM LANGUAGE Choose the language between English and French for the OSD menu LAMP Adjusts how bright you want the LCD to display it’s images. FORMAT Signal output conforms to window size of the display in particular resolution. Resolution – 1024x768, 1280x768, 1366x768, 1360x768 How to setup: 1.Select true resolution format. 2.Return Geometry item press “AUTO” once. DVI input When DVI input is selected, the following OSD menu will be displayed when the MENU button is pressed. 1.
BRIGHTNESS Adjust brightness of the screen. COLOR TEMP. Select color temperature among High, Middle, Low, or User modes. R GAIN Adjusts how much red color is in the display. G GAIN Adjusts how much green color is in the display. B GAIN Adjusts how much blue color is in the display. RECALL Reset the parameters to original factory settings. 3. AUDIO BASS Adjusts the bass level of your TV speakers. TREBLE Adjusts the treble level of your TV speakers.
SURROUND Select sound field from Off, Narrow, or Wide. RECALL Reset the parameters to original factory settings. 4. SYSTEM LANGUAGE Choose the language between English and French for the OSD menu LAMP Adjusts how bright you want the LCD to display it’s images FORMAT Signal output conforms to window size of the display in particular resolution.
BRIGHTNESS Adjust brightness of the screen. SHARPNESS Make the picture sharper. COLOR Adjust Picture Chrominance Gain/Ratio. TINT Adjust Picture Chrominance angle(or skin color). RECALL Reset the parameters to original factory settings. 2. ADVANCED (User mode) VIVID COLOR Make color brighter without over-saturation. SKIN TONE Make the skin color brighter without affecting other colors. GREEN Strengthen Green (grass color) color without affecting other colors.
TREBLE Adjusts the treble level of your TV speakers. BALANCE Adjusts the balance (left to right) of your TV speakers. LOUDNESS Enhanced Bass and Treble strength. Loudness Caution : Because the loudness option enhances bass sound effects, the possibility of X42’s speaker popping increases greatly because of different sound signals received.
5. DTV Enter DTV (ATSC) OSD menu. Note: When first enter the DTV OSD menu, press “0000” as the password. CHANNEL EDIT Displays a list of channels you can toggle between favorites and blocking. When finished editing press EXIT to save and exit. AUTO SCAN Automatically scans for all channels via HDTV antenna. MANUAL SCAN Manually input a channel number for scanning. (NOT RECOMMENDED) CAPTION FONT SIZE Adjusts the size of fonts for closed captions.
EDGE STYLE Adjusts the border style. EDGE COLOR Adjusts the border color. SETUP OPACITY Adjusts how transparent the info bar is. I-PLATE Adjusts the display time for the info bar. TIME ZONE Toggles between daylight savings time and regular time. Time is received thru antenna. ABOUT Information regarding the ATSC tuner hardware. LOCK RATING Toggles the rating chart to block children from viewing violent TV.
PASSWORD Changes the password. WARNING THERE IS NO WAY TO RESET THIS FEATURE. PLEASE REMEMBER YOUR NEW PASSWORD OR DON’T CHANGE THE PASSWORD. RESET DTV Resets all options including scanned channels.
Rating Explained General Operation To block channels you don’t want your kids to watch, you can filter them with the ratings function. TV. MPAA lets you control ratings for movies you allow your kids to watch on the For regular TV sitcoms or series you can use USTV settings. USTV settings lets you filter what content you want each age level, TV-Y, to TV-MA (refer to definitions below) to be able to watch. Look at the rolls you will see each age level.
make-believe and reality. Themes and elements in this program may include mild fantasy violence or comedic violence, or may frighten children under the age of 7. Therefore, parents may want to consider the suitability of this program for their very young children. Note: For those programs where fantasy violence may be more intense or more combative than other programs in this category, such programs will be designated TV-Y7-FV.
TV program description FV - Fantasy Violence V - Violence S - Sexual Situations L - Adult Language D - Sexually Suggestive Dialog DTV Favorite Channels Explained The DTV favorite channels function is designed so the user can access a pre-edited list of channels to watch rather than scrolling through unwanted channels and wasting time. To edit the DTV channel list make sure you have already scanned and obtained channels either through digital unscrambled cable or over the airwave HD antenna.
Other Information Cleaning the LCD TV Wipe the LCD TV with soft or dry cloth. Do not use solvent or methylbenzene. Harsh chemicals may damage your LCD TV. Make sure the LCD TV is unplugged before you clean it. Warning BEFORE PLUGGING IN THE UNIT FOR THE FIST TIME, READ THE FOLLOWING SECTION CAREFULLY. The voltage of the available power supply differs according to country or region. Be sure that the power supply voltage of the area where this unit will be used meets the required voltage (e.g.
Troubleshooting The following table contains the common problems and the solutions to these problems. Please check this list before you contact technicians. Problems No picture Reasons 1. Did you connect the power cord? 2. Did you turn on the power? 3. Is the signal cable connected correctly? 4. Is the selected input signal source connected? Solutions 1. Connect power cord correctly. 2. Turn on power 3. Connect signal cable correctly. 4. Select the input signal source with proper cable connection.
Problems Reasons Audio only, no 1. Is input signal cable picture connected correctly? Solutions 1. Check the signal cable connection. Make sure your video cable is in the right group as the audio cable. 2. Is the TV signal too weak? 2. TV-RF signal must not be lower than 50 dB. Picture only, 1. Is signal cable connected no audio correctly? 2. Is the audio volume set at the lowest level? 3. Is audio signal cable not connected? 4. Is the TV signal cable too weak? Remote correctly. 2.
Problems Possible solutions Blinking picture accompanied Check the connection of antenna/signal cable by signal box image Broken lines or Adjust antenna. Keep the TV away from noise sources such as segments neon lights, and hair dryer. Certain TV channels are Please use the channel scanning function or v-chip function to unblock.
Problems port) Possible solutions Go into your video card’s advance menu to make sure 2nd monitor / DVI port is turned on. No Sound on PC Satellite / Digital Cable box says HDCP not compatible. Make sure your green connector head audio cable is connected. Reboot your satellite / digital cable box by turning them off then unplugging the power cord. Wait for at least 1-3 minutes and plug them back into the wall and turn on the power.
Appendix FCC Compliance Statement This device complies with Part 15 of the FCC Rules. Operation is subject to the following conditions: (1) This device may not cause harmful interference (2) This device must accept any interference received, including interference that my cause undesired operation. Note: This equipment has been tested and found to comply with the limits for a Class B digital device, pursuant to part 15 of the FCC Rules.
Caution: To comply with the limits for an FCC Class B computing device, always use the signal cord and power cord supplied with this unit. The Federal communications Commission warns that changes or modifications to the unit not expressly approved by the party responsible for compliance could void the user’s authority to operate the equipment.