
Installation Guide

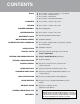


CONTENTS
4 Floors, Interior – 16, 19.2, & 24-inch o.c. joist spacing
6 Floors, Interior – Natural Stone Tile
7 Floors, Interior – Existing Vinyl
7 Floors, Interior – Structural Plank Subfloor
8 Floors, Interior – Ceramic or Stone Tile
9 Floors, Interior – Ceramic or Stone Tile
10 Shower application
12 Floors, Interior – Ceramic or Stone Tile
13 Placement guidelines and descriptions
16 Installation guidelines
17 Floors, Interior - Engineered Wood, Vinyl, WPC, LVT/LVP,
SPC, and Laminate
19
Installation instructions
25 Discussion of thin-set mortar types to be used with
Schluter
®
-DITRA-HEAT
26 Schluter
®
-DITRA-HEAT-E-HK specification
27 Products evaluation
29 Discussion of sound control in conjunction with
ceramic & stone tile
31
Solution to improve floor warming response time
32 Discussion on Schluter
®
-DITRA-HEAT installations over
concrete subfloors
33 Discussion of heating cables in 208 V applications
34 Discussion on use of Schluter
®
-DITRA-HEAT for space
heating
35 Discussion of natural stone and
single-layer wood subfloors
36
40
WOOD
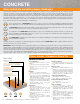
CONCRETE
GYPSUM
SHOWER ASSEMBLY
WATERPROOFING
MOVEMENT JOINTS
WOOD UNDERLAYMENT
ALTERNATIVE FLOOR COVERINGS
INSTALLATION
THIN-SET FACTS
HEATING CABLE SPECIFICATION
TESTING & CERTIFICATIONS
SOUND CONTROL
DITRA-HEAT-DUO
CONCRETE SUBFLOORS
208 V APPLICATIONS
SPACE HEATING
NATURAL STONE
HEATING CABLE TESTS LOG
WARRANTY
Heating cables must be installed by a qualified person in accordance
with this handbook and with the National Electric Code (USA) or
Canadian Electric Code Part I (CAN) as applicable. All electrical
connections must be made by a qualified electrician, according to
the electrical and building codes effective in your region.
This installation handbook is subject to change without notice.
Please visit www.schluter.com for the latest version.