
Schluter-KERDI-BOARD Brochure


4 5
Schluter
®
-KERDI-BOARD SUBSTRATE, BUILDING PANEL, BONDED WATERPROOFING
Schluter
®
-KERDI-BOARD
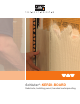
Ideal tile substrate over masonry or
existing/mixed substrates
Uneven substrates
Installing tiles using the thin-set method
requires substrates to be clean and
even. Masonry walls and existing/mixed
substrates are often unsuitable substrates
for direct application of tile because they
can be uneven or difficult to bond to.
Schluter
®
-KERDI-BOARD is ideal for
installation on:
• Concrete
• Masonry of all kinds
• Existing substrates such as plaster,
tiles, painted surfaces, etc.
• Mixed substrates
Depending on the condition of the existing
wall areas, KERDI-BOARD can be either
fully embedded in thin-set mortar or spot-
bonded. Spot-bonding the panels with
thin-set mortar allows for adjustment to
achieve plumb wall surfaces.
Schluter
®
-KERDI-BOARD can be installed
vertically as well as horizontally. Where
wall surfaces will not accept a bond to
thin-set mortar, KERDI-BOARD can be
further attached with the help of the
special anchors included in our hardware
assortment.
Tiles can be installed over Schluter
®
-KERDI-
BOARD with thin-set mortar immediately;
no additional prep is required.
Schluter
®
-KERDI-BOARD
in bonded waterproofing
assemblies
Schluter
®
-KERDI-BOARD is suitable for
use in bonded waterproofing assemblies.
For this purpose, the corners and joints
must be sealed with Schluter
®
-KERDI-
BAND using unmodified thin-set mortar.
Fastener penetrations may be sealed with
Schluter
®
-KERDI-BAND using unmodified
thin-set mortar. Other protrusions through
the KERDI-BOARD (e.g., showerhead,
tub spout, etc.) must be treated with
Schluter
®
-KERDI-SEAL-PS seals or
Schluter
®
-KERDI-FIX.
Suitable panel thicknesses
of Schluter
®
-KERDI-BOARD
If the substrate is sufficiently even to allow
for fully embedding the panels in thin-
set mortar, panel thicknesses from 3/16"
(5 mm) can be selected. If the panels are
to be spot-bonded, thicknesses of 3/8"
(9 mm) or more are required, depending
on specific project requirements.
i
Installation notes:
The images shown in this brochure
illustrate the essential installation
steps. The text provides brief,
summarized descriptions. For further
details on the individual products and
their installation, please refer to the
corresponding product data sheets
and installation handbooks.