
Installation Guide


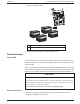

Table Of Contents
- Audience
- Safety Information
- Introduction
- Installation
- Troubleshooting
- Specifications

Before you begin, make sure you have all important system information such as the
nominal battery voltage, battery type, and battery bank capacity available.
To commission one or more charge controllers:
1. Setting the Device Number on page 45
2. Configuring Connections and Charger Settings on page 46
3. If commissioning multiple charge controllers:Copying Settings to Another Charge
Controller on page 47
4. Starting the Charge Controller on page 48
When commissioning multiple charge controllers on the same Xanbus network, make
sure to set a unique device number and the correct battery connection. The connection is
important to define so that system totals and other related information are displayed
accurately.
Setting the Device Number
To set a device number for the charge controller:
1. Make sure an SCP is attached to the Xanbus network.
2. Close the DC disconnect. When a charge controller is powered up, it will begin
communicating with the SCP and be ready for configuration through the SCP. Do not
apply PV power at this point.
3. On the SCP System Status home screen, press Enter.
The Select Device menu opens.
4. Use the arrow buttons to scroll to the charge controller to configure, and then press
Enter. Each charge controller appears as XW MPPT80 xx or XW MPPT100 xx,
where xx is its device number.
The Setup menu opens.
5. To display the Advanced Settings menu item press the Enter, up arrow, and
down arrow buttons simultaneously.
6. Press Enter to select Advanced Settings.
The Config menu opens.
7. Scroll to Multi Unit Config, and then press Enter.
The Multi menu opens. The LEDs on the charge controller you are configuring will
start to flash when you enter this menu, providing visual confirmation of the charge
controller you are configuring.
8. Scroll to Dev Number, and then press Enter. Scroll again to set it to a number other
than 00, and then press Enter to confirm the new device number. The device number
can be set to any number between 01 and 31. If you are commissioning multiple
Conext MPPT 80 and MPPT 100 Installation Guide Installation
45 This document is for use by qualified personnel 990-91319