
Installation manual


Commissioning
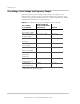
5–4 153396 Revision D
This manual is for use by qualified installers only
Apply Grid Voltage
1. Verify both Xantrex GT250 inverter enclosure doors are closed and locked.
2. Close the AC disconnect (CB1). This will energize the control power circuits.
3. Look, listen and smell for signs of defects.
4. Record any defects found.
Front Panel Display
1. Open, then close, the AC disconnect (CB1) and look at the VFD display of
the UFCU. It will display the software versions of the CCU2 and front panel
within the R
EAD menu. Record these numbers.
2. After about 20 seconds, it will be in its “ready” mode. At this time, the Fault
Code “0071 PV SWITCH OPEN” will be reported. Close the DC disconnect
switch (S1) and verify alarm 0071 clears by pressing the “F1” key on the
keypad of the UFCU. If additional alarms are present, refer to
Troubleshooting chapter of your Xantrex GT250 Grid-Tied Photovoltaic
Inverter Operation and Maintenance Manual (Part #: 153395).
3. Once all faults are clear, the front panel should report “Switched Off” and
show inverter status.
4. Using the \/ key, scroll down in the R
EAD Menu and verify that the TIME AND
D
ATE are correct.
5. If not, refer to the Operation chapter of your Xantrex GT250 Grid-Tied
Photovoltaic Inverter Operation and Maintenance Manual (Part #: 153395).
6. Scroll thru the parameters and verify that they are present.
Confirm AC Operational Parameters
For each of the following steps, refer to VFD display on the UFCU.
Access the W
RITE Menu parameter list by pressing the "MENU" key. Using the \/
key, scroll down in the W
RITE Menu and verify the parameter settings.
1. Verify the inverter’s AC limits.
2. Make any necessary changes.
3. Record these values.
Confirm DC Operational Parameters
1. Verify the inverter’s PV Settings.
2. Make any necessary changes.
3. Record these values.
Confirm Power Tracker Configuration Operational Parameters
1. Verify the inverter’s Power Tracker Configuration.
2. Make any necessary changes.
3. Record these values.