
Installation manual


Verify Voltages
975-0601-01-01 Revision B 4–5
This chapter is for use by qualified personnel and authorized service personnel only.
Verify DC Wiring
After verifying the DC wiring, complete “Step 2. Installation and Cable Check” on
page C–3 on the form in Appendix C.
To verify DC wiring:
1. Verify that the array frame grounding wires are connected to TB5 (PV
ground).
2. For a negative-grounded system, verify that PV+ is connected to TB3 and
PV- is connected to TB4.
3. For a positive-grounded system, verify that PV- is connected to TB3, and PV+
is connected to TB4.
4. Check the torque of the PV and ground terminals at TB3, 4, and 5 and tighten
as necessary.
Verify Voltages
Verify AC Voltages and Re-install the AC Barriers
Verify AC voltages before re-installing the AC barriers. After verifying AC
voltages, complete “Step 4. Verify AC Utility Voltage at TB1” on page C–3 on the
form in Appendix C.
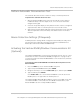
To verify AC voltages and re-install the AC barrier:
1. Confirm the AC circuit breaker (CB1) is
OPEN by checking the status window
on the front of the AC circuit breaker.
2. Close the transformer and inverter assembly doors, and tighten all door
latches.
3. Apply AC grid voltage by switching on the external AC disconnect device.
If AC auxiliary power is provided externally, apply AC auxiliary voltage by
switching on the external auxiliary AC power disconnect device.
DANGER
HAZARD OF ELECTRIC SHOCK, EXPLOSION, FIRE, OR ARC FLASH
• Voltages must only be verified by authorized service personnel as defined
on page iii. Do not proceed with this section unless you meet the
requirements for authorized service personnel.
• The AC circuit breaker (CB1) must remain in the
OPEN state and the PV
disconnecting means must remain in the
OFF position while verifying
voltages. The rotary switch behind the left door front access panel must be
in the
DISABLED position.
Failure to follow these instructions will result in death or serious injury.