Xantrex™ XW System Control Panel Owner’s Guide Manual Type Fault / Warning System Control Panel II www.schneider-electric.
Xantrex XW System Control Panel Owner’s Guide www.schneider-electric.
Copyright and Contact Copyright and Contact Copyright © 2012 Schneider Electric. All Rights Reserved. All trademarks are owned by Schneider Electric Industries SAS or its affiliated companies.
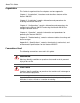
About This Guide Purpose The purpose of this Owner’s Guide is to provide explanations and procedures for installing and operating the Schneider Electric Xantrex XW System Control Panel. Scope The Guide provides safety guidelines, setup information, and procedures for installing and configuring the Xantrex XW System Control Panel. This Guide also includes information about operating and troubleshooting the unit.
About This Guide Organization This Guide is organized into five chapters and one appendix. Chapter 1, “Introduction”, introduces and describes features of the Xantrex XW SCP. Chapter 2, “Installation”, contains information and procedures for installing the Xantrex XW SCP. Chapter 3, “Configuration”, contains information and procedures for configuring the Xantrex XW SCP and using the Xantrex XW SCP to configure another device.
About This Guide Related Information For more information about related products, refer to: Xantrex XW Series Hybrid Inverter/Charger Operation Guide North America (975-0240-01-01) Xantrex XW Series Hybrid Inverter/Charger Operation Guide Europe (975-0385-01-01) Conext SW Inverter/Charger 120/240V Split-Phase Owner’s Guide (975-0638-01-01) Conext SW Inverter/Charger 230V Owner’s Guide (975-0636-01-01) Xantrex XW Series Solar Charge Controller Owner’s Manual (975-0283-01-01) Xantrex XW Automatic Generator S
vi
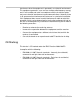
Important Safety Instructions WARNING: Save these instructions This Owner’s Guide contains important safety and operating instructions. Before using your Xantrex XW System Control Panel, be sure to read, understand, and save these safety instructions. General Precautions 1. Before installing and using this device, read all appropriate sections of this guide and any cautionary markings on the Xantrex XW SCP and the devices to which it connects. 2. If the Xantrex XW SCP has been damaged, see your warranty.
interference when the equipment is operated in a residential environment. This equipment generates, uses and can radiate radio frequency energy and, if not installed and used in accordance with the instruction guide, may cause harmful interference to radio communications. However, there is no guarantee that interference will not occur in a particular installation.
Contents Important Safety Instructions- - - - - - - - - - - - - - - - - - - - - - - - - - - - vii 1 Introduction About the Xantrex XW System Control Panel - - - - - - - - - - - - - - - - - - - - - - - - - - - Physical Features - - - - - - - - - - - - - - - - - - - - - - - - - - - - - - - - - - - - - - - - - - - - - - Front Panel Features - - - - - - - - - - - - - - - - - - - - - - - - - - - - - - - - - - - - - - - - - Back Panel Features - - - - - - - - - - - - - - - - - - - - - - - - - - - - - - - - - - -
Contents Using Cascading Parameters - - - - - - - - - - - - - - - - - - - - - - - - - - - - - - - - - - - -3–17 Viewing Device Information - - - - - - - - - - - - - - - - - - - - - - - - - - - - - - - - - - - - -3–17 4 Operation System Modes - - - - - - - - - - - - - - - - - - - - - - - - - - - - - - - - - - - - - - - - - - - - - - - - Changing System Modes - - - - - - - - - - - - - - - - - - - - - - - - - - - - - - - - - - - - - - Operating Mode - - - - - - - - - - - - - - - - - - - - - - - - - - - - - -
1 Introduction Chapter 1 introduces and describes operational and physical features of the Xantrex XW System Control Panel.
Introduction About the Xantrex XW System Control Panel Complete system control The Xantrex XW System Control Panel provides configuration and monitoring capability for a Xantrex XW and Conext SW Power System. The Xantrex XW SCP: System component • Monitors activity throughout your power system • Displays the settings and status of each Xantrex Xanbus-enabled device • Enables you to adjust settings for each Xantrex Xanbus-enabled device.
About the Xantrex XW System Control Panel Operational Features 975-0298-01-01 Other features of the Xantrex XW SCP include: • Compatibility—connect additional Xantrex Xanbus-enabled Xantrex XW and Conext SW System devices without requiring additional device-specific control panels. • Internal clock—keeps time for the entire system. • Audible alarm—if enabled, alerts you when a fault condition arises. • Low power consumption—automatically turns off the backlight after a period of inactivity.
Introduction Physical Features See Figure 1-1 and Figure 1-2 for the front and back features of the Xantrex XW SCP. Front Panel Features 7 1 6 2 3 4 5 Figure 1-1 Front Panel Feature 1 Fault/Warning light indicates a device has a fault or warning condition and requires attention. The light flashes when a warning occurs, and turns on steadily when a fault occurs. 2 Enter button confirms selection of a menu item or displays the next screen.
System Components Back Panel Features Two Xantrex Xanbus network inputs on the back panel let you connect the Xantrex XW SCP to other Xantrex Xanbus-enabled devices. See Figure 1-2. Xantrex Xanbus network inputs (8-pin RJ-45) Figure 1-2 Back Panel System Components The Xantrex Xanbus system (Figure 1-3) includes the Xantrex XW SCP and other Xantrex Xanbus-enabled devices.
1–6
2 Installation Chapter 2 contains information and procedures for planning and performing a Xantrex XW System Control Panel installation, including: • Materials and tools required • Choosing a location • Choosing a network layout • Mounting the unit • Connecting the Xantrex XW SCP to other devices.
Installation Installing the Xantrex XW System Control Panel The Xantrex XW System Control Panel is designed to be wall mounted (see page 2–7), and requires no connections other than Xantrex Xanbus network cables or a terminator plugged into the back of the unit. Because you cannot access the Xantrex XW SCP network inputs once the unit is mounted, the Xantrex Xanbus cables must be routed through the wall and connected before securing the Xantrex XW SCP.
Network Installation Network Installation This section describes requirements for installing the Xantrex XW SCP as part of a Xantrex Xanbus network-managed power system. For the system to function properly, requirements for network layout and termination must be followed.
Installation • Network terminators (Figure 2-2)—the Xantrex Xanbus network must be properly terminated at each end with network terminators. If the network is not properly terminated, signal quality is degraded and performance on the network is reduced. Permanent configuration without terminators is not supported by Schneider Electric. One terminator is included with the Xantrex XW SCP. Depending on your network layout, this terminator may need to be inserted into another device elsewhere in the network.
Network Installation Guidelines for Routing the Xantrex Xanbus Cables WARNING: Shock hazard : Do not route the Xantrex Xanbus cables in the same conduit or panel as the AC and DC power cabling. To ensure maximum performance of your network, follow these guidelines when routing the Xantrex Xanbus cables. Route the cables before installing the Xantrex XW SCP. • Route the cables away from sharp edges that might damage the insulation. Avoid sharp bends in the cable—no less than a 100 mm radius.
Installation Connecting Xantrex Xanbus Cables Follow these guidelines for connecting Xantrex Xanbus cables to the Xantrex XW SCP. The cables are connected to the Xantrex XW SCP at the same time the Xantrex XW SCP is mounted. Read “Mounting the Xantrex XW SCP” on page 2–7 before performing the following procedures. CAUTION: Equipment damage : Connect the Xantrex XW SCP only to other Xantrex Xanbus-enabled devices.
Mounting the Xantrex XW SCP Mounting the Xantrex XW SCP The Xantrex XW SCP can be mounted three ways: • Flush mounted through an opening in a wall using the mounting plate • Surface mounted using the mounting bracket • Flush mounted through an opening in a wall and secured with four #6 screws. WARNING: Shock hazard Before making an opening in a wall or panel, ensure there is no wiring or other obstruction within the wall.
Installation 3. Insert the mounting plate with the two tabs in a vertical position into the hole (see Figure 2-4). Tabs in vertical position Figure 2-4 Inserting the Mounting Plate 4. Secure the mounting plate by tightening the two screws to rotate the tabs to the horizontal position (see Figure 2-5) and pull the tabs tight against the inner surface of the wall. Be careful not to overtighten the screws and damage the wall.
Mounting the Xantrex XW SCP 5. Connect the Xantrex Xanbus cable(s) (and terminator if necessary) to either network input on the back of the Xantrex XW SCP. See Figure 2-6. Connect a network terminator to the Xantrex XW SCP if it is the last device at the end of a daisy chain network layout. Important: To ensure communication signal quality, the network must be terminated at each end with a terminator. Figure 2-6 Connecting the Network Cables 6.
Installation To flush mount the Xantrex XW SCP with no mounting plate: 1. Peel the backing from the supplied mounting template sticker and place it in your chosen installation location. Use the template to mark the location for the area to be cut out. 2. Pilot-drill the mounting holes (if necessary, depending on your mounting surface) and, using a jigsaw, cut out the hole in which the Xantrex XW SCP will be inserted. 3.
Verifying the Installation Figure 2-8 Surface Mounting the Xantrex XW SCP Verifying the Installation If network power (from an inverter/charger or external power supply) is present, the LCD backlight comes on and the Xantrex XW SCP shows the startup screen (see page 3–3). When the Xantrex XW SCP is started up on the Xantrex Xanbus system for the first time, it displays a fault message asking you to set the clock before proceeding.
2–12
3 Configuration Chapter 3 contains guidelines for configuring the Xantrex XW System Control Panel and for using the Xantrex XW System Control Panel to configure other Xantrex Xanbus-enabled devices. This chapter does not recommend specific settings for devices on your system. For device configuration information, refer to the Owner’s Guide or Operation Guide for each Xantrex Xanbus-enabled device.
Configuration Configuration Using the Xantrex XW SCP The Xantrex XW SCP can display and change the settings for any Xantrex Xanbus-enabled device in the Xantrex Xanbus system. Using Xantrex XW SCP Buttons The Xantrex XW SCP has four buttons for: • moving between status screens and menus • highlighting settings you want to change • selecting and changing configurable values for Xantrex Xanbusenabled devices. See Table 3-1 for the function of each button on the Xantrex XW SCP.
Configuration Using the Xantrex XW SCP Viewing the Xantrex XW System Control Panel Home Screens The top level screens on the Xantrex XW System Control Panel are the Startup screen, the System Status screen and the Device Home screens. After power is applied and the Startup screen appears, the Xantrex XW SCP displays the System Status screen. The Device Home screens can be viewed by pressing the up and down arrow buttons, as shown in Figure 3-1.
Configuration System Status Screen The System Status screen appears after the Startup screen. The System Status screen displays aggregated status information for the entire power system. A single system may have up to three Xantrex Xanbus network-connected Xantrex XW Inverter/Chargers, up to two Xantrex XW Solar Charge Controllers, one Xantrex XW Automatic Generator Start module and one Xantrex XW System Control Panel all connected to a single battery bank, a single generator and a common utility grid.
Configuration Using the Xantrex XW SCP Viewing Other Screens This section describes the next level of screens and menus on the Xantrex XW System Control Panel. Select Device Menu The Select Device menu displays a list of Xantrex Xanbus-enabled devices in the system, including the Xantrex XW Inverter/Charger and the Xantrex XW System Control Panel (Xantrex XW SCP). The Select Device menu is where you can access the Setup menus for each device in the system.
Configuration Select Device menu Select Device menu Xantrex XW Inverter/Charger XW Inverter/Charger SetupSetup menumenu Select Device XW6048 00: Setup Meters XW6048 [Enabled] [Disabled] [Disabled] [Enabled] To view Device Setup menu, highlight the device name and press Enter Note: The Xantrex XW System Control Panel displays only four lines of the Setup menu at one time. To view additional settings, press the Down arrow button.
Configuration Using the Xantrex XW SCP To view the Advanced menu: ◆ On the Device Setup menu, press Enter + up arrow + down arrow at the same time. Note: This keypress displays Advanced menus for every device in the system. Identifying changeable settings A Device Setup menu displays changeable settings and commands to view other menus. Changeable settings are enclosed in square brackets. To select and adjust a setting: 1.
Configuration Configuring the Xantrex XW System Control Panel You can configure the Xantrex XW SCP to suit your preferences and the requirements of the Xantrex Xanbus system. Some settings, such as the system time, affect the entire system. Other settings affect only the Xantrex XW SCP, such as the brightness of the display. You can perform all these tasks on the Xantrex XW SCP Setup menu, the Clock menu, and the System Settings menu.
Configuring the Xantrex XW System Control Panel Xantrex XW SCP Configuration Items The Xantrex XW SCP Setup menu contains settings for changing the appearance of the display, enabling button-press and alarm sounds, and setting the temperature scale. Items in gray appear only on the advanced menu. Menu item Menu item (translation) Description Values/Action Default Adjusts the brightness of the display to suit interior light conditions and enhance visibility.
Configuration Menu item Menu item (translation) Description Values/Action Default View Fault Log Displays the Fault Log, containing the last 20 Xantrex XW SCP faults. Press Enter to view log. n/a View Warning Log Displays the Warning Log, containing the last 20 Xantrex XW SCP warnings. Press Enter to view log. n/a View Event Log Displays the Event Log, containing the last 20 Xantrex XW SCP events. Press Enter to view log.
Configuring the Xantrex XW System Control Panel To customize the Xantrex XW SCP name: 1. Select Name on the Xantrex XW SCP Setup menu. 2. Press Enter. The last letter of “SCP” is highlighted. SCP: Setup [70%] [60%] [Off] [SCP] 3. Begin customizing the device name. • To change the character, press the up or down arrow button. Holding down the button causes the characters to scroll more quickly. • To delete the character, press Exit. • To add characters, press Enter. 4.
Configuration Using the Clock Menu Use the Clock menu to set the clock, the date, and the time format you prefer. The clock is listed as a separate device on the Select Device menu. Note: If a Xantrex XW Gateway is installed in your system, network time configured on the Xantrex XW Gateway overrides time configured on the Xantrex XW SCP (or any other individual device) in the network-enabled power system. To view the Clock menu: ◆ On the Select Device menu, highlight Clock and press Enter.
Using the Clock Menu Setting the Time Because the Xantrex XW SCP keeps time for the power system, setting the clock to the correct local time is essential for the system to operate as expected. The clock also provides the time stamps for the Warning and Fault logs. When you first power up the Xantrex XW SCP, it will not begin operating normally until you set the time. Note: The Xantrex XW SCP does not automatically adjust for Daylight Savings Time or leap year. To set the clock: 1.
Configuration Setting the Date You can set the reference date for the Xantrex Xanbus system from the Clock menu. To set the date: 1. On the Clock menu, press the up arrow or down arrow button to highlight Set Date. 2. Press Enter to highlight the month. 3. Press the up arrow or down arrow button to change the month. 4. When the correct month is shown, press Enter to select it and highlight the day. If you make an error, press Exit to move back to the value you need to reset.
Using the System Settings Menu Using the System Settings Menu The System Settings menu displays information related to the operation of the entire Xantrex Xanbus system. To view the System Settings menu: ◆ On the Select Device menu with System Settings highlighted, press Enter.
Configuration Menu item Menu item (translation) Description Values/Action Default Cascading Enables or disables cascading parameters when configuring device settings. See “Using Cascading Parameters” on page 3–17. Enabled, Disabled Enabled Connection Names Customizes the names of AC and DC connections in the system. For example, “AC1” can be changed to “Grid Power.
Using the System Settings Menu Using Cascading Parameters Xantrex Xanbus-enabled devices are configured one at a time. However, because devices often have common settings, cascading parameters can simplify and speed up system configuration. When a parameter is “cascaded,” a newly configured device setting is applied to all devices of the same device type on a common AC or DC connection.
3–18
4 Operation Chapter 4 contains information and procedures for operating the Xantrex XW System Control Panel, including: • System modes • Faults and warnings
Operation System Modes The system modes described in this section affect the performance and behavior of the Xantrex XW SCP and all other Xantrex Xanbus-enabled devices. You will have to change the system mode when putting your system in storage or when installing a new Xantrex Xanbus-enabled device. Changing System Modes System modes are changed using the System Settings menu (see “Using the System Settings Menu” on page 3–15). The system modes are: • Operating • Standby.
Warnings and Faults To return to Operating mode: 1. On the System Settings menu, highlight “System Mode,” and press Enter. 2. Select “Operating” and press Enter. Using the Standby Button Pressing and holding the Standby Button produces the same result as disabling “Invert” and “AC Charge” from the System Settings menu on the Xantrex XW SCP. Pressing and holding the Standby button does not affect Charge Controller operation.
Operation Warning Messages Warning messages appear when the Xantrex XW SCP detects a condition that may eventually affect its continued operation. When a warning occurs, the Xantrex XW SCP continues operating. However, you should consult the Troubleshooting chapter to find out what actions you can take to prevent the warning from escalating into a fault. Warning: W250 continue cancel Figure 4-1 Xantrex XW SCP Warning Message Types There are two types of warning messages: manual and automatic.
Warnings and Faults Manual warnings A manual warning message requires you to make a choice (usually by pressing Enter for “yes” or Exit for “no”) before you can proceed monitoring or configuring the Xantrex XW SCP. It will not disappear after three minutes. After you respond to the warning message the Xantrex XW SCP clears the warning message and returns to the screen it was displaying before the warning message appeared.
Operation Viewing the Xantrex XW SCP Warning Log The Xantrex XW SCP warning log displays the 20 most recent warnings that the Xantrex XW SCP generated. These warnings can be both active and cleared. Each warning in the log is identified by a warning code and the time that it occurred. You may need to refer to the warning log before consulting Chapter 5, “Troubleshooting”, or before you call technical support. To view the warning log: 1.
Warnings and Faults Fault Messages Fault messages appear when the Xantrex XW SCP’s operation is affected by a condition that requires immediate attention. When a fault occurs, the Xantrex XW SCP stops operating until either the fault condition goes away or until you manually clear the fault and take action to eliminate the fault condition.
Operation Viewing the Xantrex XW SCP Fault Log The fault log lists the most recent Xantrex XW SCP faults, up to a total of 20. On each line, the log shows the fault code, the date the fault occurred, and the time the fault occurred. Fault Log:SCP Figure 4-4 Xantrex XW SCP Fault Log To view the fault log: 1. On the Xantrex XW SCP advanced menu, press the down arrow button to highlight Fault log. 2. Press Enter. To return to the Xantrex XW SCP menu: ◆ Press Exit.
Warnings and Faults Viewing Multiple Fault Messages If several faults occur before you can acknowledge or clear them, the Xantrex XW SCP displays the accumulated messages on a fault list. The fault list displays messages from all network-enabled devices, not just the Xantrex XW SCP. You can select a message and view complete information for it from the fault list. To view a message from the fault list: 1.
4–10
5 Troubleshooting Chapter 5 contains reference tables of warning and fault messages that relate to the Xantrex XW SCP. For information about warning and fault messages that relate another device, see the guide for that device. Use these tables to help you identify the cause of the fault or warning, and determine the best course of action to correct the condition that caused the fault or warning.
Troubleshooting Troubleshooting Reference Types of Faults and Warnings The various types of fault and warning messages behave differently, and give you the option to treat them differently when they appear. For more information about the types of fault and warning messages, see “Types” on page 4–4 and “Types of fault messages” on page 4–7. Warning Reference Table Table 5-1 Warning Reference Table Warning number Message W250 The value failed to change. Try again.
Troubleshooting Reference Table 5-1 Warning Reference Table Warning number Message Message (translation) Type Cause Action W251 Please confirm: Equalization process. Manual You have enabled Equalization on the inverter/ charger or charge controller menu. Press Enter to begin equalizing batteries or Exit to return to the previous menu. W252 Please confirm: Manual You have selected the Restore Defaults command. Press Enter to restore default settings or Exit to cancel. Restore default settings.
Troubleshooting Table 5-1 Warning Reference Table Warning number Message Message (translation) Type Cause Action W258 Device instance is duplicated. Manual Two networked devices of the same type have the same instance. Select a different instance ID on one of the devices’ Setup menu. W501 SCP has fixed a memory problem, restored defaults. Manual The Xantrex XW SCP encountered an internal memory problem upon startup. To remain operational, the Xantrex XW SCP restored its default settings.
Troubleshooting Reference Fault Reference Table Table 5-2 Fault Reference Table Fault number Message Message (translation) Type Cause Action F250 System clock not set. Set correct time. Manual On initial startup, the clock needs to be set. The system will not operate correctly until it is. Set the clock to the correct time. See “Using the Clock Menu” on page 3–12. F251 A device is lost. Check connection. Manual The Xantrex XW SCP has lost communications with another device on the network.
Troubleshooting Table 5-2 Fault Reference Table Fault number Message Message (translation) Type Cause Action The real-time clock in the Xantrex XW SCP has failed. Reset the Xantrex XW SCP by removing and restoring network power. If problem persists, call customer service. F503 Internal reset. Call customer support. Manual F504 Lost network connection. Automatic The Xantrex XW SCP has lost communications with the network because of a faulty connection or electronic signal disruption.
A Specifications Appendix A contains the electrical and physical specifications for the Xantrex XW System Control Panel. All specifications are subject to change without notice.
Specifications Electrical Specifications Nominal input network voltage 15 Vdc Minimum operating network voltage 14.25 Vdc Maximum operating network voltage 15.
Regulatory Compliance Regulatory Compliance Safety CSA certified to CSA 107.1-01 and UL 458 4th Ed.
Specifications Figure A-1 Xantrex XW SCP Dimensions A–4 975-0298-01-01
Index 12/24 Hour 3–12 fault reference table 5–5 firmware revision 3–17 A I Advanced menu 3–7 installation connecting network cables 2–9 mounting 2–7, 2–10 planning 2–2 Numerics B backlight timer 3–9 brightness 3–9 Button Beep 3–9 K keypress for system standby mode 4–3 C changing device settings 3–6 Clear Faults 3–9 Clock menu 3–12 configuration any network-enabled device 3–2 contrast 3–9 D date, setting 3–14 device info 3–16 Device Information 3–17 Down arrow button 1–4, 3–2 E electrical specific
Index Set Time 3–12 specifications A–2 standby button 1–4, 4–3 Standby mode 4–2 startup screen 3–3 system home screen 3–4 system modes 4–2 system standby mode 4–3 T time, format and setting 3–13 U Up arrow button 1–4, 3–2 V verifying network power 2–11 view device info 3–16 View Fault Log 3–10 View Warning Log 3–10 W Warning list 3–16 Warning log 3–10, 4–6 warning messages 4–4 warning reference table 5–2 X Xanbus 1–2 IX–2 975-0298-01-01
Schneider Electric www.schneider-electric.com For other country details please contact your local Schneider Electric Sales Representative or visit our website at: http://www.schneider-electric.com/sites/corporate/en/support/operations/local-operations/local-operations.