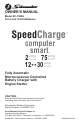
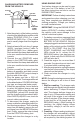
OWNER’S MANUAL Model SC-7500A For 6 and 12-Volt Batteries SpeedCharge ™ computer smart amp amp ™ 75 2 amp 12 30 ENGINE S T A R T S L O W CHARGE F A S T CHARGE Fully Automatic Microprocessor Controlled Battery Charger with Engine Starter CAUTION: Read all Safety Rules and Operating Instructions, and follow them with each use of this product. Schumacher Electric Corporation Mount Prospect, IL 60056 U.S.A. Send Warranty Product Repairs to: Customer Service Returns P.O. Box 280,1025 E.
TABLE OF CONTENTS IMPORTANT SAFETY INSTRUCTIONS .................................................................... 3 PERSONAL SAFETY PRECAUTIONS ...................................................................... 4 BEFORE USING YOUR BATTERY CHARGER ......................................................... 5 Plugging It In.......................................................................................................... 5 Assembling Your Charger....................................................
Important Safety Instructions WARNING – RISK OF EXPLOSIVE GASES WORKING IN VICINITY OF A LEAD-ACID BATTERY IS DANGEROUS. BATTERIES GENERATE EXPLOSIVE GASES DURING NORMAL BATTERY OPERATION. FOR THIS REASON, IT IS OF UTMOST IMPORTANCE THAT EACH TIME BEFORE USING YOUR CHARGER, YOU READ THIS MANUAL AND FOLLOW THE INSTRUCTIONS EXACTLY.
Never place charger directly above battery being charged. The gases from the battery will corrode and damage the charger. to prevent it from being stepped on, tripped over, or damaged. Never pull out the plug by the cord when unplugging the charger. Pulling on the cord may cause damage to the cord or the plug. Never touch the battery clamps together when the charger is on. You could cause a spark. Never operate charger if it has received a hard blow, been dropped, or otherwise damaged.
BEFORE USING YOUR BATTERY CHARGER It is important to understand your charger's requirements. This section will tell you about your charger's electrical requirements and how to prepare a battery for charging. PLUGGING IT IN Your charger requires a 120V AC 2-prong wall outlet receptacle installed according to all local codes and ordinances. Wrap clamp cables after unplugging the power cord from the AC wall outlet and store your charger in a dry location.
operating instructions NOTE: A marine (boat) boat battery must be removed and charged on shore. To charge it on board requires equipment specially designed for marine use. IMPORTANT: Follow all safety instructions and precautions when charging your battery. Wear complete eye protection and clothing protection. Charge your battery in a wellventilated area. Charging Battery In The Vehicle: part of the chassis or engine block, away from the battery (see figure).
Using Engine Start Your battery charger can be used to jump start your car if the battery is low. Follow these instructions on how to use the ENGINE START feature. Charging Battery Removed From The Vehicle: POSITIVE NEGATIVE BATTERY CHARGER BATTERY IMPORTANT: Follow all safety instructions and precautions when charging your battery. Wear complete eye protection and clothing protection. Charge your battery in a well-ventilated area. POWER CORD 24", 6 GAUGE CABLE TO GROUNDED POWER OUTLET 1.
up to 5 seconds or until the engine cranking stops. The digital display shows a countdown of the remaining crank time in seconds. It starts at 5 and counts down to 0. 3. Cool Down - After cranking, the charger enters a mandatory 3-minute (180 second) cool down state. During this period, no settings can be changed. The buttons are ignored. The digital display indicates the remaining cool down time in seconds. It starts at 180 and counts down to 0. The 75A START LED blinks once every second.
If the charge mode is changed after charging has started (by pressing the CHARGE RATE or BATTERY TYPE button), the charging process will be restarted. The voltage displayed during charging is the charging voltage and usually will be higher than the battery’s resting voltage. chargeR CONTROLs DISPLAY MODE SWITCH Use this switch button to set the function of the digital display to one of the following.
ed O O O Ch arg ing User sel. B O User selected O O O O O O O User sel. User sel. User sel. O B O O O O O O O O Ch arg O indicates an LED that is on continuously.
using the built-in BATTERY tester OVERVIEW This battery charger has a built-in battery tester that displays either an accurate battery voltage or an estimate of the battery’s relative charge based on the battery voltage and the Battery Council International scale. powered up, the battery will remain a tester (not a charger) indefinitely, unless a charge rate is selected. TESTING AFTER CHARGING After the battery has been changed from tester to charger (by selecting a charge rate), it remains a charger.
using the built-in alternator tester TESTER STATUS LEDs When the SC-7500A is operating as an alternator tester, the status LEDs light under the following conditions. This battery charger has a built-in alternator tester that displays either an accurate alternator voltage or an estimate of the alternator’s relative output compared to normal alternators. The Alternator % values displayed should be taken as general reference, not precise diagnosis.
battery percent and charge time This charger adjusts the charging time in order to charge the battery completely, efficiently and safely. The microprocessor automatically makes the necessary decisions. However, this section includes guidelines that can be used to estimate charging times. There are some important facts to keep in mind when charging a battery.
charging tips Read this entire manual before using your charger. The tips below serve only as a guide for specific situations. If your vehicle won’t start: You don’t need to fully charge a battery to start your vehicle. If the charger won’t start your vehicle using the 75A Start rate, try charging the battery using the 12A 30A rate for 10 or 15 minutes. That should charge the battery enough to allow the 75A START rate to start the vehicle.
Troubleshooting Performance problems often can be corrected by the user. Please read through this chart for a possible solution to common problems. PROBLEM POSSIBLE CAUSE SOLUTION The battery is connected and the charger is on, but isn't charging. The charger is in tester mode, not charger mode. Press the CHARGE RATE button to activate charging and select a charge rate. Indicator lights are lit in an erratic manner not explained in the “Using Your Battery Charger” section.
WARRANTY SCHUMACHER ELECTRIC CORPORATION, 801 BUSINESS CENTER DRIVE, MOUNT PROSPECT, ILLINOIS 60056-2179 MAKES THIS LIMITED WARRANTY TO THE ORIGINAL PURCHASER AT RETAIL OF THIS PRODUCT. THIS LIMITED WARRANTY IS NOT TRANSFERABLE. Schumacher Electric Corporation warrants this battery charger for one year from date of purchase at retail against defective material or workmanship. If such should occur, the unit will be repaired or replaced at the option of the manufacturer.