SCIENTECH® PDA Software Program Operation Manual PN11272B 5554
GENERAL ASPECTS OF THE PDA PROGRAM ................................................................................ 4 UNITS & CONVERSIONS MENU ....................................................................................................... 7 CONVERSIONS & MULTIPLIER MENU ........................................................................................... 8 TIME & DATE, TIMED SEND MENU.................................................................................................
Thank you for choosing Scientech’s optional personal digital assistant (PDA) software program. Please read this manual completely before using your PDA with this software. This information will enable you to fully utilize the equipment and should be located nearby for reference. The PDA is intended to be used only in the manner outlined in this manual. Misuse of the equipment may cause product failure. If you obtained a PDA from Scientech, the PDA software program has already been loaded into the PDA.
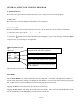
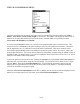
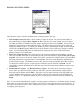
GENERAL ASPECTS OF THE PDA PROGRAM L Information icon Press this icon to get information about the topic you are using at any time in the program. Save icon Press this icon to save the displayed information to the clipboard. ……………… When an underlined text area proceeds the save icon, you can enter any text or numeric information. 1. Tap on the line to get a cursor. 2. Tap on the …l…………… graffiti icon to make the PDA keyboard appear. Type in your message, then press Done. 3.
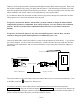
To download a print record from the print buffer to a printer, disconnect the PDA RS232 cable from your Scientech balance and connect this cable to the printer using the adapter shown in first section of this manual. Make sure your printer has the correct RS232 configuration parameters of 9600 baud, even parity. To download a print record from the print buffer to a computer, you must connect the PDA RS232 cable without any adapter into a COM port on the back of your computer.
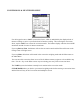
MAIN MENU L Information icon, Tap this icon to get help about any screen. Immediate action icons - Tap the icon to get the following result: Send Reads the weight on the balance and places result in Tare Tares the balance remotely T avg Places the balance in time average mode remotely. Reset Tavg Resets the time average mode to the current weight. Clear modes Places the balance in normal weighing modes. Exits from Parts Counting, Conversions, and T avg modes.
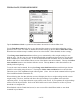
UNITS & CONVERSIONS MENU Check the appropriate box by tapping the empty square to automatically place the balance into Grams, Ounces, Troy Ounces, Carats, Pennyweight, or A (custom). The balance will display the chosen unit of measure on its front panel and the PDA will revert back to the Main Menu (except when you check Conversions and multipliers and Custom). If you check the Custom check box, you can enter a user programmable grams conversion factor.
CONVERSIONS & MULTIPLIER MENU Use the keypad to enter a CONV (conversion) factor, which is multiplied by the displayed unit of measure reading, to arrive at your desired unit of measure reading. After entering the conversion factor, tap the CONV box to enter the conversion mode. The balance display will also show a CNV enunciator instead of a units of measure enunciator. If you tap Back to Units, the balance will exit the conversion mode and the PDA will return to the Change Units of Weight screen.
TIME & DATE, TIMED SEND MENU Tap the Set Balance Clock to synchronize the balance internal clock with the PDA clock. Use the Time/Date stamp check box to put a time and date stamp on each weight reading that is to be printed or sent to a file. To enable or disable the time/date stamp, tap the box labeled Time/Date stamp. When the time and date stamp is enabled, the box has a check mark. When disabled, the box is empty.
PARTS COUNTING MENU There are three ways in which to establish a parts counting routine. You may.. 1. Place Samples on the pan. Place a know quantity of parts on the pan. You can enter the number of parts numerically by tapping Place Samples on Pan. This takes you to the sample size screen where you input the number of samples using the numeric keypad provided. Then tap Enter. The screen will display the individual part weight and total weight.
CHECK WEIGHING MENU 1. Remove all weight from the pan of the balance. 2. Tap the Tare box on the PDA to remotely tare the balance. 3. To enter a weight limit, check either the Enter limit or Place weight check boxes to enter a limit. A. If you checked Enter limit, a keyboard will appear. Enter the low weight limit, and tap ENTER. The PDA display will return to the Check Weighing screen and will show the low weight limit you just entered.
GLP & ISO MENU Initially the GLP, ISO, AutoGLP & Main icons are visible. To use any of these programs, you must set the balance clock to the current time and date. To do this, go to the Main Menu, tap the Timed Send % Clock icon and then tap the Set Balance Clock box. Manual GLP report Tapping GLP clears the balance XBAR statistics accumulator and enters the manual GLP mode. XAVG, RCL X AVG, Lot ID, New & Tare are made visible.
The sample (population) size for the run is displayed (default is 20) and can be increased or decreased using the arrow keys to the right of the sample size. Then use the up and down arrows to enter the number of samples for your statistics run. To begin Auto GLP, tap Run. A. You will be directed to place the first object on the pan. B. After you place the first object on the weighing pan and when the balance reaches stability, it will send the weight reading automatically to the PDA.
STATISTICS MENU Read - Tap this box to acquire a weight reading into the statistics accumulator and to automatically update and display the statistics on your screen. CLR - Tap this box to clear the screen and return for another statistics run. MAIN – Tap this box to exit the statistics program and return to the main menu. Save - Tap this box to save the current manual statistics run to the print buffer for downloading to a printer or file.
OTHER MENU Clearing Programmed Operation Pressing the Clear Modes key erases all functions, returns the balance to its normal operating condition, and tares the balance which returns the display to zero. Information entered into the balance storage registers is unaffected by the Clear Modes key. Storage Registers The keyboard give you access to 50 memory storage registers (0 through 49). You may store up to a seven digit number plus a decimal in these registers.
To remove container weights from a storage register: Press 0 , SPACE, ENTER , SPACE , 1 SPACE , STORE , Send To Balance. Calibrating to a Standard Weight Using the Cal function key allows easy calibration to known weights. The procedure is: 1. Zero the display. 2. Place known weight on the pan. 3. Enter the weight using the keyboard, SPACE , CAL , Send To Balance. To return the balance to normal operating mode, press Clear Modes .
4. 5. 6. 7. Press TARE then Send To Balance. Add second component to proper weight. Press TARE then Send To Balance. Continue until all components are compounded. To compound by percent: Example: 3.852 grams equals 25 percent of the compound. 1. With nothing on the weighing pan , press 3.852 , SPACE , TARE , Send To Balance. 2. Press, 25.00 , SPACE , CAL , Send To Balance. 3. Place container on the pan. 4. Press TARE then Send To Balance. 5. Add first component to proper percent. 6.
When gold items are placed on the pan, the price will be displayed. To return the balance to normal operating mode, press Clear Modes . These conversion multipliers can also be stored in any of the storage registers 0 through 49 and recalled when desired. Example: Gold chain is being sold at $40.00 per gram. The wholesaler wants to display first the weight of the gold chain in grams and then the price. 1. Enter $40.00 as a multiplier into storage register 16 by Pressing 40.
DOWNLOADING THE PRINT BUFFER TO A COMPUTER ® Windows HyperTerminal Instructions These instructions explain how to create a communications pathway interfacing a Scientech balance or PDA to a PC with Windows as the operating system. You must have a modem in your computer for these instructions to work. Use be sure to set the Local Control on the balance to “oFF”. (See page 20 of the balance operating instructions.
9. The “Phone Number” window will appear. 10. 11. Click the down arrow in the “Connect using” box. Select the correct Com port which is connected to your modem. Normally this will be “Direct to Com 1”. Click on “OK”. The “COM1 Properties” window will appear. 12. 13. Enter the following parameters into the port settings: (These parameters are the default parameters of the Scientech balance when it was sent to you.
14. 15. 16. Click on “OK”. You will now be in the communications window. Go to and click on “File” in the upper left corner of the communications window. Click on “Properties”. The Properties window will appear. 17. 18. 19. 20. 21. 22. Select the “Settings” tab in the Properties window. Select the “Terminal keys” button. Click the down arrow in the “Emulation” box. Select “TTY”. “Backscroll buffer lines” should be “500”. Click on “ASCII Setup…”. The ASCII window will appear.
23. 24. 25. 26. 27. 28. 29. 30. 31. Do not select “Send line ends with line feeds”. (The small window should not be checked.) Select “Echo typed characters locally”. (The small window should be checked.) “Line delay” should be 0 milliseconds. “Character delay” should be 0 milliseconds. Do not select “Append line feeds to incoming line ends”. (The small window should not be checked.) Select “Force incoming data to 7-bit ASCII”. (The small window should be checked.
Select the directory and file, which you have prepared beforehand, into which you want to enter the data from the HyperTerminal screen. Then press Start. When you press Start, you can begin collecting data. Balance To get a weight reading from the balance using HyperTerminal, type SEND and then press ENTER. To tare the balance, type ZERO and then press ENTER. To get a time and date stamp along with the weight reading, see page 24 of the balance operating instructions.
The text extension file can now be imported to Excel or into Word. For example, to import into Excel, on Excel's toolbar, select Data, select Get External Data, select Import Text File (this will be where you saved the HyperTerminal text file).
The Text Import Wizard will appear. In Text Import Wizard - Step 1 of 3 screen, select Delimited only and press Next. In screen 2, select Tab, Space, and Treat Consecutive Delimiters As One and then press Next.
In screen 3, select General and press Finish. Then the wizard will ask where you want to put the data.
RETURNED GOODS PROCEDURE Should it become necessary to return any item to Scientech for any reason, please contact our Product Service Department at (800) 525-0522 or (303) 444-1361 or Fax (303) 444-9229 or E-mail INST@SCIENTECHINC.COM. When you call, please be ready to provide the model number, serial number and a description of the problem. Frequently we can provide self-help information that will eliminate the need for returning the unit(s).