
Operating instructions

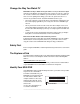


Connecting the 8240 DVR
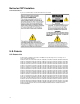
Identify the additional
devices you will connect to
the 8240 DVR and TV.
See pages 13 through 16
and the related user’s
guides for more information.
VCR
DVD
Other
Home Theater
3
1
2
4
5
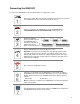
Do not turn on the 8240 DVR or TV yet.
POWE
R
6
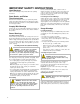
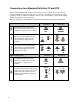
It may take several minutes for the 8240 DVR to receive the latest software,
programming, and service information. Wait until you see one of the following
displays on the front panel of the 8240 DVR that indicates that the update is
complete:
• Current time • Four dashes (- - - -)
Note: If four dashes are displayed, your 8240 DVR is not authorized. Call your
cable service provider.
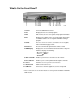
External SATA Drive
Connect the coaxial cable that carries the signal from your cable service provider
to the CABLE IN connector on the back panel of the set-top.
Connect your SDTV to the 8240 DVR. Refer to the Connections for
a Standard-Definition TV and Standard VCR section on page 13.
Plug the 8240 DVR and the TV into an AC power source.
Important: To protect the set-top from power surge damage, ground (earth)
your cable product to provide some protection against voltage surges and
built-up static charges. To avoid these voltage surges that can be caused by
lightning storms and power outages, plug the set-top into a surge protector to
reduce the risk of damage.
7
To begin watching TV, turn the TV ON, and press POWER on the front panel of
the 8240 DVR or Power on the remote control.
To connect your 8240 DVR to your entertainment devices, complete these steps.
9