Service Manual for Modular Cuber Model C2648 induding Prodigy Plus
C2648 Prodigy and Prodigy Plus Service Manual Introduction The design of this modular remote cuber is the result of years of experience with remote ice machine refrigeration systems. Standard features of this product include front accessible on-off switches, always-visible indicator lights, mechanical assist ice harvest for extra efficiency, automatically adjusting water purge and a control system that optimizes system operation.
C2648 Prodigy and Prodigy Plus Service Manual Installation: Product Specifications Location Limitations Remote condenser This ice system is made up of three parts, the ice making machine, or head; the remote condenser; and the interconnecting tubing. The ice making machine must be installed indoors, in a controlled environment. Space must be provided near the machine for service access. The remote condenser may be installed above or below the ice machine, per the limits stated later in this manual.
C2648 Prodigy and Prodigy Plus Service Manual Model Number Description Standard bin applications – Adapter information Example • C2648SR-3D Model C2648 • C=cuber • 24=nominal capacity in 100s of pounds • 48=nominal width of cabinet in inches BH1100, BH1300 or BH1600 Adapter panels included with bin, no adapter needed Other bins and applications: • S=cube size, S=small or half dice, Take note of the depth of the machine.
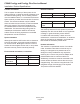
C2648 Prodigy and Prodigy Plus Service Manual Product Description, Electrical Requirements Ice Machine Model Electrical Use Minimum Maximum Suggested Dimensions condenser Circuit Fuse* Size Fuse* Size w” x d” x h” Ampacity 48 x 28 x 31 C2648SR-3 208-230/60/3 PRC241-32A 21.6 30 30 same C2848MR-3 208-230/60/3 PRC241-32A 21.6 30 30 Remote Condenser Footprint: On center mounting hole spread: 27.57” w x 33.38” d. See page 5. Minimum bin top opening: 20.5” x 40.
C2648 Prodigy and Prodigy Plus Service Manual Condenser and Ice Machine Layouts January 2015 Page 6
C2648 Prodigy and Prodigy Plus Service Manual Water The quality of the water supplied to the ice machine will have an impact on the time between cleanings and ultimately on the life of the product. There are two ways water can contain impurities: in suspension or in solution. Suspended solids can be filtered out. In solution or dissolved solids cannot be filtered, they must be diluted or treated. Water filters are recommended to remove suspended solids.
C2648 Prodigy and Prodigy Plus Service Manual Panel Removal 1. Locate and loosen the two screws at the bottom edge of the front panel. Install the bin top adapter if one is required for the application. 2. Pull the front panel out at the bottom until it clears the bin. If the ice machine has not been unpacked, do so now. Remove the carton from the skid. Cut away any shipping strapping. Lift the ice machine off the skid directly onto the bin. 3. Lower the front panel down and off the machine. 4.
C2648 Prodigy and Prodigy Plus Service Manual Remote Condenser Location Run = dd+rd+hd = Calculated Line Length Use the following for planning the placement of the condenser relative to the ice machine Configurations that do NOT meet these requirements must receive prior written authorization from Scotsman.
C2648 Prodigy and Prodigy Plus Service Manual For The Installer: Remote Condenser Roof Attachment Locate the condenser as near as possible to the interior location of the ice machine. Install and attach the remote condenser to the roof of the building, using the methods and practices of construction that conform to the local building codes, including having a roofing contractor secure the condenser to the roof.
C2648 Prodigy and Prodigy Plus Service Manual Precharged Line Routing Do not connect the precharged tubing until all routing and forming of the tubing is complete. See the Coupling Instructions for final connections. Caution: Do NOT kink the refrigerant tubing while routing it. Important: CONFIRM that the correct line set (RTEL prefix) has been provided. 4. Follow straight line routing whenever possible.
C2648 Prodigy and Prodigy Plus Service Manual Coupling Instructions The couplings on the ends of the pre-charged line sets are self-sealing when installed properly. Follow these instructions carefully. It is important that ONLY the nut on the pre-charged tube be turned, or the diaphragms will be torn out by the piercing knives and they will be loose in the These steps must be performed by an EPA Certified Type II or higher technician. Initial Connections 1. Remove the protector caps and plugs.
C2648 Prodigy and Prodigy Plus Service Manual Plumbing Requirements All models require connection to cold, potable water. A hand actuated valve within site of the machine is required. There is a single 3/8” flare nut inlet water connection, and a 3/8” to 3/8” flare union is supplied with the machine and can be used if desired. Water Filters Install a new cartridge if the filters were used with a prior machine. Drains All models require drain tubing to be attached to them.
C2648 Prodigy and Prodigy Plus Service Manual Electrical The machine is not supplied with a power cord, one must either be field installed or the machine hardwired. Electrical connections are made inside the junction box in the back panel of the ice machine. The dataplate on the back of the cabinet details the power requirements, including voltage, phase, minimum circuit ampacity and maximum fuse size. 1.
C2648 Prodigy and Prodigy Plus Service Manual Final Check List: 1. Is the unit located indoors in a controlled environment? 2. Is the unit located where it can receive adequate cooling air? 3. Has the correct electrical power been supplied to the machine? 4. Have all the water supply connections been made? 5. Have all the drain connections been made? 6. Has the remote condenser been properly installed? 7.
C2648 Prodigy and Prodigy Plus Service Manual Initial Start Up Remove front and left side panels. Check machine for any packing or wires rubbing moving parts. Note location of control board in lower left corner of the machine’s front. 7. When the ice has frozen enough, the Ready for Harvest indicator light will be on steady. After it’s been on steady for a few seconds Harvest will begin. 1. Switch on the electrical power to the machine. The display shows an H.
C2648 Prodigy and Prodigy Plus Service Manual Adjustments Bridge Thickness - For A Service Tech Only 1/8 to 3/16” bridge 1. Push and hold Off till the machine stops. 2. Remove evaporator cover. 3. Remove left curtain. 4. Use a box wrench and rotate the bridge thickness adjustment screw in 1/8 turn increments CW to increase bridge thickness. Rotate CCW to decrease bridge thickness. Caution: Do not make the bridge too thin or the machine will not harvest properly.
C2648 Prodigy and Prodigy Plus Service Manual Use and Operation Once started, the ice machine will automatically make ice until the bin or dispenser is full of ice. When ice level drops, the ice machine will resume making ice. There are four indicator lights at the front of the machine that provide information on the condition of the machine.
C2648 Prodigy and Prodigy Plus Service Manual Switch Panel Area The On and Off switches are front accessible at the lower left corner. knob and an additional indicator light to the right of the controller’s switches near the top of the unit. The ultrasonic ice level control allows control of the point that the ice machine stops making ice.
C2648 Prodigy and Prodigy Plus Service Manual Options and Other Information Smart-Board When this option is present there is an additional display panel in the area below the main control board. It is not visible when the front panel is on. The Smart-Board’s features include: • Seven day programmable ice level setting when used with the optional Vari-Smart ice level control • Recording of machine operation, including cycle time.
C2648 Prodigy and Prodigy Plus Service Manual Cleaning, Sanitation and Maintenance This ice system requires three types of maintenance: • Remove the build up of mineral scale from the ice machine’s water system and sensors. • Sanitize the ice machine’s water system and the ice storage bin. • Clean the remote condenser. It is the User’s responsibility to keep the ice machine and ice storage bin in a sanitary condition. Without human intervention, sanitation will not be maintained.
C2648 Prodigy and Prodigy Plus Service Manual 23. Pour one gallon of the sanitizer solution into the reservoir. 24. Push and release the yellow Clean button. Squeeze Tabs Together, Slide Out Until it Stops, Then Lift To Remove 25. Operate the machine until it stops. 26. Return all removed panels to their original positions. 27. Push and release the green ON button to resume ice making. Remove and discard all ice.
C2648 Prodigy and Prodigy Plus Service Manual Remote condenser and other maintenance The condenser fins will need to be cleaned. Push and release the Off button. Wait until the machine stops. Note: Lock out the controller or the ice machine power supply to prevent an unauthorized fan motor restart. If there is imbedded grease, use a commercial coil cleaner to wash out the grease. Dust can be blown out with compressed air from the inside or use a vacuum cleaner and soft brush.
C2648 Prodigy and Prodigy Plus Service Manual What to do before calling for service Reasons the machine might shut itself off: To Manually Reset the machine. • Lack of water. 1. Open the switch door • Freeze cycle takes too long. 2. Push and release the Off button. • Harvest cycle takes too long. 3. Push and release the On button. • High discharge temperature. To Shut the Machine Off: • Controller self test failure. 1. Open the switch door • Very high voltage 2.
C2648 Prodigy and Prodigy Plus Service Manual Overall System Types: • Refrigeration: Mechanical remote cooled. Includes reciprocating hermetic compressor, head pressure control valve (headmaster), receiver and liquid line solenoid valve. • Water System: Inlet water solenoid valve fills reservoir once per cycle. Purge solenoid valve opens to discharge some reservoir water once per cycle.
C2648 Prodigy and Prodigy Plus Service Manual Controller Information Machine Indicator Lights • Power • Status • Water • Clean Code Display Main codes - automatically displayed F . . . . . . . . . . Freeze Cycle F flashes.Freeze Cycle is Pending H . . . . . . . . . . Harvest Cycle H flashes . . . . Manual Harvest b. . . . . . . . . . . Bin is Full C . . . . . . . . . . Clean Cycle L. . . . . . . . . . . Board Locked d . . . . . . . . . . Test Mode O . . . . . . . . . . Off E. . .
C2648 Prodigy and Prodigy Plus Service Manual Controller Information Component Indicator Lights • Condenser Fan / Aux (Aux = liquid line solenoid) • Water Pump • Purge Valve • Water Solenoid • Hot Gas • Compressor • Ready to Harvest • Sump Empty • Sump Full • Curtain SW1 • Curtain SW2 • Curtain SW3 - in Display Code January 2015 Page 27
C2648 Prodigy and Prodigy Plus Service Manual How It Works Freeze Cycle. At start up the controller drains and refills the reservoir. The reservoir refills when the mid length water level sensor probe is uncovered and continues to fill until the top probe is in contact with water. When the reservoir has filled, the liquid line valve, compressor and water pumps are switched on.
C2648 Prodigy and Prodigy Plus Service Manual Electrical Sequence - Remote Cooled Power connected, unit previously switched Off. Control board does a self check. If the self check fails, the unit displays an E and no further action will occur. If the self check passes, the controller will display a 0, the curtain lights will be ON and the Power and Sump Empty lights will be ON. Pushing and releasing the On button will start the ice making process. The display will begin to blink F.
C2648 Prodigy and Prodigy Plus Service Manual Electrical Component Details Compressor • Operated by the compressor contactor. Contactor • Operated by the controller and the high pressure cut out switch. Line voltage coil. When energized the Compressor indicator light will be ON. Water Pumps • Operated by the controller, one of them thru a NC relay. When the Pump light is ON during a Freeze cycle, both pumps should be operating.
C2648 Prodigy and Prodigy Plus Service Manual Electrical Component Details Controller • Senses ice thickness, water level, water temperature, discharge temperature. Controls compressor contactor, fan motor, water pump, inlet water valve, hot gas valve, purge valve, harvest assist solenoid. Indicates status and component operation. 12 volt. Transformer • 12 volt secondary, supplies power to controller only. Water Level Sensor • Three probe conductivity sensor.
C2648 Prodigy and Prodigy Plus Service Manual Component Indicator Light Table System Condenser Fan or Liquid Line Valve Water Pump Purge Valve Inlet Water Solenoid Valve Hot Gas Compressor Contactor Ready to Harvest Sump Empty Sump Full Curtain Switch Indicator Light ON LLV open Pump Motor Powered Purge Valve Opens Inlet Water Valve Opens Hot Gas Valve Opens Contactor Closes Water contacting ice thickness sensor probe Open between mid sensor and common Closed between top probe and mid probe Curtain open J
C2648 Prodigy and Prodigy Plus Service Manual Refrigeration Refrigerant: R-404A Charge: 240 ounces Compressor: Copeland hermetic Compressor Amps: • Freeze - 13.2 to 12.9, declining to 9.6 at the end of the freeze cycle. 11.6 to 11.9 at five minutes. • Harvest - 12.7 to 11.8 Expansion valves: Non adjustable, internally equalized, one per evaporator. Hot gas valves: Pilot operated, line voltage coils. One per plate. Condenser: Upflow type with aluminum coils. Headmaster: Included with condenser.
C2648 Prodigy and Prodigy Plus Service Manual Refrigeration Schematic Remote Condenser Suction Evaporator Head Pressure Control Discharge Hot Gas Valve Liquid OPR Valve TXV Compressor Receiver Liquid Line Valve Liquid Heat Exchange Accumulator C2648R January 2015 Page 34
C2648 Prodigy and Prodigy Plus Service Manual Water System Batch type. Water reservoir contains full water charge for each ice making cycle. Water valve: Solenoid type. Opens to fill reservoir when mid sensor probe no longer makes a circuit to the bottom probe. Closes when reservoir is full and top probe makes circuit to mid probe. Pumps: Unsealed pedestal type, twist-release mounting Water purge valve: Solenoid type. Opens to purge water during harvest cycle. Water Level Sensor: Three probe conductivity.
C2648 Prodigy and Prodigy Plus Service Manual Control Operation Standard control: • Electronic controller operating from a 12 AC volt power supply. Will operate within a voltage range between 10 and 15.5. • User’s Indicator lights, four front visible: Power, Status, Water, De-scale/Sanitize. • Accessible On switch. • Accessible Off switch. • Code Display: Displays letters and numbers to indicate cycles and diagnostic codes. • Manual Harvest switch: Use to trigger harvest at any time.
C2648 Prodigy and Prodigy Plus Service Manual Control Safeties Max freeze time – 45 minutes When exceeded, the controller will attempt another freeze cycle. If the next cycle's freeze time is less than maximum, the control will continue normal ice making. If the next freeze cycle was too long, the control will again attempt another freeze cycle. If the freeze cycle is too long three consecutive cycles, the controller will shut the unit off and it must be manually reset.
C2648 Prodigy and Prodigy Plus Service Manual Restarts Power Interruption The controller will automatically restart the ice machine after adequate voltage has been restored. • H blinks on code display • Status indicator light blinks • Reservoir is drained and refilled Default harvest is initiated. The curtain switch does not have to open to terminate harvest, harvest will continue until the default harvest time expires. Default harvest time is 3 minutes.
C2648 Prodigy and Prodigy Plus Service Manual Control Button Use (from standby) Set purge level, 1-5 (1 is minimum, 5 is maximum) or Automatic: • Hold off button in for 3 seconds. Release. • Press and release the On button to cycle through and select one of the five purge settings or to use the Automatic setting. Recall diagnostic code: • Hold off button in for 3 seconds. Release. • Press and release the Harvest button to cycle thru the last 10 error codes from most recent to oldest.
C2648 Prodigy and Prodigy Plus Service Manual Diagnostics Problem No power to unit Likely Cause Power disconnected No power to controller Shut down on max.
C2648 Prodigy and Prodigy Plus Service Manual Diagnostics Problem Shut Down on Maximum Freeze Time (continued) Shut down on maximum harvest time Likely Cause Compressor not operating (continued) Probable Solution Check compressor temperature Check compressor voltage Check compressor windings Low refrigerant charge Add some refrigerant and restart unit. If cycle time improves, look for leak.
C2648 Prodigy and Prodigy Plus Service Manual Diagnostics Problem Shut down on maximum harvest time (continued) Shut down on minimum freeze time Low Ice Making Capacity Problem Long freeze cycle Likely Cause Probable Solution Curtain switch does not open when Check switch with ohmmeter curtain does Machine in very cold ambient Move machine to a warmer location Hot gas valve does not open Check hot gas valve, check controller using test mode Harvest assist probe out of position Check harvest assist mechan
C2648 Prodigy and Prodigy Plus Service Manual Test Procedures - Sensors All electrical components in this ice machine can be diagnosed with a volt-ohmmeter. Curtain Switch: 1. Test using the controller’s indicator lights. Observe SW1 and SW2 and the Period in the display code. Open and close the curtain in question. When the curtain is opened, the SW light will be ON. When the curtain gets to within a half inch of closing (at the switch) the SW light will go OUT. 2. Test with an ohmmeter.
C2648 Prodigy and Prodigy Plus Service Manual Ice Thickness Sensor 1. Test using the controller’s indicator light. Observe the Ready To Harvest light. Shut the machine off. Use a wire to connect the metal part of the Ice Thickness sensor to the evaporator or simply remove the Ice Thickness Sensor and touch its metal surface to the metal control box wall. The Ready for Harvest light should go ON. 2. Test with an Ohmmeter. Disconnect electrical power. Open the control box cover.
C2648 Prodigy and Prodigy Plus Service Manual Water Level Sensor 1. Test using the controller’s indicator lights (sump empty and sump full). Unit must be powered up and there must be water in the sump. Add some manually if needed. Locate water level sensor. Release from sump cover and slowly lift up until the mid-length probe is out of the water. The sump empty light should come on, and if the unit is on the inlet water solenoid valve will open to fill the reservoir.
C2648 Prodigy and Prodigy Plus Service Manual Temperature Sensors 1. Check controller. If the sensor calibration is completely out of range, the code display will read either 5 or 7. 2. Check with an ohmmeter. Open control box cover, unplug sensor from J6. Water temperature probe: Measure the temperature of the water. Push and release the clean button. Wait one minute.
C2648 Prodigy and Prodigy Plus Service Manual Water Pumps Test using the controller’s indicator lights. 1. Check the indicator light during the freeze cycle. The light will be On for all but the 30 second anti-slush period, so observe the light for one minute. When it is On, check the water pumps, both should be operating. If only one is operating check for voltage to that pump, if there is no voltage, replace that pump.
C2648 Prodigy and Prodigy Plus Service Manual Purge valve Test using the controller’s indicator lights. 1. Shut unit off by holding the Off button for 3 seconds. 2. Wait four minutes. Push and release the On button, observe the Purge Valve indicator light. As the unit drains the reservoir, the purge valve will be powered. When it gets power, the indicator light will be ON. If the purge valve does not open to drain the reservoir when its indicator light is on, do a voltage check. 3.
C2648 Prodigy and Prodigy Plus Service Manual Compressor contactor Test using the controller’s indicator lights. 1. When the unit is in ice making mode the compressor contactor will have power. Check the Compressor indicator light, when it is on the compressor contactor will have pulled in. If it is not, do a voltage check. Place voltmeter leads on the coil of the contactor. 2. There should be full voltage . If there is full voltage present and the contactor has not pulled in, replace the contactor.
C2648 Prodigy and Prodigy Plus Service Manual Pressure switch High pressure cut out. The high pressure cut out switch will open at a preset pressure, shutting off power to the compressor contactor. After the pressure has fallen to another preset level, the switch will re-close and the contactor coil will be energized. To Test High Pressure Switch: A. Attach refrigeration gauge set to high side port. B. Disconnect leads to fan motor. C. Measure voltage at high pressure control. D.
C2648 Prodigy and Prodigy Plus Service Manual Liquid Line Solenoid Test using the controller’s indicator lights. 1. Put the controller into test mode (depress Off for 3 seconds then depress Clean for 3 seconds). At the end of the test cycle, the liquid line valve will be powered and the Condenser Fan motor indicator light will be on. The liquid line valve should be open at that time. 2.
C2648 Prodigy and Prodigy Plus Service Manual Inlet Water Solenoid Valve Test using the controller’s indicator lights. 1. Shut unit off by holding the Off button for 3 seconds. Wait four minutes. 2. Push and release the On button, observe the Water Solenoid indicator light. After the unit drains the reservoir, the inlet water valve will be powered to refill the reservoir. When it gets power, the indicator light will be ON.
C2648 Prodigy and Prodigy Plus Service Manual Harvest Assist Test using the controller’s indicator lights. Harvest Assist Solenoid - No Longer Used on This Model Push and release the Harvest button. The Hot Gas indicator light will be on. At the same time the Harvest Assist Solenoid will be powered. If the ice on the evaporator is thin, the solenoid will extend.
C2648 Prodigy and Prodigy Plus Service Manual Reservoir Removal The reservoir may be removed from the cabinet if needed. 1. Drain water by holding in the Clean button repeatedly until no more water will drain. 2. Disconnect electrical power. 3. Twist counterclockwise and lift water pumps up and tip to one side. 4. Remove front water reservoir cover plate, set aside. 5. Remove sump cover and water level sensor, set sump cover aside. 6. Pull water reservoir forward; tip up and out of the machine.
C2648 Prodigy and Prodigy Plus Service Manual Controller Differences The controllers are programmed at the factory for the model they are installed on, they cannot be moved from one model to another due to differences in: • Water purge time per setting • Maximum harvest time • Number of evaporator plates • Prodigy Plus models have a connector for the lower light and switch panel. The service controller is OK to use on all Prodigy cubers without that connector.
C2648 Prodigy and Prodigy Plus Service Manual Thermistor Values Deg. F Ohms Deg. F Ohms Deg. F Ohms Deg. F Ohms Deg.
C2648 Prodigy and Prodigy Plus Service Manual Performance Information Cycle Time (minutes) -20 Condenser Intake Air Temp.
C2648 Prodigy and Prodigy Plus Service Manual Repair Procedures 1. Inlet Water Solenoid Valve 2. Disconnect electrical power Electrical Shock Hazard Disconnect electrical power before beginning 3. Shut off the water supply. 4. Remove front panel. 5. Unplug wire from coil. 6. Disconnect water supply tube from the inlet of the valve. 7. Disconnect the water outlet tube. 8. Remove the two mounting screws holding the valve to the center panel. 9. Pull the valve forward and out of the machine. 10.
C2648 Prodigy and Prodigy Plus Service Manual Harvest Assist 1. Remove front panel. 2. Push and release Manual Harvest button, when unit shuts off go to next step. 3. Disconnect electrical supply Electrical Shock Hazard Disconnect electrical power before beginning 4. Unplug wires from solenoid or motor Do steps 5 and 6 if the harvest assist is a solenoid between plates 1 and 2. Both must be replaced if either has failed. 5.
C2648 Prodigy and Prodigy Plus Service Manual Ice thickness sensor 1. Push and release the Off switch. 2. Remove front and top panels. 3. Push and release the Harvest switch 4. Remove the evaporator cover. 5. Disconnect electrical power. Electrical Shock Hazard Disconnect electrical power before beginning 6. Open the control box. 7. Remove left most curtain. 8. Locate sensor, squeeze mounting legs together to release it from the mounting bracket. 9. Remove sensor, follow wire back to control box.
C2648 Prodigy and Prodigy Plus Service Manual Contactor or Controller Contactor 1. Disconnect electrical power. Electrical Shock Hazard Disconnect electrical power before beginning 2. Remove front panel. 3. Open control box cover. 4. Remove right side of control box. 5. Remove metal barrier from control box 6. Remove mounting screws holding contactor to control box. 7. Exchange wires from old controller to new. Refer to wiring diagram as needed. Reverse to reassemble. Controller 1.
C2648 Prodigy and Prodigy Plus Service Manual Curtain or Curtain Switch Curtain 1. Push and hold the Off button to shut the machine off. 2. Remove front panel. 3. Remove evaporator cover. 4. Push inside tab in to release front curtain pin from holder. 5. Pull curtain from machine. 6. Reverse to reassemble. 7. Push and release the ON button to restart the machine. Curtain switch 1. Push and hold the Off button to shut the machine off. 2.
C2648 Prodigy and Prodigy Plus Service Manual Purge Valve or Water Level Sensor Purge valve 1. Push and hold the Off button to shut the machine off. 2. Disconnect electrical power. Electrical Shock Hazard Disconnect electrical power before beginning 3. Remove front panel. 4. Unplug wires from valve coil. Note: The coil can be removed from the valve body by rotating it 1/8 turn CW. After removal of the coil the spring and plunger can be taken out. 5.
C2648 Prodigy and Prodigy Plus Service Manual Water pumps There are two water pumps. The front pump forces water to the two left evaporators and the back pump waters the right evaporator and drains the reservoir. 1. Push and hold the Off button until the machine shuts off. 2. Remove the front panel. Electrical Shock Hazard Disconnect electrical power before beginning 3. Unplug the water pump 4. Rotate the pump CCW about 1/8 turn to release it. 5. Lift pump up and remove hose 6.
C2648 Prodigy and Prodigy Plus Service Manual Evaporator 1. Remove front panel. 2. Remove evaporator cover. 3. Remove top and right side panels. 4. If the machine was in operation, push and release the Harvest button to warm up the evaporator. 5. Disconnect electrical power. Electrical Shock Hazard Disconnect electrical power before beginning 6. Remove harvest assist 7. Recover refrigerant. 8. Remove curtain 9. Remove water distributor 10. Release ice thickness sensor 11.
C2648 Prodigy and Prodigy Plus Service Manual Compressor 1. Remove front panel. 2. If the machine was in operation, push and release the Harvest button to shut it down. Wait until the harvest cycle has ended so the evaporator has no ice on it. 3. Open the replacement compressor box. Check the compressor nameplate, be SURE that the replacement compressor is the correct one for the unit. 4. Disconnect electrical power. Electrical Shock Hazard Disconnect electrical power before beginning 5.
C2648 Prodigy and Prodigy Plus Service Manual Thermostatic Expansion Valve 1. Remove front panel. 2. If the machine was in operation, push and release the Harvest button to shut it down. Wait until the harvest cycle has ended so the evaporator has no ice on it. 3. Disconnect electrical power. 4. Recover refrigerant. 5. Remove insulation covering expansion valve and bulb. 6. Remove strap securing bulb to suction line. 7. Open both discharge and suction access valves 8.