
User manual


GB-4
FRONT PANEL CONTROLLER:
13. CUE INDICATOR
When in CUE mode, the CUE indicator lights up.
14. CUE (CUE BUTTON)
Press the CUE button during playback to return to the position at which playback started.
15. +10 (TRACK +10 BUTTON)
Use this button to skip ahead 10 tracks.
16. PLAY/PAUSE BUTTON
Use this button to start playback. Press once to start playback, twice to set the pause mode, and
three times to resume playback.
17. PLAY INDICATOR
The PLAY indicator lights up during play mode.
18. BUTTON
Use these buttons to skip to the next CD track.
19. PITCH BEND – BUTTON
The CD slows down while this button is pressed. Release the button to return to the original BPM.
20. PITCH BEND + BUTTON
The CD speeds up while this button is pressed. Release the button to return to the original BPM.
21. PITCH (PITCH BUTTON)
Press the PITCH button to switch the pitch adjustment on/off. Hold the PITCH button down for
more than 0.6 seconds to adjust the playing speed (+/-8% / +/-12% / +/-16%).
22. PITCH SLIDER
Use the slider to adjust the CD pitch. Slide up to decrease the pitch, or down to increase the pitch.
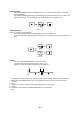
23. CONTROL START SOCKETS
These sockets are designed to connect to a mixing console using a 3.5mm jack plug. This will
provide you with remote start capability from your mixing console.
24. CONTROL CONNECTOR
Connect this connector to the “CONNECT TO REMOTE CONTROL” connector on the main unit
using the included control cord.
MAIN UNIT:
1. POWER (POWER ON/OFF SWITCH)
When the POWER switch is pressed, the power turns on.
2. OPEN/CLOSE BUTTON
Press this button to open and close the disc compartment. The control unit also includes
OPEN/CLOSE buttons. The disc compartment cannot be opened during playback, so please stop
playback before pressing the button.
3. DISC COMPARTMENT
Place the discs in the disc compartments. Press the OPEN/CLOSE button to open and close the
corresponding disc compartment.
4. REMOTE CONTROL CONNECTOR
Connect this connector to the control unit using the included control cord.
5. AUDIO OUT R AND L
The audio signals from each player can be sent to another unit via these jacks.
6. DIGITAL OUT SOCKET
This socket transmits a digital audio signal. Connect the output to the respective input of a digital
amplifier for example.