
User guide


GB - 4
2
4
5 6 7 8 9
10
11
3
CONNECTIONS
Back panel
1. Power cord (AC~)
2. SCART OUTPUT socket
3. FM antenna output (FM 75 ohm)
4. POWER ON/OFF switch
5. Video output
6. Connector for AM loop antenna
7. AUX IN jack
8. HDMI output
9. Audio input L/R
10.
Earphones jack
11. USB port
Note:
First remove the cover to gain access to the back panel
Connecting to the TV
The way in which the main unit is connected and the kinds of cables used can make a noticeable difference in picture
quality. Before selecting one of the options, please make sure that any other equipment has the required input/output
connections. Use any of the options below:
Press the HD RES button on the remote control will automatically set to the optimal resolution for your TV.
AUDIO INPUTS
You can connect an external appliance (for example a VCR or satellite receiver) in order to listen to the sound on the
speakers of this unit. In order to do so, use a red and white RCA audio cable (supplied) to connect the audio outputs
on the external appliance to the left/right audio inputs on the DVD micro system. Then press the SOURCE button
to select “AUX” mode.
AUX IN
You can use your DVD micro system to amplify the sound from your external audio device (such as an MP3, CD
or MD player). In order to do this, connect the AUX IN jack of this unit to the headphones output of your audio device
using an audio cable (not supplied). Then press the SOURCE button to select “AUX” mode.
Note: Do not connect both RCA left/right audio inputs and AUX IN jack at the same time as both signals would be
mixed,
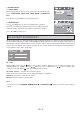
Different options for connecting your DVD player to a TV
Output(s)
Picture
quality
Cable
Cable
supplied
(Yes/No)
Video mode
(Press the HD RES button
on the remote control)
SCART Normal SCART cable No 480P/576P (TV-RGB)
Composite VIDEO
output
Normal
Video cable
(yellow)
Yes 480P/576P (TV-RGB)
HDMI Excellent HDMI cable No 720P, 1080i, 1080P)