
User`s manual


Chapter 8 - Initialization Utilities
57
6. Next, go back to the LCD Display Control Panel and change the printer
mode to “Ready/Roll” mode by pressing the LEFT ARROW button
twice. The display will read “READY” with a “roll of paper” icon.
Continue on with next section.
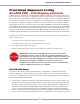
BLAZER PRO Alignment Procedures - LFP Remote Panel
Whether you are performing the Initial Setup or correcting minor printing concerns, the following steps
are necessary to perform a Print Head alignment for your T-Jet Blazer PRO. You may also complete the
process using the LCD Display Control Panel. If completing the Head Alignment process for the initial
setup, also see the later section - Quick Alignment (Optional). You may be able to save time with this
option.
1. Open the LFP Remote Panel by double-clicking on the Epson LFP
icon on your Desktop or go to Start > Programs > Epson > Epson LFP Remote Panel.
2. From the main Epson LFP Remote Panel
Window, select your printer from the drop down
menu (Epson Stylus Pro 4800 or 4880 - see scale
in Chapter 6 - Printer Driver Installation to
determine correct model).
Next, select Media Adjustment from the list of
3.
icons. If you were performing a Power Cleaning
or a Nozzle Check from the LFP Panel you
would select Power Cleaning.
WARNING
DO NOT change any values
or run any Utilities other than those specied in this Manual. Your Blazer Series
printer is a highly modied version of the Epson 4800/4880 and several custom
settings were implemented at the factory level. If you modify any preset values, it
may result in signicant downtime
and/or additional expense.
4. The next window that opens is called the Media
Adjustment Screen. From the Media Adjustment
screen select the Auto Adjustment icon.
READY
1