
Installation guide


Hawk 2LP (Wide) Installation Guide, Rev. A 33
Drive installation
This section describes the physical mounting of the
drive in the host cabinet and the logical installation as
a system member, which is called drive setup.
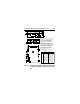
Disc drive mounting
Do not touch the connector pins or any PCB compo-
nents without observing static-discharge precautions.
Always handle the drive by the frame only.
The drive may be mounted in any orientation.
• See notes in Figures 4 and 5 pertaining to proper
drive installation.
• Verify that all connections between the drive and the
host system are correctly installed. Most cables have
a contrasting color stripe indicating pin 1. Pin 1 on the
drive I/O connector and the DC power connector are
indicated in the figures in the Initial Setup Information
section.
• Verify option select, drive ID select jumpers and
terminator enable jumper where applicable. See Drive
Configuration section.