DESKTOP Internal Drive Installation Guide
Seagate Desktop Installation Guide © 2013 Seagate Technology LLC. All rights reserved. Seagate, Seagate Technology, the Wave logo, and FreeAgent are trademarks or registered trademarks of Seagate Technology LLC, or one of its affiliates. All other trademarks or registered trademarks are the property of their respective owners. When referring to hard drive capacity, one gigabyte, or GB, equals one billion bytes and one terabyte, or TB, equals one thousand billion bytes when referring to hard drive capacity.
Install the drive in your computer Install the drive in your computer Before completing the procedures in this guide, install your new drive in your computer using the instructions in the printed Quick Start Guide. Make sure your computer detects your drive at start up With the new drive installed, start your computer. If your new drive connects directly to your motherboard and is not automatically detected at start up, you may need to run the System Setup (BIOS) program to enable the SATA ports.
Single drive installation (Windows) Single drive installation (Windows) Before you start: DiscWizard is not needed for this operation. The Windows XP operating system requires SATA host drivers for embedded motherboards and add-in SATA host adapter cards to be loaded from a floppy (diskette) drive. The SATA drivers are usually contained on the CD that came with your motherboard or add-in SATA host adapter. Please extract the drivers to a diskette before you start the installation.
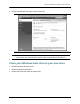
Clone your Windows boot drive to your new drive 3. Choose the Add New Disc option to format the drive. Note: Formatting can also be completed by using the Windows Disk Management Utility in the Control Panel. For more information, see the support documentation on the utility CD. Clone your Windows boot drive to your new drive 1. Boot into Windows 8/7/Vista or XP. 2. Install the DiscWizard software. 3. Choose the Clone Disc option and select next.
Clone your Windows boot drive to your new drive 4. Click Automatic (default) and choose Next. 5. Highlight your source drive and click Next. 6. Choose your destination and select Next. 7. Review the layout and select Next. 8. Proceed with reboot. Upon reboot, the clone procedure starts copying your data. Follow the on-screen instructions and shut down your system after the copy. Windows Vista users need to be ready with the Vista OS disk for security authentication.
Additional storage installation (Mac) Additional storage installation (Mac) Note: These instructions assume that you have one existing SATA drive, which you will continue to use as the boot drive, and that you are adding your new Seagate drive to your Mac for additional storage and performance. If you want to image your old drive to your new Seagate drive and make it bootable, review the Apple Disk Utility help files or visit the Apple support site. 1.
Getting Help • Product Support: Installation assistance, specifications, jumper settings, installation guides, and product manuals.