
System Manual


RESIDENTIAL SYSTEM MANUAL
Step 1:
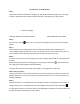
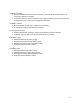
Plug hub into wall outlet with bands in charging port using SEAL SwimSafe charging cords. Let charge
overnight. All bands and the hub lights should be solid green, indicating they are fully charged.
←← Wall Power Supply
HUB WITH BANDS IN CHARGING PORTS HUB CONNECTED TO POWER
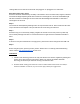
Step 2:
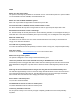
Press the power button on the hub. The LCD screen should light up and a welcome message will
appear.
Step 3:
Remove bands from the charging tower. Upon removal bands will flash white, meaning they are
communicating with the hub and ready for use. You will also note that on the top of the hub screen, the
band count will increase indicating how many bands are being monitored by the hub.
Step 4:
If a band is removed from the hub charging port and does not begin flashing white you will need to relink
the band.
Relink band by placing band in hub charging port and pressing the link button . Remove band from
hub charging port and white light should begin flashing.
*Linking a band to hub can be done with hub plugged in or unplugged from a wall outlet*
What is linking anyway?
Linking is the process of connecting the band to the hub so that monitoring of a swimmer can begin. By
linking the band to the hub you are opening communication between the two, if communication is lost a
full alarm will happen.
Step 5:
All bands are preset to our standard level, which will alarm if swimmer is submerged for 20 seconds. To
change the swim level of a band place band in hub charging port and press the swim level button .
The pink light is beginner (3 seconds to alarm), the dark blue light is standard (20 seconds to alarm) and
the light blue light is advanced (55 seconds to alarm) .
5