Owner'sManual ManualDel Propietario ® VacuumCleaner Aspiradora Model, Modelo 116.26212 L- CAUTION: Read and follow all safety and operating instructions before first use of this product. CUIDADO: Lea y siga todas las instrucciones de operaci6n y seguridad antes del uso de este producto. Sears, Roebuck and Co., Hoffman Estates, IL 60179 U.S.A. www.sears.com Printed in Mexico Part No.
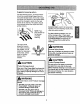
Before UsingYour Vacuum Cleaner New .................... 2 Kenmore Vacuum Cleaner Warranty Important Safety Instructions ......... Parts and Features ................. Assembly Instructions ............. ... 2 3 4-5 6-7 Operating Instructions ............... 8 How to Start ........................ 8 Vacuuming Tips ..................... 9 Suggested Pile Height Settings ........ 10 Attachments ....................... 10 Attachment Use Table ............... 11 Performance Features .............
&, WARNING Your safety is important to us. To reduce the r sk of fire, electrical shock, injury to persons or damage when usin.g your vacuum c eaner, follow basic safety precautions including the follow, ng: Read all instructions in this manual before assembling or using your vacuum cleaner. Use extra care when cleaning on stairs. Do not put on chairs, tables, etc. Keep on floor. Use your vacuum cleaner only as described in this manual. Use only with Sears recommended attachments.
It is important to know your vacuum cleaner's parts and features to assure its proper and safe use. Review these before using your vacuum cleaner. Item Part No. In U.S. Part No. In Canada Headlight Bulb 20-5240 20-40600 Belt 20-5201 20-40979 POWER-MATE® _ Cord or "-- Handle Quick Release Upper Wand Wand Cord Holder-- Power Cord ,.
HOSE ATTACHMENTS Crevice Tool 2.Way On/Off Switch Floor/Carpet Brush _- Combination Brush _- Floor Hose SwivaJ CANISTER Item Part No. In U.S, Part No. In Canada Dust Bag 20-50558 20-50403 Exhaust Filter 20-86880 20-40320 Motor $afey Filter 20-86883 20-40321 Attachment Storage Canister _:Tp_ "_...._ / _ Bag Holder Cover I On/Off Switch l (_ _'_ _- .
Please pay special attention to these hazard alert boxes, and follow any instructions given. WARNING statements alert you to such dangers as fire, electric shock, burns and personal injury. CAUTION statements alert you to such dangers as personal injury and/or property damage. kWARNING Electrical Handle Shock Hazard DO NOT plug into electrical supply until assembly is complete.
CANISTER HOSE 1. Open the canister hood. 1. Line up the hose latch tab and notch in canister hood and insert hose into canister until 2. Check to see that the dust bag is properly installed. See BAG CHANGING for instructions. 3. Check to see that the motor safety filter is properly installed. See MOTOR SAFETY FILTER CHANGING for instructions. it snaps in place.
OPERATING INSTRUCTIONS kWARNING Personal Hazard Injury Fndicator and Product Damage DO NOT plug in if switch is in ON position. Personal injury or property damage could result. The cord moves rapidly when rewinding. Keep children away and provide a clear path when rewinding the cord to prevent personal injury. DO NOT use outlets above counters. Damage from cord to items in surrounding area could occur. 1. Pull cord out of canister to desired length. 2.
Suggested sweeping pattern. Suction Control For best cleaning action, the Power-Mate ® should be pushed straight away from you and pulled straight back. At the end of each pull stroke, the direction of the Power-Mate ® should be changed to point into the next section to be cleaned. This pattern should be continued across the carpet with slow, gliding motions. Carpeted stairs need to be vacuumed regularly. For best cleaning results, fully close the suction control.
For best deep down cleaning, use the XLO setting. However, you may need to raise the height to make some jobs easier, such as scatter rugs and some deep pile carpets, and to prevent the vacuum cleaner from shutting off. Suggested settings are: HI - Shag, deep pile, or scatter rugs. MED - Medium to deep pile. LO - Low to medium pile. XLO - Most carpets and bare floors. ATTACHMENTS ON WANDS CAUTION • 1. To remove wands from Power- DO NOT attach or remove handle or wands while vacuum cleaner is ON.
CLEANING AREA ATTACHMENT Between Furniture* Cushions* Combination Brush 4 Crevice Tool # Drapes* Stairs ,/ / Bare Floors Carpeted FloorstRugs Walls # 4 4 Floor Brush 4 4** Power-Mate ® Handi'Mate Jr.®*** ,/ 4 Power-Mate Jr2*** / 4 * Always clean attachments before using on fabrics. ** 2-position switch should be in FLOOR position. *** Some models; Handi-Mate Jr. ® and Power-Mate Jr. ® attachment with the products.
THERMAL PROTECTOR To correct problem: Turn the vacuum cleaner off and unplug the power cord from the outlet to allow the vacuum cleaner to cool and the thermal protector to reset. Check for and remove clogs, if necessary. Also check and replace any clogged filters.Wait approximately thirty (30) minutes and plug the vacuum cleaner in and turn back on to see if the motor protector has reset. This vacuum cleaner has a thermal protector which automatically trips to protect the vacuum cleaner from overheating.
CANISTER CARE 7. The red bag mount will flip forward after For best cleaning results, the dust bag should be changed often. NOTE: See PARTS AND FEATURES removing bag. This will prevent the hood from closing until a new bag is installed. for Note: Bag Number. DO NOT bend or crease the middle of the cardboard when installing into the bag mount slots. 1. Unplug cord from wall outlet. the bag 8.
IbWARNING 2. Lift the rubber Electrical Shock Hazard retainer and pull out motor safety filter as shown. Unplug power cord from electrical outlet. Do not operate the vacuum cleaner without the motor safety filter. Be sure the filter is dry and properly installed to prevent motor failure and/or electrical shock. 3. Replace the filter, white side out, by sliding it back into place under the ribs in the bag cavity.
POWER-MATE ®CARE Always follow all safety precautions when cleaning and servicing the Power-Mate ®. I WARNING Electrical Shock Or Personal Injury Hazard Disconnect electrical supply before performing maintenance to the vacuum cleaner. Failure to do so could result in electrical shock or personal injury from vacuum cleaner suddenly starting. TO REMOVE BELT ._ 5. Depress tabs on rear of agitator cover and rotate forward to release from the Power-Mate ® base. Mate® 1.Turn upside Powerdown.
TO CLEAN AGITATOR: TO REPLACE BELT NOTE: In order to keep cleaning efficiency high and to prevent damage to your vacuum cleaner, the agitator must be cleaned every time the belt is chanqed. 1. Install new belt over motor drive, then over belt The agitator must also be cleaned according to the following schedule: Vacuum Cleaner Use Clean Aaitator HEAVY every week - pulley. NOTE: See PARTS AND FEATURES for Belt number.
1. Remove Power-Mate ® cover as shown in BELT CHANGING AND AGITATOR CLEANING section. Push In And Turn _Pushlnl-- I And Turn I I 3. Push in and turn bulb clockwise, to replace. Bulb must not be higher than 15 Watts(130 Volts). 2. Push in and turn bulb counterclock4. Reinstall Power-Mate ® cover as shown in BELT CHANGING AND AGITATOR CLEANING section. to remove. wise, then pull out NOTE: See PARTS AND FEATURES Bulb number.
Review this chart to find do-it-yourself solutions for minor performance problems. Any service needed, other than those described in this owner's manual, should be performed at a Sears Service center. WARNING Disconnect electrical supply before performing maintenance to the vacuum cleaner, Failure to do so could result in electrical shock or personal injury, Vacuum cleaner won't start. Poorjob of dirt pick-up, Vacuum cleaner starts but cuts off, 1. Unpluggedat wall outlet. 2.
Antesde usarsu asplradoranueva ..... 1 Garantia de la aspiradora de Kenmore ... 1 Instrucciones importantes de seguridad ............................ 2 Piezas y caracteristicas .............. 3-4 Instrucciones de ensemblado ......... 5-6 Instrucciones de operati6n ............. Pars comenzar ....................... Sugerenciaspara aspirar ............... Sugerenciassobre el ajustede nivelde pelode la alfombra .................... Accesorios........................... Cuadrode usode los accesorios .........
A ADVERTENCIA Su seguridad es muy importante para nosotros Para reducir el riesgo de ncendio, choque el_ctrico lesibn corporal o dafios al ut zar su aspiradora, act_e de acuerdo con precauciones b_s cas de seguridad, entre elias: Lea las instruccionesen este manualantes de armar o usar su aspiradora. Use su aspiradora0nicamente en la forma descritaen este manual. Use 0nicamente con accesoriosrecomendadospar Sears. Desconecte el cord6n el6ctricoantes de componer o limpiarel _rea del cepillo.
Es [mportanteconocer las piezas y caracteristicas de su aspiradora 9ara asegurar su uso adecuado y seguro. Examinelas antes de usar su aspiradora.
MANGUERA ACCESORIOS Interruptor de encendido/ apagado de dos posiclones (Floor/Carpet) (Piso/Alfromba) Herramien ta pare hendiduras-----=" combinaci_n Cepillo para Cepillo pare pisos _ LLL[I -U Dispositivo giratorio de RECEPTACULO Objecto Pieza N_.
I,& Por favor ponga especial atenci6n a _stos recuadros con alerta de riesgo. Advertencia: Este informaci6n le alertara del peligro de fuego, choques electricos, quemadas y lesiones. Cuidado: Este informaci6n le alertara de peligros cemo lesiones y dafios de propiedad. ADVERTENCIA Mango F_eligmde choque el_ctrico No conecte la aspiradora hasta que termine de armada. De Io contrario podria causar un choque eldctrico o lesibn corporal.
RECEPTACULO MANGUERA 1. Abra la tapa del receptaculo. 1. Alinee la pestafia de sujeci6n de la manguera y la ranura de la cubierta del recept_culo e introduzca la manguera en el recept_culo hasta que quede fija en posici6n. 2. Examine la bolsa para polvo este instalado correctamante. Consulte las instrucciones de instalaci6n en la CAMBIO DE LA BOLSA. 3. Examine el filtro de seguridaddel motor este instalado correctamante.
INSTRUCCIONES DE OPERATION IADVERTENCIA nivel de pelo de la alfombra Peligro de lesibn personal y da_o al _roducto NO enchufe ia aspiradora si el interrupter est_ en la posicibn ON. Podria causar lesi6n personal o da_o al producto. Pedal de liberaci6n El cord6n el_ctrico se mueve r_pidamente durante el enrollamiento. Mantenga alejados a los niSosy asegure espacio libra suficiente para evitar lesionee personales al enrollar el cordbn.
Estilodelimpiaza sugerido. Paraobtener la mejor acci6nde limpiezase reco- Control de mienda empujarla Power-Mate®en direcci6n directamente opuesta a usted y jalarla en linea recta. AI final de cada pasada de regreso, cambie la direcci6n de la Power-Mate®hacia la siguiente secci6n a limpiar, Continee asia trav_s de toda]a alfombra de una manera lenta y desiizante. \\ Los escalones alfombrados requieren limpieza peri6dica.
Use el ajuste XLO (bajo) para obtener la mejor limpieza a fondo. Pot otra parte, quiz_,sse requiera elevar el nivel para facilitar algunas tareas, come por ejemplo cuando se trata de tapetes y algunas alfombras de pelo largo, y para impedir que la aspiradora se apague. Se sugieren los siguientes ajustes: HI - Pelo muy largoy suelto, tapetes,alfombras muy acojinadas. MED - Pelo mediano a largo. LO - Pelo cortoa mediano, XLO - La mayoria de las alfombras y pisos descubiertos.
AREA A LIMPIAR ACCESORIO Meubles* Cepilloparacombinacibn ,/ Herramienta pare hendiduras ,( Entre cojines* Pisos Piso$ CoHinas* Escalones descubierto= alfombrados/ Paredes Alfombras 4 4 4 4 Cepillo para pisos Power-Mate" 4 t/** Handi-mate Jr.®*** P°wer'mate Jr'®*-- ,/ _i 4 4 # / ,/ 4 * Siempre limpielos accesoriosantes de usar sobre telas. ** El interruptor de 2 posiciones debe estar en la posici6n FLOOR (piso descubierto). *** La Handi*Mate Jr.®y la Power-MateJr.
PROTECTOR TERMAL Para corregir el problema: Si esto ocurre, apague la aspiradora y desenchufe el cord6n del tornacorriente para permitir qua ta aspiradora se enfrie y qua el protector termal se reajuste. Busque y saque las obstrucciones, si es necesario, Examine tambi6n y reemplace/limpie cualquier flltro obstruido, Espere aproximadamenta treinta (30) minutos y enchufe la aspiradora y volt6ela para ver si el protector del motor se ha reajustado.
CUIDADO DEL RECEPTACULO CAMBIO DE LA BOLSA 7. Examine y limpie el filtro de seguridad del motor. El montaje rojo de la bolsa se inclinar_ hacia adelante despu6s de que retire la bolsa. Esto impedir_ que la tapa se cierre antes de ifistalar una bolsa nueva. La bolsa debe cambiarse seguidopara lograr los mejores resultados de limpieza. NOTA: Consulte la PIEZAS Y CARACTERiSTICAS para determinar el N°. de la bolsa. NOTA: NO doble ni pliegue el centro del cartbn al instalar la bolsa en las ranuras 1.
kADVERTENCIA 2. Levante el dispositivo de retenci6n de goma y saqueel filtro de seguridad como se ve en el diagrama. Peligro de choque el_ctrico Desenchufe el cordbn de la corriente eldctrica. No opera la aspiradora sin el filtro de segurldad del motor. Aseg6urese de que el filtro est_ saco e instalado adecuadamenta para impedir que el motor falle y/o que se produzca un choque el_ctrico. I FILTRO DE SEGURIDAD DEL MOTOR ELECTROSTATICO Este flltrodebeser cambiado cuando aste socio.
CUIDADO DE LA POWER-MATE® Siempre deber._n seguirse todas las precauclones de seguridad al limpiar y dar servicio a la Power-Mate ®. kADVERTENCIA Peligrode choque el_ctrico o lesibn corporal Desconecte la unidad antes de limpiarla o darle servicio, De Io contrario podria producirse un choque el_ctrico o causar lesi6n corporal si la aspiradora arranca de manera imprevista. PARA RETIRAR LA CORREA 5.
LIMPIEZADEL AGITADOR PARA RETIRAR LA CORREA NOTA:Paramantener una alta eficiencia de limpieza y evitar el daSo a la aspiradora, J0a,Y aue limDiar el agitador cada vez que se cambia ]a_r,.o.[[€_. 1, Instale una correa nuevasobre el impulsor del motor y luegesobre la rueda dentadadel cepillo.
I _ 3. Empuje hacia adentro Empujehacia adentroy glre y gireen el sentido con- 1.Quite la cubierta de la Power-Mate@come se describe en la seccibnCAMBIO DE LA CORREAY LIMPIEZA DEL AGITADOR. ! Empuje hacia adentro y girs _ 2. Empuje hacia adenfro y gire la bombilla en el sentido sontrarioal de las agujas del reloj, luego tire hacia afuera para sacar. reloj para reemplacer. La bombilla no debe ser trario a] de las agujasdel m_s de 15 vatios( 130 voltios/). 4.
Consulte este cuadro para encontrar soluciones que ustedmismo puede realizar cuando tenga problemas menores de rendimiento. Cualquier servicio que necesite aparte de otros descritos en este manual tienen que ser hechos per un represetante de servicio autorizado Sears. I ADVERTENCIA Desconecte la aspiradora antes de efectuar el mantenimiento a su aspiridora. De Io contrario podria producirse un cheque el_ctrico o causar lesl6n corporal, La asplradora no arranca. 1. Est_desconecteda 2.
:: Your Home ..... For repair - in your home - of all major brand appliances, lawn and garden equipment, or heating and cooling systems, no matter who made it, no matter who sold itl For the replacement parts, accessories and owner's manuals that you need to do-it-yourself. fill II i_ii i!ii !iii!i_iiiiiiii!i For Sears professional installation of home appliances and items like garage door openers and water heaters. 1-800-4-MY-HOME ® Anytime, day or night _ii!ili!iiiii!_'! (1-800.469-4663) (U.S.A.