Owner's Manual Manuel de l’usager ® DEHUMIDIFIER DESHUMIDIFICATEUR Model, Modèle 25850 50 Pint Low Temp 25870 70 Pint Low Temp ENGLISH FRANÇAIS Sears Canada Inc. Toronto,M5B 2B8 www.sears.
TABLE OF CONTENTS TABLE OF CONTENTS ................................2 OPTIONS FOR DISPOSING WARRANTY..................................................2 OF COLLECTED WATER.............................8 SAFETY INSTRUCTIONS ............................3 MAINTENANCE ............................................9 Grille and case .........................................9 ELECTRICAL REQUIREMENTS ..................4 Air filter .....................................................
SAFETY INSTRUCTIONS IMPORTANT SAFETY INSTRUCTIONS To reduce the risk of fire, electric shock or injury when using your dehumidifier, the following safety precautions must be followed: • Do not place the power cord near a heater. It may cause fire and electric shock. • Do not use the power cord near flammable gas or combustibles such as gasoline, benzene, thinner, etc. It may cause explosion or fire. • Do not disassemble or modify products. It may cause electric shock and failure.
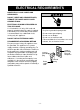
ELECTRICAL REQUIREMENTS OBSERVE ALL LOCAL CODES AND ORDINANCES. DO NOT, UNDER ANY CIRCUMSTANCES, REMOVE THE POWER SUPPLY CORD GROUND PRONG. ELECTRICAL GROUND IS REQUIRED ON THIS APPLIANCE. A 115-volt 60 Hz, AC only, 15A fused and properly grounded electrical supply is required. A time delay fuse or time delay circuit breaker is recommended. Use a dedicated circuit, serving only this appliance. Electrical Shock Hazard Plug into a grounded 3 prong outlet. Do not remove ground prong. Do not use an adapter.
INSTALLING YOUR DEHUMIDIFIER • Install the dehumidifier on a level floor strong enough to support the unit with a full bucket of water. • For best performance, allow at least 12-18 inches of air space on all sides of the unit for good air circulation • Keep all outside doors, windows,and other openings closed when operating the dehumidifier. Humid outdoor air will add to the unit's work load.
OPERATION FEATURES To reduce the risk of fire, electric shock, or injury to persons, read the important SAFETY instructions section before operating this appliance.
OPERATION 6 7 AUTO RESTART HUMIDITY SETTING 5 4 3 2 1 CONTROL PANEL 1. POWER key Pressing this key once turns the dehumidifier "ON" and pressing again turns the dehumidifier "OFF". 2. HUMIDITY CONTROL keys 3. HUMIDITY SETTING display Displays the selected humidity setting. 4. FAN SPEED key Press to set the fan speed as "High" or "Low". • Pressing this key changes the fan speed from High → Low → High. • The selected fan speed is indicated by indicator lights marked "High" and "Low". 5.
OPTIONS FOR DISPOSING OF COLLECTED WATER EMPTYING THE BUCKET MANUALLY USING A GARDEN HOSE 1. When the bucket is full, slide it out by grasping the handle and emptying it into a large sink or tub, and then replace it properly. See Figure 1. 2. Empty the bucket when the indicator light turns on. 3. Do not remove the bucket while the dehumidifier is operating. Moving the bucket can cause water to drop on the base pan or the floor. 4. Carry the bucket by supporting it from the bottom as well as by the handle.
MAINTENANCE GRILLE AND CASE To clean the case: Use water and a mild detergent. Do not use bleach or an abrasive cleaner. To clean the grille: Use a vacuum with an attachment or brush. Electrical Shock Hazard • Disconnect power supply cord from receptacle before performing any maintenance. • Be careful when cleaning the coils. Fins are sharp. AIR FILTER GENERAL CLEANING • Dust the front grille and the side panels with a soft brush or use the dusting attachment of your vacuum.
MAINTENANCE CLEANING INSIDE THE UNIT 1.
TROUBLESHOOTING The dehumidifier may be operating abnormally when: Problem Dehumidifier does not start What To Do • The dehumidifier power cord is unplugged • The fuse is blown or circuit breaker is tripped. • Water bucket is full • Bucket is not installed. • Room humidity level is less than selected humidity setting. • Auto Restart. • Did not allow enough time to remove the moisture. • Airflow is restricted. • The humidity control may not be set low humidity.
TABLE DES MATIÈRES TABLE DES MATIÈRES .....................12 OPTIONS POUR JETER L’EAU ACCUMULÉE ..................................18 GARANTIE ...............................................12 MAINTENANCE...............................19 RECOMMANDATIONS DE SECURITE .......13 Grille et coffrage......................................19 EXIGENCES ELECTRIQUES ............14 Filtre à air ................................................19 INSTALLATION DU DESHUMIDIFICATEUR ...................
RECOMMANDATIONS DE SECURITE RECOMMANDATIONS IMPORTANTES Pour réduire les risques d’incendie, de décharge électrique ou de blessures pendant l’utilisation du déshumidificateur, les précautions suivantes doivent être respectées : • Ne pas placer le câble d’alimentation près d’une source de chaleur. Risque d’incendie ou de décharge électrique. • Ne bloquer ni l’entrée ni la sortie. Risque de défaillance de l’appareil ou détérioration de ses performances.
EXIGENCES ELECTRIQUES OBSERVER TOUS LES CODES ET ORDONNANCES LOCAUX. AVERTISSEMENT NE RETIRER SOUS AUCUN PRETEXTE LA FICHE DE CONNEXION A LA TERRE DONT LA PRISE EST MUNIE. UNE CONNEXION A LA TERRE EST REQUISE POUR CET APPAREIL. Le courant nécessaire est de 115v 60Hz, seulement AC, fusibles de 15A et une connexion à la terre. Il est recommandé d’utiliser un fusible temporisé ou un disjoncteur. N’utiliser le circuit que pour cet appareil.
INSTALLATION DE VOTRE DESHUMIDIFICATEUR • Installer le déshumidificateur sur un sol suffisamment résistant pour supporter le récipient plein d’eau. • Pour une meilleure performance laisser de 12 à 18 de chaque côté de l’appareil afin d’assurer • pouces une bonne circulation d’air. • Laisser toutes les ouvertures sur l’extérieur, fenêtres et autres fermées pendant le fonctionnement du déshumidificateur. L’humidité extérieure entraînerait une surcharge de travail de l’appareil.
FONCTIONNEMENT CARACTERISTIQUES AVERTISSEMENT Pour réduire les risques d’incendie, de décharge électrique ou de blessures, lire la section des recommandations sur ÉCURITÉ avant de faire fonctionner cet appareil.
FONCTIONNEMENT 6 7 AUTO RESTART HUMIDITY SETTING 5 4 3 2 1 PANNEAU DE CONTRÔLE 1. Touche POWER Appuyer une fois pour mettre le déshumidificateur en marche, position « ON » et appuyer de nouveau pour l’arrêter, position « OFF ». 2. Touches de CONTRÔLE DE L’HUMIDITÉ Appuyer pour sélectionner le taux d’humidité désirée. • : Pour augmenter le taux d’humidité désirée. • : Pour réduire le taux d’humidité désirée.
OPTIONS POUR JETER L’EAU ACCUMULEE VIDAGE MANUEL DU RÉCIPIENT UTILISATION D’UN TUYAU D’ARROSAGE 1. Quand le récipient est plein, le faire glisser vers l’extérieur en le prenant par la poignée et le vider dans un grand creuset ou tuyau, et le remettre en place correctement. Voir Figure 1. 2. Vider le récipient lorsque l’indicateur lumineux s’allume. 3. Ne pas retirer le récipient pendant le fonctionnement du déshumidificateur.
MAINTENANCE AVERTISSEMENT GRILLE ET COFFRAGE Pour nettoyer le coffrage : Utiliser de l’eau et un détergent doux. Ne pas utiliser de blanchissants ni de produits nettoyants abrasifs. Electrical Shock Hazard • Débrancher le câble d’alimentation de la prise murale avant de procéder à tout type d’entretien. • Faites attention en nettoyant les serpentins. Les extrémités en sont pointues. Pour nettoyer la grille : Utiliser un aspirateur avec un embout ou une brosse.
MAINTENANCE NETTOYAGE INTERNE DE L’APPAREIL 1. Retirer la grille frontale comme indiqué.
SOLUTIONS DE PROBLÈMES Le déshumidificateur ne fonctionne pas normalement quand : Problème Le déshumidificateur ne démarre pas Le déshumidificateur ne sèche pas l’air comme il devrait Cause possible Que faire Le déshumidificateur est débranché. • Vous assurer que l’appareil est bien branché. Le fusible est brûlé ou le disjoncteur a sauté. • Vérifier le fusible ou le disjoncteur et changer le premier ou remettre à zéro le second. Le récipient à eau est plein.
NOTE - 22 -
Master Protection Agreements Accord de Protection Complète Congratulations on making a smart purchase. Your new Kenmore ® product is designed and manufactured for years of dependable operation. But like all products, it may require preventive maintenance or repair from time to time. That's when having a Master Protection Agreement can save you money and aggravation. Félicitations pour votre achat. Votre nouvel appareil Kenmore© a été conçu et fabriqué pour des années de fonctionnement fiable.
Get it fixed, at your home or ours! Your Home For repair – in your home – of all major brand appliances, lawn and garden equipment, or heating and cooling systems, no matter who made it, no matter who sold it! For the replacement parts, accessories and owner’s manuals that you need to do-it-yourself. For Sears professional installation of home appliances and items like garage door openers and water heaters. 1-800-4-MY-HOME® (1-800-469-4663) Call anytime, day or night (U.S.A. and Canada) www.sears.