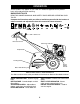
Owner’s Manual REAR TINE TILLER WITH COUNTER ROTATING TINES 5.0 HP 17 Inch Tine Width Model No. 917.29425 This product has a low emission engine which operates differently from previously built engines. Before you start the engine, read and understand this Owner’s Manual. IMPORTANT: Read and follow all Safety Rules and Instructions before operating this equipment. Sears, Roebuck and Co., Hoffman Estates, IL 60179 U.S.A. Visit our Craftsman website:www.sears.
TABLE OF CONTENTS Safety Rules .......................................... 2 Warranty ................................................ 2 Product Specifications ......................... 4 Assembly/Pre-Operation ....................... 6 Operation............................................... 8 Maintenance ........................................ 13 Service and Adjustments..................... 15 Storage ................................................ 18 Troubleshooting ...................................
SAFETY RULES • Use extension cords and receptacles as specified by the manufacturer for all units with electric drive motors or electric starting motors. • Never attempt to make any adjustments while the engine (motor) is running (except where specifically recommended by manufacturer). • Never operate the machine at high speeds on slippery surfaces. Look behind and use care when backing. • Never allow bystanders near the unit.
In the state of California the above is required by law (Section 4442 of the California Public Resources Code). Other states may have similar laws. Federal laws apply on federal lands. A spark arrester for the muffler is available through your nearest Sears service center (See REPAIR PARTS section of this manual). PRODUCT SPECIFICATIONS Gasoline Capacity: 2 Quarts Unleaded Regular Oil (API-SF-SJ): (Capacity: 20 oz.) SAE 30 (Above 40°F) SAE5W-30/10W-30 Spark Plug : (Gap: .
ACCESSORIES These accessories were available when the tiller was produced. They are also available at most Sears retail outlets and service centers. Some of these accessories may not apply to your tiller. ENGINE SPARK PLUG MUFFLER AIR FILTER GAS CAN ENGINE OIL STABILIZER TILLER PERFORMANCE FURROW OPENER TILLER MAINTENANCE BELT TINES SHEAR PIN HAIRPIN CLIP UNASSEMBLED PARTS CONTENTS OF HARDWARE PACK (2) Handle Locks (1) Carriage Bolt 3/8-16 UNC x 1 Gr.
ASSEMBLY/PRE-OPERATION Your new tiller has been assembled at the factory with the exception of those parts left unassembled for shipping purposes. To ensure safe and proper operation of your tiller all parts and hardware you assemble must be tightened securely. Use the correct tools as necessary to insure proper tightness. 4. Cut down right hand front and right hand rear corners of carton, lay side car ton wall down. 5. Remove packing material from handle assembly. 6.
Handle Column Handle Assembly "UP" Position Tighten handle lock lever to hold Cables Cable Clip Loosen Handle Lock Lever to Move handles_14 CONNECT SHIFT ROD 1. Insert end of shift rod farthest from bend into hole of shift lever indicator. 2. Insert hairpin clip through hole of shift rod to secure with bend of clip on right side. handles_97 4. Insert pivot bolt in front part of plate and tighten. 5. Cut down remaining corners of carton and lay panels flat. 6. Lower the handle assembly.
OPERATION These symbols may appear on your Tiller or in literature supplied with the product. Learn and understand their meaning. KNOW YOUR TILLER READ THIS OWNER'S MANUAL AND SAFETY RULES BEFORE OPERATING YOUR TILLER. Compare the illustrations with your tiller to familiarize yourself with the location of various controls and adjustments. Save this manual for future reference.
00155 The operation of any tiller can result in foreign objects thrown into the eyes, which can result in severe eye damage. Always wear safety glasses or eye shields before starting your tiller and while tilling. We recommend a wide vision safety mask over spectacles or standard safety glasses. Know how to operate all controls before adding fuel and oil or attempting to start engine.
CHECK ENGINE OIL LEVEL The engine in your unit has been shipped, from the factory, already filled with SAE 30 summer weight oil. 1. With engine level, clean area around oil filler plug and remove plug. 2. Engine oil should be to point of overflowing when engine is level. • For approximate capacity see “PRODUCT SPECIFICATIONS” on page 3 of this manual. All oil must meet A.P.I. Service Classification SF-SJ.
CAUTION: Alcohol blended fuels (called gasohol or using ethanol or methanol) can attract moisture which leads to separation and formation of acids during storage. Acidic gas can damage the fuel system of an engine while in storage. To avoid engine problems, the fuel system should be emptied before storage of 30 days or longer. Drain the gas tank, start the engine and let it run until the fuel lines and carburetor are empty. Use fresh fuel next season. See Storage Instructions for additional information.
ADJUST WHEELS FOR CULTIVATING 3 4 5 2 6 1. Place blocks under right hand side of tiller and remove hairpin clip and clevis pin from right hand wheel. 2. Move wheel outward approximately 1 inch until hole in inner wheel hub lines up with inner hole in axle. 3. Replace clevis pin and hairpin clip on inside of wheel and remove blocks. 4. Repeat preceding steps on left hand side.
FILL IN DATES AS YOU COMPLETE REGULAR SERVICE BE FO R MAINTENANCE SCHEDULE EE EV AC ER H US Y5 E HO EV ER UR Y2 S 5H EV OU ER RS Y5 0H EV OU ER YS RS EA SO N MAINTENANCE SERVICE DATES Check Engine Oil Level Change Engine Oil 1,2 Oil Pivot Points Inspect Spark Arrester / Muffler Inspect Air Screen Clean or Replace Air Cleaner Cartridge 2 Clean Engine Cylinder Fins Replace Spark Plug RH Gear Case Grease Fitting (1oz.
5. Refill engine with oil. See “CHECK ENGINE OIL LEVEL” in the Operation section of this manual. CAUTION: Disconnect spark plug wire before performing any maintenance (except carburetor adjustment) to prevent accidental starting of engine. Prevent fires! Keep the engine free of grass, leaves, spilled oil, or fuel. Remove fuel from tank before tipping unit for maintenance. Clean muffler area of all grass, dirt, and debris. Do not touch hot muffler or cylinder fins as contact may cause burns.
SPARK PLUG Replace spark plugs at the beginning of each tilling season or after every 50 hours of use, whichever comes first. Spark plug type and gap setting is shown in “PRODUCT SPECIFICATIONS” on page 4 of this manual. TRANSMISSION Once a season, lubricate the right hand gear case grease fitting with 1 oz. of EP #1 grease. CLEANING Do not clean your tiller when the engine and transmission are hot. We do not recommend using pressurized water (garden hose, etc.
TO REMOVE BELT GUARD NOTE: For ease of removal, remove hairpin clip and clevis pin from left wheel. Pull wheel out from tiller about 1 inch. 1. Remove two (2) screws from side of belt guard. 2. Remove hex nut and washer from bottom of belt guard (located behind wheel). 3. Pull belt guard out and away from unit. 4. Replace belt guard by reversing above procedure. 2. Remove old belt by slipping off engine pulley first then remove from transmission pulley. 3.
• To maintain the superb tilling performance of this machine the tines should be checked for sharpness, wear, and bending, par ticularly the tines which are next to the transmission. If the gap between the tines exceeds 3-1/2 inches they should be replaced or straightened as necessary. • New tines should be assembled.
STORAGE Immediately prepare your tiller for storage at the end of the season or if the unit will not be used for 30 days or more. CAUTION: Never store the tiller with gasoline in the tank inside a building where fumes may reach an open flame or spark. Allow the engine to cool before storing in any enclosure. NOTE: Fuel stabilizer is an acceptable alternative in minimizing the formation of fuel gum deposits during storage. Add stabilizer to gasoline in fuel tank or storage container.
TROUBLESHOOTING CHART: See appropriate section in manual unless directed to Sears service center PROBLEM Will not start CAUSE CORRECTION 1. Out of fuel. 2. Engine not “CHOKED” properly. 3. Engine flooded. 4. Dirty air cleaner. 5. Water in fuel. 6. Clogged fuel tank. 7. Loose spark plug wire. 8. Bad spark plug or improper gap. 9. Carburetor out of adjustment. 10.Oil soaked air filter. Hard to start 1. Throttle control not set properly. 2. Dirty air cleaner. 3. Bad spark plug or improper gap. 4.
TROUBLESHOOTING CHART: See appropriate section in manual unless directed to Sears service center PROBLEM Engine overheats CAUSE CORRECTION 1. Low oil level/dirty oil. 2. Dirty engine air screen. 3. Dirty engine. 4. Partially plugged muffler. 5. Improper carburetor adjustment. 1. Check oil level/change oil. 2. Clean engine air screen. 3. Clean cylinder fins, air screen, muffler area. 4. Remove and clean muffler. 5. Adjust carburetor to richer position. Excessive bounce/difficult handling 1.
Get it fixed, at your home or ours! Your Home For repair – in your home – of all major brand appliances, lawn and garden equipment, or heating and cooling systems, no matter who made it, no matter who sold it! For the replacement parts, accessories and owner’s manuals that you need to do-it-yourself. For Sears professional installation of home appliances and items like garage door openers and water heaters. 1-800-4-MY-HOME® (1-800-469-4663) www.sears.com Anytime, day or night (U.S.A. and Canada) www.sears.