® Compactor Compactador ii"_'_',_,,,,,_'i _i!!:!l iiiiiii_ _!,b;ii _ii,_!i!!!'_ii_ iiiii,i:::i;::i _!i!!!!_'_ ¸ Uii_i!_:!i!ii_, CI_, iii!!!_,_ ''¸C L_iiiii CI!_i!!!!:i!i_C!i C_, _,¸ Models/Modelos 665.1361" * = color number, nQmero de color g871870B Sears Roebuck and Co., Hoffman Estates, IL 60179 U.S.A. www.sears.
TABLE OF CONTENTS PROTECTION AGREEMENTS PROTECTION AGREEMENTS ....................................................... Accessories .................................................................................. 2 3 WARRANTY ..................................................................................... 3 COMPACTOR 4 SAFETY .................................................................. INSTALLATION INSTRUCTIONS .................................................. Unpacking ................
Sears hasover12,000 professional repairspecialists, whohave access toover4.5millionqualitypartsandaccessories. That's thekindofprofessionalism youcancountontohelpprolong the lifeofyournewpurchase foryearstocome.Purchase your Master Protection Agreement today! ONE-YEAR Some limitations and exclusions apply. For prices and additional information, call 1-800-827-6655. For one year from the first day of use in your home, Sears will repair, free of charge, defects in materials or workmanship.
COMPACTOR SAFETY Your safety and the safety of others are very important. We have provided many important safety messages in this manual and on your appliance. Always read and obey all safety messages. This symbol alerts you to potential hazards that can kill or hurt you and others. All follow the safety alert symbol and either the word "DANGER" or Thissafety is themessages safety alertwillsymbol. "WARNING.
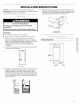
INSTALLATION INSTRUCTIONS Installer: Leave Use and Care Guide with the homeowner. Homeowner: Keep Use & Care Guide for future reference and for local electrical inspector's use, if required. Place the other 2 corner posts on the floor to the side of the compactor. Grasp the sides of the compactor cabinet and put compactor on its side on top of the corner posts. Remove the shipping base from the bottom of the compactor. Excessive Weight Hazard Use two or more people to move and install compactor.
Cutout dimensions : \ 3" (7 _ 1/4" rain. Electrical (87 cm) Plug into a grounded Do not remove Shock Hazard 3 prong outlet. ground prong. Do not use an adapter. 151/4 mm (38.7 cord. Failure to follow these death, fire, or electrical instructions shock. can result in cm) A. Grounded electrical outlet must be a minimum of 3" (7.6 cm) away from surrounding cabinets or nearby walls as shown. It can be placed either to the left or the right side of the product.
Tighten screw. Repeat for other rear wheel. Freestanding 1. Installation Use pliers to lower leveling legs away from cabinet. With the drawer still removed from the compactor cabinet, place level inside on the floor of the cabinet. Check that the compactor is level from front to back and side to side. Adjust the leveling legs until the compactor is level. J 2. Move the compactor 3. Plug into a grounded 3 prong outlet. 4. Carefully move compactor into its final position.
Countertop mounting There are three options for changing the decorative panel: • Order an acrylic panel • Create a custom panel for use with a trim kit • Create a custom panel for installation without trim To order an acrylic panel or a trim kit, see "Accessories." Trim Kit Panel Dimensions c A. Countertop B. Retaining bracket (provided in conversion kit) C. Mounting screw (provided in conversion kit) Use these dimension drawings to create a custom panel for use with a trim kit.
6. Trimless Panel with Handle Reinstall the toe guard using the existing mounting and 1/2"washer. Then, reinstall the foot pedal. screws Dimensions Use these dimensions drawings to create a custom panel for use without a trim kit. The panel should be 1/2"to %" (13 mm to 16 mm) thick. NOTE: A thicker panel may need rounded front corners and a cutout for access to the handle. B 2313/1_" (60_5 ram) D _'_ (3&1 ram) Installation 1. Remove the mounting screws attaching the foot pedal to the compactor.
Installation 1. 7. Remove the mounting screws attaching the foot pedal to the compactor. Remove foot pedal. Reinstall the toe guard using the existing mounting screws and 1/2"washer. Then, reinstall the foot pedal. A / / \ A. Mounting screws B. Foot pedal 2. Remove mounting screws attaching the toe guard to the compactor. Remove toe guard. 3. Remove the mounting screws attaching the decorative panel to the compactor. Remove decorative panel and discard mounting screws. D 4.
IMPORTANT: Do not push items down into compactor hands or feet, with 1. Turn the Key-Knob to START, and then release it. REMOVE NOTE: You will not see compacting of trash the first few times you load the compactor. The compactor drawer should be about 1/2full before the compactor can begin to compress the load. 1. O Open the drawer. Lift and pull the handle or press the foot pedal to open the drawer. START NOTE: Pressing the foot pedal opens the container only 3" to 6" (7.6 cm to 15.
3= Release drawer side latch. Tilt right drawer side down. This will make removing the full bag easier. 4. Lift bag by bag caddy handles. Remove trash bag from compactor and dispose properly. The solid air freshener system is designed to help control odors that might develop in the trash. An air freshener disc can be purchased in department stores (not sold with compactor). Place the disk-shaped solid air freshener into the air freshener compartment. The air freshener should last 4 to 6 weeks.
3= Place either a plastic or paper bag into the drawer. • • If using a paper bag, open bag and pull top edges over the drawer top. Slide front edge of bag over front edge of drawer. Slide rear edge over rear of drawer. If using plastic bag, open bag and pull top edges over drawer top. Lock bag into place by pulling the 4 prepunched holes over the bag retainer buttons. Holes will expand over buttons without harming bag.
Grasp the drawer on the sides and pull it out the rest of the way. Set the drawer down gently. 3= Cleaning the Ram NOTE: You may want to wear protective bits of glass on the ram cover. 4. Vacuum the inside of the cabinet. Liquid spills or wet trash should be cleaned up by hand, or by using a vacuum designed to pick up liquids. 5. Wash the inside of the cabinet with a clean sponge or soft cloth and a mild detergent in warm water. Rinse and dry thoroughly with a soft cloth. gloves as there may be 1.
iNDICE CONTRATOS DE PROTECCION ................................................ Accesorios ................................................................................. GARANTIA .................................................................................... SEGURIDAD DEL COMPACTADOR INSTRUCCIONES CONTRATOS DE 15 16 16 .......................................... 17 DE INSTALACION ......................................... 18 Desempaque del compactador ............................................
Sears cuenta con un equipo de mas de 12.000 especialistas en reparaci6n competentes, quienes tienen a disposici6n mas de 4,5 millones de repuestos y accesorios de calidad. Cse es el tipo de profesionalismo con el que usted puede contar para ayudarle a prolongar la vida de su nuevo artefacto por muchos aSos mas. iAdquiera hey su Contrato Maestro de Protecci6n! Se aplican algunas limitaciones y exclusiones. Para obtener precios e informaci6n adicional, Ilame al 1-800-827-6655.
SEGURIDAD DEL COMPACTADOR Su seguridad y la seguridad de los demf=s es muy importante. Hemos incluido muchos mensajes importantes de seguridad en este manual yen su electrodomestico. Lea y obedezca siempre todos Uosmensajes de seguridad. Este simbolo le llama la atenci6n sobre peligros potenciales que pueden ocasionar la muerte o una lesi6n a usted y a los demas. Este eslos el mensajes simbolo dedeadvertencia de seguridad.
INSTRUCCIONES Instalador(a): Deje el Manual de uso y cuidado con el(la) duer_o(a) de casa. DE INSTALACION 3. Coloque los dos esquinales del cart6n en el piso cerca del compactador. Abra la gaveta del compactador y saque todo material de embalaje u otro artfculo que se encuentre en la gaveta. No saque la bolsa del compactador. Sujete la manija y levante el frente de la gaveta hasta que pase los topes de la gaveta. Sujete ambos lades de la gaveta y levante la gaveta fuera del compactador.
Dimensiones del corte \ Jl 3" [-- (7.6 cm) 34V4" PeHgro mi_. de Choque Conecte a an contacto tierra de 3 terrninales. E_ectrico de pared de conexi6n a (61 cm) No quite e_ terminal de conexi6n a tierra. (46.7 crn) No use an adaptador. No seguir ta muerte, estas instrucciones incendio o choque puede ocasionar et_ctrico. 18 "iin" 15V,_" m_'rL (3&7 cm) M_todo A.
IMPORTANTE: • Para mover el compactador control. Apriete el tornillo. Repita el procedimiento rueda posterior. no Io sujete pot el tablero de para la otra Deslice el compactador hacia un cart6n o un tablero antes de desplazarlo per el piso para evitar que el revestimiento del piso se dafie. AI levantar o mover el compactador no deje que el marco posterior del compactador toque el revestimiento del piso. Instalacibn independiente Use alicates para bajar las patas niveladoras del gabinete.
8= Usando el juego (provisto tornillos Montaje los dos tornillos de montaje #8 - 18 x 1/2"(provisto en de conversi6n), sujete los soportes de retenci6n en el juego de conversidn) al mostrador con los de montaje.
6. Panel sin adorno y con manija Reinstale el guardapies usando los tornillos disponibles y una arandela de 1/2",Luego, reinstale el pedal. Dimensiones Use estos dibujos acotados para crear un panel personalizado para uso sin el juego de adornos. El panel debera tener de 1/2"a %" (de 13 mm a 16 mm) de espesor. NOTA: Un panel mas grueso puede necesitar esquinas frontales redondeadas y un recorte para acceso a la manija. 23W_" (50,5 ram) _(.3 15" _l 8,1 ram) I E F Instalacibn 1.
Instalaci6n 1. 7. Saque los tornillos de montaje que sujetan el pedal al compactador. Saque el pedal. Reinstale el guardapies usando los tornillos disponibles y la arandela de 1/2%Luego reinstale el pedal. A. Tornillos de montaje B. Pedal 2. Saque los tornillos de montaje que sujetan el guardapies al compactador. Saque el guardapies. 3. Saque los tornillos de montaje que sujetan el panel decorativo al compactador. Quite el panel decorative y descarte los tornillos de montaje. 4.
Durante el ciclo de EXTRA PAC el pis6n permanecera en la posici6n de abajo para Iograr una compactaci6n extra, Mientras el ciclo EXTRA PAC este funcionando, un indicador aparece en el tablero de control. La gaveta se traba y no puede abrirse cuando el pis6n esta abajo. Para Iograr 6ptimos resultados, use el ciclo EXTRA PAC por Io menos 30 minutes a la vez.
Para quitar una bolsa Ilena 1= 2. Jale la gaveta hasta abrirla por complete. Es posible que usted ya tenga una bolsa de papel o de plastico en su lugar. Sirvase tomar come referencia las instrucciones adecuadas para su bolsa. • Si usted tiene una bolsa de papel, levante y pliegue los bordes superiores doblados de la bolsa. Doble los bordes hacia dentro y una las tapas laterales. Doble las tapas para cerrar la bolsa.
Empuje la parte interior de la bolsa contra el fondo, los costados y los rincones de la gaveta para que quede bien extendida. 4= 3= Sostenga hacia abajo la traba de palanca e incline el costado de la gaveta hacia afuera hasta que la traba libere el frente de la gaveta. NOTA: Si Io desea, puede quitar el lade de la gaveta inclinandolo y luego levantandolo hacia afuera. CUIDADO DEL COMPACTADOR Su nuevo compactador esta diser_ado para brindarle muchos a_os de servicio confiable.
4. Pase la aspiradora en el interior del gabinete. Los derrames de liquidos o basura mojada deben limpiarse a mano, o usando una aspiradora dise_ada para recoger liquidos. Quite los alimentos con una esponja limpia o un paso liso y un detergente suave en agua caliente. Enjuague y seque meticulosamente con un paso liso. L_J 5. 6. 7. Lave el interior del gabinete con una esponja limpia o un patio liso y un detergente suave en agua caliente. Enjuague y seque meticulosamente con un pa_o liso.
Your Home For repair-in your home-of all major brand appliances, lawn and garden equipment, or heating and cooling systems, no matter who made it, no matter who sold it! HHHHHHHH_ For the replacement owner's parts, accessories and manuals that you need to do-it-yourself. HHHHHHHH_ For Sears professional installation of home appliances and items like garage door openers and water heaters. HHHHHHHH_ 1-800-4-MY-HOME Call anytime, ® (1-800-469-4663) day or night (U.S.A. and Canada) HHHHHHHH_ www.sears.