
Operating instructions


- 14 -
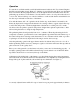
against the gear teeth of the valve spindle. As each gear tooth moves by a click can be heard
and a slight jolt felt through the cleaning needle. Stop turning the valve spindle after 5 clicks
are produced.
Now rotate the control stem slowly clockwise so that the cleaning needle rack and valve
spindle teeth engage. As the control stem is rotated still further to clockwise to the close or
“off” position the cleaning needle will be drawn down into the burner. No increase in
resistance should be felt during this operation. If the needle jams it will have to be removed
and the previous step repeated.
Note that when the burner valve is fully closed the top tooth of the cleaning needle rack
should remain above the center of the gear on the valve spindle. If the cleaning needle is too
deep in the burner it may bottom out before the needle valve is closed completely. This
would produce inability to completely shut off the burner. If you are not sure repeat the
procedure of installing the needle, being certain that only 5 clicks are heard during
installation.
14. You are now ready to install the nozzle in place – tighten it firmly. As a check, turn the valve
spindle to its fully closed position and then counterclockwise until it stops. This should be
just over half a turn of the valve spindle. If less than half a turn is found from “off” to “clean”
positions the cleaning needle has not been properly installed and that portion of assembly
should be performed again. In the “clean” position, that is fully counterclockwise, the
cleaning wire will be seen protruding slightly through the nozzle hole.
15. Complete the burner overhaul by placing the inner cap in position on the burner. The outer
cap may then be snapped into place. A slight tap with a wooden block or screwdriver handle
may be required to seat the cap.
16. You are now ready to re-install the burner. A new copper washer for the base is
recommended. Tighten the burner until the copper washer just begins to be compressed.
From this point the burner must be turned at least half a turn to make a tight seal and then
further until the valve spindle is pointing towards the control knob shaft.
17. From here on, re-assembly is the reverse of the disassembly procedure previously discussed.
After assembly of the stove, pressurize the fuel system and check for any fuel leaks at the burner
base or piping to the fuel tank. If all is well, proceed through the preheat operation to adjustment
of the fuel/air ratio of the burners. You will now find your pressurized alcohol stove to be
operating in “as new ” condition and should give you safe and satisfactory operation for many
years.