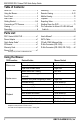
DR-1 Series H.264 Pentaplex Network DVR Quick Setup Guide* DR-116Q shown DR-104Q DR-108Q DR-116Q No. of Channels 4 8 16 Easy recording and setup. Remote LAN and Web viewing. iPhone/Smart phone compatible. Per-event recording and search. Pictures Per Second 120 240 240 BNC and VGA outputs. Programmable motion detection. Multi-channel audio recording. Free DDNS server. *For more installation tips, consult the User’s Manual on the CMS Software CD included with this product, or visit www.seco-larm.com.
ENFORCER DR-1 Series DVR Quick Setup Guide Table of Contents: Parts List ....................................................... 2 Using the Mouse ........................................... 2 Front Panel ................................................... 3 Rear Panel .................................................... 4 Getting Started ........................................... 5-6 Connecting a PTZ Camera ........................... 7 Viewing ......................................................
ENFORCER DR-1 Series DVR Quick Setup Guide Front Panel: 1 2 3 4 ENFORCER® DOME 16 Channel 2 3 4 5 6 7 8 9 10 11 12 13 14 15 16 6 7 IR IRIS OPEN FOCUS (+) 18 DR-116Q shown. H.
ENFORCER DR-1 Series DVR Quick Setup Guide Rear Panel: DR-104Q: 1 3 5 2 4 9 11 12 10 6 DR-108Q / DR-116Q: (DR-116Q shown) 3 1 10 8 7 4 6 5 2 9 11 12 Rear panel feature descriptions: 1 LAN 10/100M (RJ-45) 2 PS2-Compatible USB Port 3 4 5 6 4 VGA Output Alarm I/O Input Video Out / Main Monitor Audio Out/ Main Audio Use a Cat5e/6 cable to connect the DVR to a Local Area Network for remote access. Provides connection point for a PS2-compatible USB mouse.
ENFORCER DR-1 Series DVR Quick Setup Guide Getting Started: Connections: 1. Connect cameras to the BNC channel inputs on the rear of the device. 2. Connect a VGA-capable display to the VGA port on the rear of the device. 3. If connection to a Call Monitor is desired, connect via the BNC port marked Call Monitor Out on the rear of the device. 4. If network access to the DVR is desired, connect the DVR to a Local Area Network (LAN) using a Cat5e/6 cable with an RJ-45 connector. 5.
ENFORCER DR-1 Series DVR Quick Setup Guide Continued from page 5 4. To adjust the time and date: Note: Changes to time and date settings may cause inconsistency or data loss in previously recorded material. Back up all data before making changes. For more information on how to back up data, please see Exporting Video on pg. 11 of this guide. a. Enter the system menu and select System Setup . b. Select Date/Time. c. Select Date. The year will flash.
ENFORCER DR-1 Series DVR Quick Setup Guide Connecting a PTZ (Pan / Tilt / Zoom) Camera Note: For pin configurations, please see Pin Connection for Alarm I/O & RS-485 and Audio In on page 12 of this guide. 1. Make sure the RS-485 connector from the PTZ camera is configured correctly. See pg. 12. 2. Connect the PTZ camera’s RS-485 cable to the DVR’s Alarm I/O input. 3. Press MENU to access the OSD main menu and select Camera Setup. a. Select Dome Protocol to choose the corresponding protocol. b.
ENFORCER DR-1 Series DVR Quick Setup Guide Continued from page 7 b. For Full Screen mode, present channel will zoom. For other modes, the last selected channel will zoom. c. Pan up/down/left/right using the front panel/remote or onscreen (for mouse) arrow buttons. 4. Certain icons will appear on screen while in any display mode. Please refer to the following chart for descriptions: Icon Description On-Screen Position The DVR is in playback mode. Lower left-hand corner A user is not logged in.
ENFORCER DR-1 Series DVR Quick Setup Guide Continued from page 8 Select End: to start playing from latest recorded video. At Select, choose a date and time to from which to start playing video. Select or click the play icon to begin playback from the selected start point. Calendar Search Select Calendar Search from the SEARCH menu. Choose the year and month you wish to view. Choose a day on the calendar and press ENTER.
ENFORCER DR-1 Series DVR Quick Setup Guide Continued from page 9 Ch1 Ch2 Ch3 Ch4 Remote™ 2 1 2010/05/01 PM 12:00:00 Ch5 Ch6 Ch7 Ch8 Ch9 Ch10 Ch11 Ch12 8 3 4 5 6 7 1 3 5 7 9 11 13 15 High Speed 10 Ch13 11 Ch14 12 Ch15 13 9 Ch16 17 15 2 4 6 8 10 12 14 16 19 4:3 100% 14 16 Remote Viewing Software Interface Descriptions 1 Channel images with channel numbers 2 Current date and time 3 Sound ON/OFF 4 Quick Record (press once to assign file and start recording, press again to sto
ENFORCER DR-1 Series DVR Quick Setup Guide Playback: 1. Playback is stopped and started by pressing the PLAY/STOP button on the front panel or remote, or by right clicking the main screen and choosing . 2. Playback will start from wherever the previously displayed recording was stopped. 3. Use the MODE, PLAY/STOP, FREEZE and ZOOM buttons to adjust playback. Using the mouse, right click and select , , or respectively. 4.
ENFORCER DR-1 Series DVR Quick Setup Guide Pin Connection for Alarm I/O & RS-485, and Audio In: Alarm I/O & RS-485: DR-104Q: Pin 1 2 3 4 Connection Alarm Out Open Alarm Out COM RS-485 D+ RS-485 D- Pin 5 6 7 8 Connection Alarm In 1 Alarm In 2 Alarm In 3 Alarm In 4 Pin 9 10 11 12 Connection Alarm Out Close GND GND GND Pin 13 14 15 Connection GND GND GND DR-108Q and DR-116Q: Pin 1 2 3 4 5 6 7 8 9 Connection Alarm Out Open Alarm Out COM RS-485 D+ RS-485 DReserved Alarm In 1 Alarm In 2 Alarm In 3 Alarm