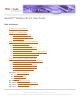
Serial/IPTM Redirector 4.3 User Guide Table of Contents End-User License Agreement Chapter 1 — Getting Started 1.1 A Brief Review of the Basics 1.2 What You Need to Get Started 1.3 Solving Problems Chapter 2 — Installing the Serial/IP Redirector 2.1 Pre-installation Checklist 2.2 Configuring the Serial Server 2.3 Running the Serial/IP Setup Program 2.4 Selecting Serial/IP COM Ports 2.5 Configuring Serial/IP COM Ports in the Control Panel 2.6 Using the Serial/IP Configuration Wizard 2.
1. Getting Started 1.1 A Brief Review of the Basics 1.2 What You Need to Get Started 1.3 Solving Problems 1. Getting Started This chapter provides the basic information you need before installing and using the Serial/IP Redirector. In This Chapter A Brief Review of the Basics About serial servers, the Serial/IP Redirector, and how they work together with your PC applications. What You Need to Get Started The four things you need to install the Serial/IP Redirector software.
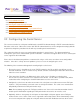
1. Getting Started 1.1 A Brief Review of the Basics 1.2 What You Need to Get Started 1.3 Solving Problems 1.1 A Brief Review of the Basics The Serial/IP Redirector from Tactical Software adds "virtual" COM ports to the Windows operating system. Similar to regular COM ports that allow PC applications to use local serial ports, Serial/IP COM ports allow PC applications to use serial ports on a serial server.
2. Using the manufacturer's instructions, you configure the serial server to make its serial ports available to the network via TCP/IP. 3. You install the Serial/IP Redirector software on each PC that will use devices attached to the serial server. 4. You configure the Serial/IP Redirector to create one or more virtual COM ports. 5. For each Serial/IP COM port, you specify the IP address of a serial server and the TCP port number that provides access to its serial ports. 6.
1. Getting Started 1.1 A Brief Review of the Basics 1.2 What You Need to Get Started 1.3 Solving Problems 1.2 What You Need to Get Started Before you install and use the Serial/IP Redirector, you will need the following: 1. Administrator privileges when you are installing the software. 2. A serial server on your TCP/IP local area network. This server must be configured to provide serial ports to the network using the instructions provided by the manufacturer.
1. Getting Started 1.1 A Brief Review of the Basics 1.2 What You Need to Get Started 1.3 Solving Problems 1.3 Solving Problems If problems are encountered with the Serial/IP Redirector, a number of resources are available to you: ● ● ● ● ● ● For problems during installation, see the section Troubleshooting Installation Problems in Chapter 2. For problems with application operation, see the section Troubleshooting Application Problems in Chapter 3.
2. Installing the Serial/IP Redirector 2.1 2.2 2.3 2.4 2.5 2.6 2.7 Pre-installation Checklist Configuring the Serial Server Running the Serial/IP Redirector Setup Program Selecting Serial/IP COM Ports Configuring Serial/IP COM Ports in the Control Panel Using the Serial/IP Configuration Wizard Troubleshooting Installation Problems 2. Installing the Serial/IP Redirector The Serial/IP Redirector software is installed on a PC by a setup program.
How to proceed if the installation is not trouble-free.
2. Installing the Serial/IP Redirector 2.1 2.2 2.3 2.4 2.5 2.6 2.7 Pre-installation Checklist Configuring the Serial Server Running the Serial/IP Setup Program Selecting Serial/IP COM Ports Configuring Serial/IP COM Ports in the Control Panel Using the Serial/IP Configuration Wizard Troubleshooting Installation Problems 2.1 Pre-Installation Checklist The PC running the Serial/IP Redirector must comply with the following requirements: ● Processor: Intel-compatible, Pentium class.
2. Installing the Serial/IP Redirector 2.1 2.2 2.3 2.4 2.5 2.6 2.7 Pre-installation Checklist Configuring the Serial Server Running the Serial/IP Setup Program Selecting Serial/IP COM Ports Configuring Serial/IP COM Ports in the Control Panel Using the Serial/IP Configuration Wizard Troubleshooting Installation Problems 2.2 Configuring the Serial Server The server must make its serial ports available to the Serial/IP Redirector through a TCP/IP connection from the PC to the serial server.
server. 5. If available, enable the Telnet protocol for incoming TCP/IP connections on the TCP ports (see step 3 above).
2. Installing the Serial/IP Redirector 2.1 2.2 2.3 2.4 2.5 2.6 2.7 Pre-installation Checklist Configuring the Serial Server Running the Serial/IP Setup Program Selecting Serial/IP COM Ports Configuring Serial/IP COM Ports in the Control Panel Using the Serial/IP Configuration Wizard Troubleshooting Installation Problems 2.3 Running the Serial/IP Setup Program Before running the Serial/IP setup program: ● Ensure that you are logged in as a user with administration privileges.
is used, it allows up to 256 Serial/IP COM ports and disables any optional software features. If the same license key is used on more than one PC, the Serial/IP Redirector will display a window listing the IP address of the PC that has the conflicting license key. An updated license key can be entered in this window, after which the Serial/IP Redirector can continue normal operation. Click here for more information.
2. Installing the Serial/IP Redirector 2.1 2.2 2.3 2.4 2.5 2.6 2.7 Pre-installation Checklist Configuring the Serial Server Running the Serial/IP Setup Program Selecting Serial/IP COM Ports Configuring Serial/IP COM Ports in the Control Panel Using the Serial/IP Configuration Wizard Troubleshooting Installation Problems 2.4 Selecting Serial/IP COM Ports The Select Ports Window displays a list of COM ports available to become Serial/IP COM ports.
2. Installing the Serial/IP Redirector 2.1 2.2 2.3 2.4 2.5 2.6 2.7 Pre-installation Checklist Configuring the Serial Server Running the Serial/IP Setup Program Selecting Serial/IP COM Ports Configuring Serial/IP COM Ports in the Control Panel Using the Serial/IP Configuration Wizard Troubleshooting Installation Problems 2.5 Configuring Serial/IP COM Ports in the Control Panel Control Panel Overview The Serial/IP Control Panel window manages the settings for Serial/IP COM Ports.
Note: When you change settings for a COM port, the changes are effective immediately. There is no separate confirmation dialog to confirm or cancel your changes. Configuring Serial/IP COM Ports You configure each Serial/IP COM port as follows: 1. Select a COM port in the list. 2. For IP Address of Server, enter a numeric IP address or a DNS name for the serial server.
3. For Port Number, enter the TCP port number that the serial server uses to provide its serial ports to the network. This TCP port number must be the same as the TCP port number you used when you configured the serial server, as discussed in the previous section Configuring the Serial Server. 4. For Server Credentials, the default is No Login Required.
More About Server Credentials In addition to the No Login Required setting, there are three ways to specify server credentials: 1. Use Windows Credentials • The Serial/IP Redirector will use the user name and password of the current user's Windows login. The user must log off and log back on before this choice is effective. Note: This option is not available in Windows 98/95/Me or multi-user operating systems. 2.
When using Prompt on Port Open, please note: ● ● ● If a user is not logged in at the time a COM port is opened, the Redirect proceeds as if "No Login Required" was selected. This feature is not available on Windows 98, 95, ME, or multi-user versions of Windows like Terminal Services and Citrix. When the Configuration Wizard is run, the Username and Password fields in the Configuration Wizard window are enabled, and those credentials will be used during the Configuration Wizard session.
the connection is restored or the Serial/IP COM port is closed by the PC application. When the Configuration Wizard detects support for the COM Port Control protocol in the serial server, it recommends the following settings: ● ● ● Emulate DTR (unchecked) Emulate DSR always high (unchecked) Emulate DCD always high (unchecked) Adjusting the COM Port options — with the exception of Restore Failed Connections — is not necessary if the serial server supports the COM Port Control protocol.
2. Installing the Serial/IP Redirector 2.1 2.2 2.3 2.4 2.5 2.6 2.7 Pre-installation Checklist Configuring the Serial Server Running the Serial/IP Setup Program Selecting Serial/IP COM Ports Configuring Serial/IP COM Ports in the Control Panel Using the Serial/IP Configuration Wizard Troubleshooting Installation Problems 2.
1. Open the Control Panel and select a Serial/IP COM port from the list at the left. 2. The Control Panel displays settings for this Serial/IP COM port. If they need to be set, refer to Configuring Serial/IP COM Ports in the Control Panel earlier in this chapter. If you provide initial settings for the following, the Configuration Wizard will use them: IP Address of Server, Port Number, and Credentials. 3. Click the Configuration Wizard button to open its window. Running the Configuration Wizard 1.
6. Based on the results of its interaction with the serial server, the Wizard will recommend settings for Connection Protocol and COM Port Options. 7. Click Use Settings to make all settings effective for the current Serial/IP COM port. Click Cancel to discard settings and return to the Serial/IP Control Panel. The Configuration Wizard should be used for each Serial/IP COM port by returning to the Serial/IP Control Panel, selecting each COM port, and re-running the Configuration Wizard.
2. Installing the Serial/IP Redirector 2.1 2.2 2.3 2.4 2.5 2.6 2.7 Pre-installation Checklist Configuring the Serial Server Running the Serial/IP Setup Program Selecting Serial/IP COM Ports Configuring Serial/IP COM Ports in the Control Panel Using the Serial/IP Configuration Wizard Troubleshooting Installation Problems 2.
3. Using the Serial/IP Redirector 3.1 3.2 3.3 3.4 3.5 Checking for Special Application Requirements Modifying Application Settings Troubleshooting Application Problems Monitoring Serial/IP COM Port Activity Tracing Serial/IP COM Port Data 3. Using the Serial/IP Redirector A PC application employs ports on a serial server when it uses the COM ports that are created and managed by the Serial/IP Redirector.
3. Using the Serial/IP Redirector 3.1 3.2 3.3 3.4 3.5 Checking for Special Application Requirements Modifying Application Settings Troubleshooting Application Problems Monitoring Serial/IP COM Port Activity Tracing Serial/IP COM Port Data 3.1 Checking for Special Application Requirements Nearly all Windows applications can use Serial/IP COM ports and serial servers instead of local COM ports. The exceptions mostly fall into two general categories.
3. Using the Serial/IP Redirector 3.1 3.2 3.3 3.4 3.5 Checking for Special Application Requirements Modifying Application Settings Troubleshooting Application Problems Monitoring Serial/IP COM Port Activity Tracing Serial/IP COM Port Data 3.2 Modifying Application Settings For a PC application to use the Serial/IP Redirector and a serial server, its COM port settings must be changed to use Serial/IP COM ports. The general procedure is: 1.
3. Using the Serial/IP Redirector 3.1 3.2 3.3 3.4 3.5 Checking for Special Application Requirements Modifying Application Settings Troubleshooting Application Problems Monitoring Serial/IP COM Port Activity Tracing Serial/IP COM Port Data 3.
3. Using the Serial/IP Redirector 3.1 3.2 3.3 3.4 3.5 Checking for Special Application Requirements Modifying Application Settings Troubleshooting Application Problems Monitoring Serial/IP COM Port Activity Tracing Serial/IP COM Port Data 3.4 Monitoring Serial/IP COM Port Activity The Serial/IP Activity display summarizes the status of all Serial/IP COM ports. To see this display, click on the Port Monitor button in the Serial/IP Control Panel.
● TD is "lit" when transmitting data to the serial server. ● RD is "lit" when receiving data from the serial server. Three more indicators appear only if the serial server supports COM Port Control: ● ● ● TR (DTR) is the signal to the serial port that the PC application has opened the Serial/IP COM port. The most frequent use of DTR is to signal the serial server to disconnect by lowering the DTR line.
3. Using the Serial/IP Redirector 3.1 3.2 3.3 3.4 3.5 Checking for Special Application Requirements Modifying Application Settings Troubleshooting Application Problems Monitoring Serial/IP COM Port Activity Tracing Serial/IP COM Port Data 3.5 Tracing Serial/IP COM Port Data The Serial/IP Trace window can be invaluable in solving difficult configuration problems by showing all interactions between the client application and the remote device.
You can also save files for examination in text editors, such as Windows Notepad, by first running a trace and then by selecting "Copy" from the Edit pull-down menu option. Copy places the text content into the Windows clipboard, where it can then be pasted into any text editor program. Controls in the Trace Window The Trace window provides the following controls: 1. Clear button. This clears the display and resets the trace data collection mechanism. 2. Enable Trace checkbox.
Events Displayed in the Trace Window The Trace window displays a series of events, one event per line. Every event is tagged with the current time (shown in hour:minute:second.millisecond format), and the Serial/IP COM port where the event occurred. There are three types of events: 1. Transmit events. Shown in green and preceded by "»", these indicate that the application software transmitted data to the COM port.
Appendix A: Advanced Settings Appendix A Table of Contents A.1 — Proxy Servers A.1.1 Introduction A.1.2 Using a Proxy Server A.1.3 Troubleshooting A.2 — SSL/TLS Security A.2.1 Introduction A.2.2 Security Issues in Tactical Software Products A.2.3 SSL/TLS Security Features A.2.4 What You Need to Get Started A.2.5 Enabling and Using SSL/TLS Security Features A.2.6 Configuring the Encryption Feature A.2.7 Configuring the Authentication Feature A.2.8 Configuring the Certificate Feature A.2.9 Troubleshooting A.
Appendix A: Advanced Settings A.1. Proxy Servers A.1.1 Introduction A.1.2 Using a Proxy Server A.1.3 Troubleshooting A.1. Proxy Servers Applicable Products The following Tactical Software products support the Proxy Server feature: ● DialOut/Client Redirector ● Serial/IP Redirector ● COM/IP Redirector In This Chapter Introduction About the support for proxy servers in Tactical Software products. Using a Proxy Server How to enable and configure a Tactical Software product to use a proxy server.
Appendix A: Advanced Settings A.1. Proxy Servers A.1.1 Introduction A.1.2 Using a Proxy Server A.1.3 Troubleshooting A.1.1 Introduction The COM/IP, Serial/IP, and DialOut/Client Redirectors support TCP network connections made through proxy servers, which may be controlling access to external networks (such as the Internet) from private networks that lack transparent IP-based routing, such as NAT.
Appendix A: Advanced Settings A.1. Proxy Servers A.1.1 Introduction A.1.2 Using a Proxy Server A.1.3 Troubleshooting A.1.
1. Select the Advanced button in the Tactical Software Redirector's Control Panel window. 2. Select the Proxy Server tab if necessary. 3. Select the checkbox Use a Proxy Server. 4. If the proxy server requires a login, fill in the Username and Password fields. 5. The Protocol Type, IP Address, and Port Number are required fields. If you wish to have the software automatically locate the proxy server and sense the correct settings, select the Auto Detect button.
Technical Notes on the Auto Detect Feature The Auto Detect operation uses the following algorithm: 1. A DNS lookup of “wpad” is attempted. 2. For each IP address returned by the DNS lookup, attempt protocol detection for each supported protocol (SOCKS v5, SOCKS v4, in that order). This is done by attempting a TCP connection to the IANA-defined port for each protocol, then (if successful) attempting proxy operations. 3.
Appendix A: Advanced Settings A.1. Proxy Servers A.1.1 Introduction A.1.2 Using a Proxy Server A.1.3 Troubleshooting A.1.3 Troubleshooting If operation with a proxy server is not working as expected, the following resources may be of help: ● ● ● ● ● ● ● Verify with the "ping" command (in a DOS prompt window) that the proxy server responds at the expected IP address. Use the Test button. This conducts additional checks that can not be readily performed otherwise.
Appendix A: Advanced Settings A.2. SSL/TLS Security A.2.1 A.2.2 A.2.3 A.2.4 A.2.5 A.2.6 Introduction Security Issues in Tactical Software Products SSL/TLS Security Features What You Need to Get Started Enabling and Using SSL/TLS Security Features Configuring the Encryption Feature A.2.7 Configuring the Authentication Feature A.2.8 Configuring the Certificates Feature A.2.9 Troubleshooting A.2.10 COM/IP AT Commands A.2.11 Certificate Authorities A.2.
Configuring the Authentication Feature Being sure the software is communicating with the expected destination. Configuring the Certificate Feature Offering proof of the identity of the local computer. Troubleshooting How to proceed if using SSL/TLS Security is not trouble-free. COM/IP AT Commands Configuring the SSL/TLS Security features using commands to the COM/IP software modem. Certificate Authorities The built-in CA's that are included and used by default.
Appendix A: Advanced Settings A.2. SSL/TLS Security A.2.1 A.2.2 A.2.3 A.2.4 A.2.5 A.2.6 Introduction Security Issues in Tactical Software Products SSL/TLS Security Features What You Need to Get Started Enabling SSL/TLS Security Features Configuring the Encryption Feature A.2.7 Configuring the Authentication Feature A.2.8 Configuring the Certificate Feature A.2.9 Troubleshooting A.2.10 COM/IP AT Commands A.2.11 Certificate Authorities A.2.
Technical Knowledge Assumed in this Chapter This User Guide does not attempt to describe security concepts and technology in detail. For users needing this information, Tactical recommends the book SSL and TLS: Designing and Building Secure Systems by Eric Rescorla (ISBN 0201615983), a respected tutorial and reference that is widely used in the industry.
Appendix A: Advanced Settings A.2. SSL/TLS Security A.2.1 A.2.2 A.2.3 A.2.4 A.2.5 A.2.6 Introduction Security Issues in Tactical Software Products SSL/TLS Security Features What You Need to Get Started Enabling SSL/TLS Security Features Configuring the Encryption Feature A.2.7 Configuring the Authentication Feature A.2.8 Configuring the Certificate Feature A.2.9 Troubleshooting A.2.10 COM/IP AT Commands A.2.11 Certificate Authorities A.2.
A PC application using a serial connection is even simpler, relying on correct physical wiring to secure the data and establish the identities of the connection endpoints.
1. In the Tactical Software product Control Panel, click the Advanced button to get the Advanced Settings dialog window. 2. Select the Certificate tab. 3. Select the checkbox Supply Certificate to Peer. This enables the other controls in the window. 4. In the Certificate File field, enter the filename of a certificate file or use Choose File to specify a file. 5. Click Enter Certificate Password to provide the password for the certificate in the file.
Appendix A: Advanced Settings A.2. SSL/TLS Security A.2.1 A.2.2 A.2.3 A.2.4 A.2.5 A.2.6 Introduction Security Issues in Tactical Software Products SSL/TLS Security Features What You Need to Get Started Enabling SSL/TLS Security Features Configuring the Encryption Feature A.2.7 Configuring the Authentication Feature A.2.8 Configuring the Certificate Feature A.2.9 Troubleshooting A.2.10 COM/IP AT Commands A.2.11 Certificate Authorities A.2.
COM/IP Redirector DialOut/IP, DialOut/EZ, and Serial/IP Redirectors DialOut/Server modem server Secure the data stream in the connection to any TCP/IP network peer Secure the data stream between the user PC and the modem server or serial server Check identity of any TCP/IP connection peer when initiating a connection Provide private key and prove identity when receiving a connection Check the identify of the modem server or serial server Prove identity by supplying own certificate on demand Check th
Appendix A: Advanced Settings A.2. SSL/TLS Security A.2.1 A.2.2 A.2.3 A.2.4 A.2.5 A.2.6 Introduction Security Issues in Tactical Software Products SSL/TLS Security Features What You Need to Get Started Enabling SSL/TLS Security Features Configuring the Encryption Feature A.2.7 Configuring the Authentication Feature A.2.8 Configuring the Certificate Feature A.2.9 Troubleshooting A.2.10 COM/IP AT Commands A.2.11 Certificate Authorities A.2.
Appendix A: Advanced Settings A.2. SSL/TLS Security A.2.1 A.2.2 A.2.3 A.2.4 A.2.5 A.2.6 Introduction Security Issues in Tactical Software Products SSL/TLS Security Features What You Need to Get Started Enabling SSL/TLS Security Features Configuring the Encryption Feature A.2.7 Configuring the Authentication Feature A.2.8 Configuring the Certificate Feature A.2.9 Troubleshooting A.2.10 COM/IP AT Commands A.2.11 Certificate Authorities A.2.
The SSL/TLS Security option is available only if the Tactical Software product has been installed with a license key that enables it. 1. Enter the Control Panel for the Tactical Software product. 2. If the checkbox named Enable SSL/TLS Encryption is missing, the license key used to install this copy of the Tactical Software product does not enable the SSL/TLS Security features. To remedy this: ❍ ❍ Obtain a license key that does enable the SSL/TLS Security features.
Appendix A: Advanced Settings A.2. SSL/TLS Security A.2.1 A.2.2 A.2.3 A.2.4 A.2.5 A.2.6 Introduction Security Issues in Tactical Software Products SSL/TLS Security Features What You Need to Get Started Enabling SSL/TLS Security Features Configuring the Encryption Feature A.2.7 Configuring the Authentication Feature A.2.8 Configuring the Certificate Feature A.2.9 Troubleshooting A.2.10 COM/IP AT Commands A.2.11 Certificate Authorities A.2.
1. In the Control Panel, click the Advanced button to get the Advanced Settings dialog window. 2. Select the Encryption tab. 3. In the Encryption Strength group, select Minimum and Maximum strengths in their respective dropdown lists. The highest value available for Maximum is limited by the product license key used to install this copy of the software. 4. In the Encryption Ciphers group, select one or more cipher suites. 5. Verify that at least one cipher appears in the Cipher Set Preview display.
Appendix A: Advanced Settings A.2. SSL/TLS Security A.2.1 A.2.2 A.2.3 A.2.4 A.2.5 A.2.6 Introduction Security Issues in Tactical Software Products SSL/TLS Security Features What You Need to Get Started Enabling SSL/TLS Security Features Configuring the Encryption Feature A.2.7 Configuring the Authentication Feature A.2.8 Configuring the Certificate Feature A.2.9 Troubleshooting A.2.10 COM/IP AT Commands A.2.11 Certificate Authorities A.2.
1. In the Tactical Software product Control Panel, click the Advanced button to get the Advanced Settings dialog window. 2. Select the Authentication tab. 3. Select the checkbox Require Validated Certificate. This enables the other controls in the window. 4. In the Validate Criteria group, select the checkbox for each certificate field that must be checked when validating a certificate. 5. For each field, enter the data that the field must match.
Appendix A: Advanced Settings A.2. SSL/TLS Security A.2.1 A.2.2 A.2.3 A.2.4 A.2.5 A.2.6 Introduction Security Issues in Tactical Software Products SSL/TLS Security Features What You Need to Get Started Enabling SSL/TLS Security Features Configuring the Encryption Feature A.2.7 Configuring the Authentication Feature A.2.8 Configuring the Certificate Feature A.2.9 Troubleshooting A.2.10 COM/IP AT Commands A.2.11 Certificate Authorities A.2.
Appendix A: Advanced Settings A.2. SSL/TLS Security A.2.1 A.2.2 A.2.3 A.2.4 A.2.5 A.2.6 Introduction Security Issues in Tactical Software Products SSL/TLS Security Features What You Need to Get Started Enabling SSL/TLS Security Features Configuring the Encryption Feature A.2.7 Configuring the Authentication Feature A.2.8 Configuring the Certificate Feature A.2.9 Troubleshooting A.2.10 COM/IP AT Commands A.2.11 Certificate Authorities A.2.
Appendix A: Advanced Settings A.2. SSL/TLS Security A.2.1 A.2.2 A.2.3 A.2.4 A.2.5 A.2.6 Introduction Security Issues in Tactical Software Products SSL/TLS Security Features What You Need to Get Started Enabling SSL/TLS Security Features Configuring the Encryption Feature A.2.7 Configuring the Authentication Feature A.2.8 Configuring the Certificate Feature A.2.9 Troubleshooting A.2.10 COM/IP AT Commands A.2.11 Certificate Authorities A.2.
Encryption Protocol (AT+SPROTO) This command allows the application to query and set what encryption protocol is to be used, currently either TCP (i.e., no encryption) or TLS.
following command: AT+SCS=56,128,RC4,DES Entries may be omitted from the list, in which case the defaults from the GUI are used.
negotiated on the last TCP connection, the command processor simply emits “OK”. Certificate Required (AT+SCR) This command allows the application to set and query whether the remote endpoint must present a valid certificate at the beginning of the SSL/TLS session. It is of the format: AT+SCR=[0,1] If the application specifies 0, no certificate checking is performed. If the application specifies 1, then certificate checking is performed in accordance with the following two commands.
AT+SCA= The is the field within the certificate, and may be one of the following values: C: Country S: State L: Locality O: Organization OU: Organizational Unit CN: Common Name EM: Email Address The is a literal string with the addition of three tokens: %h which means the hostname of the remote peer, %i which means the IP Address of the remote peer.
OK Certificate Presentation (AT+SCP) This command allows the application to set and query the filename of the SSL/TLS certificate. It is of the format: AT+SCP= The specifies the file that contains the certificate (in PEM format). If any passwords for the private key have been specified previously, they are cleared. If no file is specified, then no certificate will be made available to the remote peer.
For example: AT+SCPW? NONE OK AT+SCP=c:\sample.
Appendix A: Advanced Settings A.2. SSL/TLS Security A.2.1 A.2.2 A.2.3 A.2.4 A.2.5 A.2.6 Introduction Security Issues in Tactical Software Products SSL/TLS Security Features What You Need to Get Started Enabling SSL/TLS Security Features Configuring the Encryption Feature A.2.7 Configuring the Authentication Feature A.2.8 Configuring the Certificate Feature A.2.9 Troubleshooting A.2.10 COM/IP AT Commands A.2.11 Certificate Authorities A.2.
SIA S.p.A. Saunalahden Serveri SecureNet Swisskey AG TC TrustCenter for Security in Data Networks GmbH Thawte Consulting The USERTRUST Network ValiCert, Inc. VeriSign, Inc.
Appendix A: Advanced Settings A.3. Options A.3. Options The Options tab of the Advanced Settings window provides control of infrequently used settings. This tab is present only in the redirector products, and only the applicable settings appear in each product. Delay COM Port Closure • All Redirectors Products: All redirectors. Default value: 8000 (8 seconds) This setting changes the number of milliseconds that the COM port will be considered open after an application closes it.
Products: All redirectors except COM/IP. Default setting: Enabled. When enabled, the redirector uses the Nagle algorithm to coalesce small TCP/IP packets in the connection to the server. This incurs a minor latency impact on the data stream, which is irrelevant to nearly all applications. Include Domain in Windows Credentials Products: All redirectors except COM/IP and DialOut/Client. Default setting: Enabled.
Appendix Appendix B. Using a Presets File Presets are a convenient way to quickly change the settings that are associated with a COM port. Rather than retype an IP address, TCP port number and all the other configuration settings, you can keep them in a comma-delimited text file and then use an optional Presets pull-down menu to access them conveniently. The Presets file is a text file containing the preset values. It must be named "presets.
The Preset File Format The text file format for Serial/IP is as follows:
Server 2,10.0.0.
Appendix Appendix C. Configuration Wizard Messages Status Panel The following messages may appear in the Status panel: Server connection failure. The Wizard window here shows a simple communication problem. In this case, the Wizard indicates that it cannot connect to the IP address and TCP port number set for this Serial/IP COM port. Normal progress messages. When the Wizard's work proceeds normally, the messages summarize the interaction with the server.
1. Verify that your serial server is at the IP address you expect. 2. Verify your server configuration is providing devices for access at the TCP port number you expect. Note: In many cases the Port Number is determined when the serial server is configured. There is no "correct" value that works for every type of serial server. User authentication error messages.
The Log panel can also contain error messages showing error codes that sometimes relate to specific causes. They include: CONNREFUSED Most likely cause: The TCP port number is incorrect, or the serial server is not properly configured to accept connections at that port number. NETUNREACH, TIMEDOUT, or HOSTUNREACH Most likely cause: The IP address number is incorrect. NAMETOOLONG, AFNOSUPPORT Most likely cause: The IP address as entered is a malformed hostname.
Appendix Appendix D. Basic Diagnostics Windows utilities and administration commands can serve as basic independent diagnostics that help debug problems relating to Serial/IP Redirector installation or configuration of the serial server. Use "ping" to Check the Network Connection Ensure that the PC is connected to the server using the Microsoft TCP/IP networking software supplied with Windows.
Use "telnet" to Check the Serial Server Type the telnet command from the DOS prompt to establish a connection to one of the ports on the server. This, in turn, opens a Telnet window session. Note: You can run the telnet command from a DOS prompt, or by using the Run command in the Start menu. If your server has a name on your network, you may be able to use the server´s name instead of the numeric address.
Serial/IP Redirector User Guide Appendix Appendix E.
| | Client Functions > > > > NETWORK > > > Server Functions Server Functions < < < < NETWORK < < < Client Functions Figure 3. Both computers can initiate connections. Accepting Inbound Connections Only If a Serial/IP COM port is configured to only accept connections: ? ? ? ? ? ? User Credentials are disabled. The Configuration Wizard is unavailable. Deferred Port Open is disabled. While waiting for an inbound connection, data sent to the COM port by the application is discarded.
Tactical Software End-User License Agreement THIS TACTICAL SOFTWARE END USER LICENSE AGREEMENT (this “Agreement”) IS A BINDING AGREEMENT BETWEEN TACTICAL SOFTWARE, LLC (“Tactical”) AND THE INDIVIDUAL, COMPANY, ORGANIZATION OR OTHER ENTITY (“Licensee”) ACQUIRING THE LICENSE TO USE THE SOFTWARE PRODUCT (AS DEFINED IN SECTION 1) PURSUANT TO THIS AGREEMENT.
(a) Licensee may not, and Licensee may not permit others, to (i) reverse engineer, decompile, or disassemble the Software Product, or otherwise attempt to derive the source code of the Software Product, except to the extent (if at all) expressly permitted under any applicable law.
8. WARRANTY; LIMITATIONS (a) Notwithstanding anything to the contrary in this Agreement, the Software Product is delivered to Licensee for the Evaluation Period “AS IS”, without any warranty of any kind, whether express or implied. Without limiting the generality of the foregoing, the Limited Warranties (as defined in Section 8(d)) do not apply during the Evaluation Period.
WILL TACTICAL BE LIABLE FOR ANY DAMAGES WHATSOEVER IN EXCESS OF THE AMOUNT PAID TO TACTICAL FOR THE SOFTWARE PRODUCT THAT IS THE SUBJECT MATTER OF THE CLAIM OR THAT IS DIRECTLY RELATED TO THE CAUSE OF ACTION. 11. TERM AND TERMINATION (a) This Agreement shall become effective upon installation of the Software Product and shall terminate automatically and immediately upon breach of this Agreement by Licensee, if any.
(c) for any end-use that is prohibited by United States law and the laws of the jurisdiction in which the Software Product was obtained. Licensee represents and warrants that Licensee is not located in, under control of, or a national or resident of any such country or on any such list and that no U.S. federal agency has suspended, revoked, or denied Licensee's import or export privileges. 14.