300 IEM Series Instruction manual
Contents Contents Important safety instructions ........................................................................................................................ 2 The evolution wireless series ew 300 IEM G3 ................................................................................................ 3 The frequency bank system ........................................................................................................................... 4 Product overviews ...........................
Important safety instructions Important safety instructions System • Read this instruction manual. • Keep this instruction manual. Always include this instruction manual when passing the products on to third parties. • Heed all warnings and follow all instructions in this instruction manual. • Only clean the products when they are not connected to the mains. Use a cloth for cleaning. • Only use attachments/accessories specified by Sennheiser.
The evolution wireless series ew 300 IEM G3 • Danger due to high volumes This product is also intended for professional use. Commercial use is subject to the safetyat-work regulations. Sennheiser, as the manufacturer, is therefore obliged to expressly point out possible health risks arising from use. This product is capable of producing sound pressure exceeding 85 dB(A).
The frequency bank system The frequency bank system Transmitter and receiver are available in 6 UHF frequency ranges with 1,680 frequencies per frequency range: Range A: 516 – 558 Range G: 566 – 608 Range B: 626 – 668 Range C: 734 – 776 Range D: 780 – 822 Range E: 823 – 865 Each frequency range (A–E, G) offers 26 frequency banks with up to 16 channels each: Channel 1 – frequency preset Channel 2 – frequency preset Frequency bank 1...
Product overviews Product overviews Overview of the SR 300 IEM G3 transmitter PEAK PEAK 0 0 -10 -10 -20 -20 -30 -30 -40 -40 AF I AF II Stereo Transmitter A B.Ch: 1. 1 EQ Standard -18dB Stereo Transmitter SR 300 IEM FREQ Range-D 780-822 MHz B 0682 ew300IEM 519.
Product overviews Overview of the displays of the SR 300 IEM G3 transmitter After switch-on, the transmitter displays the standard display. PEAK PEAK 0 -10 -20 -30 -40 0 -10 -20 -30 -40 B.Ch: 1. 1 ew300IEM 519.
Product overviews Overview of the EK 300 IEM G3 diversity receiver 쐋 On/off/volume control Charging contacts 3.
Product overviews Overview of the displays of the EK 300 IEM G3 diversity receiver After switch-on, the diversity receiver displays the standard display “Frequency/Name”. For further illustrations and examples of the different standard displays, refer to page 18. The standard display displays the operating states of the diversity receiver. The display backlighting is automatically reduced after approx. 20 seconds. 519.
Putting the devices into operation Putting the devices into operation Putting the SR 300 IEM G3 transmitter into operation When using more than one transmitter, we recommend connecting remote antennas and, if necessary, using Sennheiser antenna accessories. Fore more information, visit the ew G3 product page at www.sennheiser.com. Setting up the transmitter on a flat surface Place the transmitter on a flat, horizontal surface. Please note that the device feet can leave stains on delicate surfaces.
Putting the devices into operation Mounting the transmitter into a 19” rack Do not fit the device feet when mounting the transmitter into a 19” rack. CAUTION! Risks when rack mounting the transmitter! When installing the device in a closed or multi-rack assembly, please consider that, during operation, the ambient temperature, the mechanical loading and the electrical potentials will be different from those of devices which are not mounted into a rack.
Putting the devices into operation Rack mounting two transmitters To mount two transmitters into a rack using the GA 3 rack adapter: 왘 Place the two transmitters side by side upside-down onto a flat surface: 왘 Secure the jointing plate to the transmitters using six recessed head screws (M 3x6). 왘 Secure the rack mount “ears” to the transmitters as described on page 9. To mount the antennas: 왘 Use remote antennas, if necessary in conjunction with the AC 3 antenna combiner.
Putting the devices into operation Connecting devices to the input sockets 왘 Use a suitable cable to connect the output of an external device (e.g. a mixing console or an PUSH PUSH additional SR 300 IEM G3) to the input socket BAL AF IN L(I) and/or BAL AF IN R(II) (see also page 13). L(I) BAL AF IN +22dBu MAX 왘 Adjust the output level of your external device. 왘 Via the operating menu, adjust the transmitter’s input sensitivity.
Putting the devices into operation Daisy chaining audio signals You can transmit the same audio signal (e.g. the sum of all audio signals) to several diversity receivers of a multi-channel system. To do so, you have to daisy chain this audio signal from one transmitter to the next via the output sockets LOOP OUT BAL L(I) or LOOP OUT BAL R(II) . The audio signal is then transmitted by all transmitters on one of the two audio channels L(I) or R(II).
Putting the devices into operation Putting the EK 300 IEM G3 diversity receiver into operation Inserting the batteries/accupack For powering the diversity receiver, you can either use two 1.5 V AA size batteries or the rechargeable Sennheiser BA 2015 accupack. 왘 Open the battery compartment by pushing the two catches in the direction of the arrows and open the cover . 왘 Insert the two batteries or the accupack as shown above. Please observe correct polarity when inserting the batteries/accupack.
Putting the devices into operation Attaching the diversity receiver to clothing You can use the belt clip to attach the diversity receiver to clothing (e.g. belt, waistband). The belt clip is detachable so that you can also attach the diversity receiver with the antenna pointing downwards. To do so, withdraw the belt clip from its fixing points and attach it the other way round. The belt clip is secured so that it cannot slide out of its fixing points accidentally.
Using the devices Using the devices To establish a transmission link, proceed as follows: 1. Switch the transmitter on. 2. Switch the diversity receiver on. The transmission link is established. It is vital to observe the notes on frequency selection on page 27. If you cannot establish a transmission link between transmitter and receiver: 왘 Make sure that transmitter and receiver are set to the same frequency bank and to the same channel – the easiest way is to synchronize the devices (see page 20).
Using the devices When in the operating menu, pressing the STANDBY button will cancel your entry (ESC function) and return you to the standard display. The STANDBY button is backlit in red both during operation and in standby mode. To completely switch the transmitter off: 왘 Disconnect the transmitter from the mains by unplugging the mains unit from the wall socket. The backlighting of the STANDBY button goes off.
Using the devices Selecting a standard display on the diversity receiver ESC 왘 Press the ESC button to select a standard display. In stereo mode, you can alternatively press the rocker button. Contents of the display 519.150 MHz ew300 IEM RF AF P MUTE B.CH 1.1 Lim: - 6dB RF AF P 519.
Using the devices The lock mode icon of the transmitter or the lock mode icon of the diversity receiver flashes prior to the lock mode being activated again. B.Ch: 1. 1 ew300IEM 519.150 MHz EQ Standard -18dB 519.150 MHz ew300 IEM RF AF P MUTE Adjusting the audio channels on the transmitter Via the “Mode” menu item, you can adjust the audio channels. 왘 Select “Stereo” if you want to transmit two separate audio signals on channel I and channel II (e.g.
Using the devices Synchronizing transmitters and EK 300 IEM G3 receivers via the infra-red interface Synchronization allows you to quickly and easily transfer transmitter and receiver settings from one device to the other, especially if you want to configure a multi-channel system. There are two transfer directions: 1.
Using the devices Carrying out an Easy Setup Sync or a Sync function The following assumes that you are using the Easy Setup Sync function for setting up a multichannel system. You can also you the Easy Setup Sync function for establishing a transmission link between one transmitter and one EK 300 IEM G3 receiver. Easy Setup Sync Sync 왘 Switch all transmitters and one diversity 왘 Switch your transmitter and your diverreceiver on. sity receiver on.
Using the devices Easy Setup Sync Either: Sync – 왘 Store the frequency bank and channel setting by pressing the jog dial on your transmitters. The RF signal is activated. You can carry out the Sync function (see right-hand column) at a later time to establish a transmission link between transmitters and receivers. Or: – 왘 Immediately synchronize your receivers with your transmitters by carrying out the Sync function (see right-hand column).
Using the operating menus Using the operating menus The buttons of the SK 300 IEM G3 transmitter Button Function of the button Press the STANDBY button • Switches the transmitter on and off • Cancels the entry and returns to the standard display (ESC function) • Activates/deactivates the RF signal (special function, see page 19) Press the jog dial • Changes from the standard display to the operating menu • Calls up a menu item • Enters a submenu • Stores the settings and returns to the operating menu
Using the operating menus Overview of the operating menus For more detailed information on the operating menus, refer to the instruction manuals of the transmitter and the diversity receiver which can be downloaded from www.sennheiser.com.
Using the operating menus Display Function of the menu item Warnings Activates/deactivates the warning messages (color change and warning messages) LCD Contrast Adjusts the contrast of the display panel in 16 steps Reset Resets the transmitter When resetting the transmitter, only the selected settings for the pilot tone and for the frequency banks “U1” to “U6” remain unchanged. For an overview of the factory-preset default settings, refer to the supplied frequency information sheet.
Using the operating menus Display Function of the menu item “Easy Setup” Reset List Releases all locked frequency presets Current List Selects an unused frequency preset Scan New List Scans for unused receiving frequencies (frequency preset scan) Exit Exits the submenu “Easy Setup” and returns to the main menu Extended menu “Advanced Menu” Tune Sets the receiving frequencies for the frequency banks “U1” to “U6” Special function: Sets a channel and a receiving frequency for the frequency banks “U
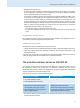
Synchronizing the transmitter with the diversity receiver Synchronizing the transmitter with the diversity receiver When synchronizing the transmitter with the receiver, please observe the following: 왘 Only use a transmitter and a receiver from the same frequency range (see the type plate on the transmitter and the receiver). 왘 Make sure that the desired frequencies are listed in the enclosed frequency information sheet.
Cleaning the devices Using freely selectable frequencies You can also freely select the frequencies and store these frequencies in the frequency banks “U1” to “U6”. If you want to use the frequency banks “U1” to “U6”: 왘 Make sure to use transmitters and receivers from the same frequency range (see page 4 and the type plates of the devices). To ensure that the desired frequencies are intermodulation-free: 왘 Contact your Sennheiser partner (see www.sennheiser.com).
If a problem occurs ... If a problem occurs ... SR 300 IEM G3 transmitter Problem Possible cause Possible solution Transmitter cannot be operated, “Locked” appears on the display panel Lock mode is activated Deactivate the lock mode (see page 18 and page 24). No operation indication No mains connection Check the connections of the mains unit. No RF signal at the receiver Synchronize the transmitter with the receiver (see page 20).
If a problem occurs ... EK 300 IEM G3 diversity receiver Problem Possible cause Possible solution Receiver cannot be operated, “Locked” appears on the display panel Lock mode is activated Deactivate the lock mode (see page 18). No operation indication Batteries are flat or accupack is flat Replace the batteries or recharge the accupack (see page 14). No RF signal Transmitter and receiver are not on the same channel Set the transmitter and receiver to the same channel.
If a problem occurs ...
If a problem occurs ... NT 2-3 mains unit Input voltage Current consumption Output voltage Secondary output current Temperature range 100 to 240 V~, 50/60 Hz max. 120 mA 12 V 400 mA –10°C to +40°C In compliance with Europe EMC EN 55022, EN 55024, EN 55014-1/-2 EN 60065 Safety USA Canada 47 CFR 15 subpart B ICES 003 The mains unit is certified in accordance with the legal safety requirements of Europe, the United States, Canada, Russia and Japan.
If a problem occurs ... Approved by Canada Industry Canada RSS 123 IC 2099A-G3SREK300 limited to 806 MHz Connector assignment SR 300 IEM G3 transmitter ¼’’ (6.3 mm) stereo jack plug, balanced (BAL AF IN/LOOP OUT) XLR-3F connector, balanced (BAL AF IN) + 2 DC connector for power supply 1 3 ¼’’ (6.3 mm) mono jack plug, unbalanced ¼’’ (6.3 mm) stereo jack plug for headphone output EK 300 IEM G3 receiver 3.
Manufacturer Declarations Manufacturer Declarations Warranty Sennheiser electronic GmbH & Co. KG gives a warranty of 24 months on this product. For the current warranty conditions, please visit our web site at www.sennheiser.com or contact your Sennheiser partner.
Manufacturer Declarations Statements regarding FCC and Industry Canada These devices comply with Part 15 of the FCC Rules and with RSS-210 of Industry Canada. Operation is subject to the following two conditions: (1) these devices may not cause harmful interference, and (2) these devices must accept any interference received, including interference that may cause undesired operation.
Sennheiser electronic GmbH & Co. KG Am Labor 1, 30900 Wedemark, Germany www.sennheiser.com Printed in Germany Publ.