
User Guide


Using the devices
16
Using the devices
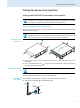
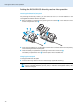
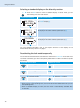
To establish a transmission link, proceed as follows:
1. Switch the transmitter on.
2. Switch the diversity receiver on.
The transmission link is established.
If you cannot establish a transmission link between transmitter and receiver:
왘 Make sure that transmitter and receiver are set to the same frequency bank and to the
same channel – the easiest way is to synchronize the devices (see page 20).
왘 If necessary, read the chapter “If a problem occurs ...” on page 29.
Switching the devices on/off
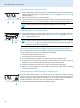
Switching the SR 300 IEM G3 transmitter on/off
To switch the transmitter on (online operation):
To switch the transmitter on and to deactivate the RF signal on switch-on (offline operation):
To activate the RF signal:
To switch the transmitter to standby mode:
왘 If necessary, deactivate the lock mode (see page 18).
It is vital to observe the notes on frequency selection on page 27.
왘 Press the STANDBY button .
The transmitter switches on and the standard display appears.
The transmitter transmits an RF signal and the transmission icon
is displayed
.
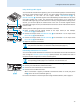
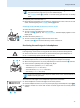
왘 Press the STANDBY button until “RF Mute On?” appears on the display panel.
왘 Press the jog dial.
The transmission frequency is displayed but the transmitter does not transmit
an RF signal. The transmission icon
is not displayed
.
In addition, the display
backlighting changes from orange to red and “RF Mute” flashes in alternation
with the standard display.
Use this function to prepare a transmitter for use during live operation without
causing interference to existing transmission links.
왘 Briefly press the STANDBY button .
“RF Mute Off” appears on the display panel.
왘 Press the jog dial.
The transmission icon
is displayed again.
왘 Keep the STANDBY button pressed until “OFF” appears on the display panel.
The transmitter switches to standby mode.