
Instructions for use
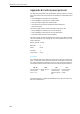


Table Of Contents
- Thank you for choosing Sennheiser!
- Contents
- Important safety instructions
- Important safety information
- SDC 8200 - the digital conference and interpretation system
- Overview of the components of the SDC 8200 system
- The components of the SDC 8200 system in detail
- Operating the components of the SDC 8200 system
- Turning the conference and interpretation system on/off
- Operating the delegate units
- Operating the VIP units
- Operating the chairman unit
- Operating the interpreter consoles
- Adjusting the volume and the middle and treble response of the headphones connected to the interpreter console
- Adjusting the volume of the interpreter consoles’ built-in loudspeakers
- Configuring the B-channel of an interpreter console
- Setting the channel to be output via the interpreter console’s built-in loudspeaker
- Selecting an interpretation channel
- Using the interpreter console
- Switching between the A-channel and the B-channel
- Muting the microphone of the interpreter console
- Displaying text messages on the interpreter console’s display
- Operating the central unit
- Structuring the SDC 8200 system
- Interconnecting the conference/interpreter consoles
- Connecting cable strings to a central unit
- Interconnecting up to twelve SDC 8200 CU central units
- The three expansion stages
- Determining maximum cable lengths
- Structuring an interpretation system
- Selectable modes between or within interpreter booths
- Using external equipment
- Setting up the SDC 8200 system
- Preparing the SDC 8200 system components for set up
- Interconnecting the SDC 8200 system components
- Connecting additional equipment
- Connecting external audio sources
- Setting up remote conferences
- Connecting PA systems, recording units, etc.
- Pin assignment of the 15-pole sub-D socket (AUX OUT 2-3-4-5-6)
- Connecting an SDC 8200 AO analog output unit to the SDC 8200 CU central unit
- Connecting several SDC 8200 AO analog output units to the SDC 8200 CU central unit
- Connecting external equipment to the SDC 8200 AO’s phoenix connector
- Connecting a PC to the central unit
- Configuring the SDC 8200 system
- Introduction to the central unit’s operating menu
- The start display
- The six main menus
- The submenus of the “Conference” menu (part 1 of 7)
- The submenus of the “Conference” menu (part 2 of 7)
- The submenus of the “Conference” menu (part 3 of 7)
- The submenus of the “Conference” menu (part 4 of 7)
- The submenus of the “Conference” menu (part 5 of 7)
- The submenus of the “Conference” menu (part 6 of 7)
- The submenus of the “Conference” menu (part 7 of 7)
- The submenus of the “Interpretation” menu (part 1 of 5)
- The submenus of the “Interpretation” menu (part 2 of 5)
- The submenus of the “Interpretation” menu (part 3 of 5)
- The submenus of the “Interpretation” menu (part 4 of 5)
- The submenus of the “Interpretation” menu (part 5 of 5)
- The submenus of the “Aux-In/Out” menu (part 1 of 8)
- The submenus of the “Aux-In/Out” menu (part 2 of 8)
- The submenus of the “Aux-In/Out” menu (part 3 of 8)
- The submenus of the “Aux-In/Out” menu (part 4 of 8)
- The submenus of the “Aux-In/Out” menu (part 5 of 8)
- The submenus of the “Aux-In/Out” menu (part 6 of 8)
- The submenus of the “Aux-In/Out” menu (part 7 of 8)
- The submenus of the “Aux-In/Out” menu (part 8 of 8)
- The submenus of the “System” menu (part 1 of 2)
- The submenus of the “System” menu (part 2 of 2)
- The submenus of the “Language” and the “License” menu (part 1 of 1)
- Setting the volume of the consoles’ built-in loudspeakers
- Configuring the conference system
- Automatically initializing all conference consoles
- Manually initializing all conference consoles
- Loading the factory-preset default configuration for the conference system
- Adding a conference console to an already existing configuration
- Removing a conference console from an already existing configuration
- Reserving a microphone number
- Selecting a conference mode
- Setting the speaker limit
- Adjusting the audio settings for the consoles’ built-in loudspeakers
- Adjusting the audio settings for the consoles’ microphones
- Configuring additional chairman units (Chairmen)
- Deleting the list of chairman units (Chairmen)
- Configuring additional VIP units (VIP)
- Deleting the list of VIP units (VIP)
- Activating/deactivating the special rights of the VIP units (VIP)
- Resetting the conference system (Reset)
- Testing the consoles’ built-in loudspeakers
- Testing the consoles’ microphones
- Activating/deactivating the flashing of the signal light ring
- Configuring the display of the voting options
- Configuring the interpretation system
- Working with the interpreter configuration
- Creating a new interpreter configuration
- Modifying the currently active interpreter configuration
- Loading a previously saved interpreter configuration
- Options
- Setting the max. number of interpreter booths/languages
- Setting the max. number of interpreter consoles per booth
- Configuring the operating mode between booths
- Configuring the operating mode within a booth
- Configuring the language options for the interpreter booths
- Configuring the main target language (A-channel) of a booth
- Configuring the second target language (B-channel) of a booth
- Enabling the auto-relay interpretation function (Auto-floor)
- Half-automatically initializing all interpreter consoles on the central unit
- Manually assigning an interpreter console an individual booth number
- Manually assigning an interpreter console an individual desk number (interpreter console number)
- Displaying the booth and desk number of an interpreter console
- Adding interpreter consoles to an existing configuration
- Loading the factory-preset default configuration for the interpretation system
- Resetting the interpretation system
- Configuring the audio inputs and outputs of the central unit and the anaolog output unit
- Choosing the audio inputs and outputs
- Adjusting the volume of the audio outputs
- Adjusting the volume differences between the Aux Out 1 outputs
- Assigning a channel to an audio output
- Turning on/off the audio inputs or outputs
- Adjusting the volume differences between the headphone outputs
- Configuring the audio outputs for remote conferencing
- Turning on/off an external equalizer
- Adjusting the input level of an audio input
- Adjusting the input sensitivity of an audio input
- Configuring the outputs of the SDC 8200 AO analog output unit
- Making a system diagnosis
- Configuring connected additional components
- Software, language and license
- Introduction to the central unit’s operating menu
- If problems occur...
- Accessories
- Specifications
- Appendix A: Camera control protocol
- Appendix B: Control panel protocol
- Appendix C: Repeater for the SDC 8200 system
- Manufacturer declarations

Manufacturer declarations
125
Manufacturer declarations
Warranty regulations
The guarantee period for this Sennheiser product is 24 months from the
date of purchase. Excluded are accessory items, rechargeable or disposable
batteries that are delivered with the product; due to their characteristics
these products have a shorter service life that is principally dependent on
the individual frequency of use.
The guarantee period starts from the date of original purchase. For this
reason, we recommend that the sales receipt be retained as proof of pur-
chase. Without this proof (which is checked by the responsible Sennheiser
service partner) you will not be reimbursed for any repairs that are carried
out.
Depending on our choice, guarantee service comprises, free of charge, the
removal of material and manufacturing defects through repair or replace-
ment of either individual parts or the entire device. Inappropriate usage
(e.g. operating faults, mechanical damages, incorrect operating voltage),
wear and tear, force majeure and defects which were known at the time of
purchase are excluded from guarantee claims. The guarantee is void if the
product is manipulated by non-authorised persons or repair stations.
In the case of a claim under the terms of this guarantee, send the device,
including accessories and sales receipt, to the responsible service partner.
To minimise the risk of transport damage, we recommend that the original
packaging is used. Your legal rights against the seller, resulting from the
contract of sale, are not affected by this guarantee.
The guarantee can be claimed in all countries outside the U.S. provided
that no national law limits our terms of guarantee.
Use only original Sennheiser accessories (see “Accessories” on page 115)
or the warranty becomes null and void.
CE Declaration of Conformity
This equipment is in compliance with the essential requirements and other
relevant provisions of Directives 89/336/EC or 73/23/EC. The declaration
is available on the internet site at www.sennheiser.com.
Before putting the equipment into operation, please observe the respec-
tive country-specific regulations!
FCC Rules
This equipment has been tested and found to comply with the limits for a
Class B digital device, pursuant to Part 15 of the FCC Rules. These limits are
designed to provide reasonable protection against harmful interference in
a residential installation. This equipment generates, uses and can radiate
radio frequency energy and, if not installed and used in accordance with
the instructions, may cause harmful interference to radio communications.
However, there is no guarantee that interference will not occur in a partic-