
Instruction manual SKM 100 G3


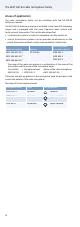

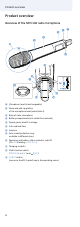
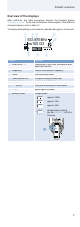
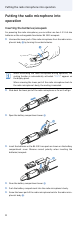
Table Of Contents
- Important safety instructions
- The SKM 100 G3 radio microphone family
- Delivery includes
- Product overview
- Putting the radio microphone into operation
- Using the radio microphone
- Using the operating menu
- Adjusting settings via the operating menu
- The main menu “Menu”
- The extended menu “Advanced Menu”
- Setting transmission frequencies and the frequency bank “U” – “Tune”
- Setting a transmission frequency for the current channel
- Selecting a channel and assigning this channel a frequency
- Activating/deactivating the pilot tone transmission – “Pilot Tone”
- Adjusting the contrast of the display panel – “LCD Contrast”
- Loading the factory-preset default settings – “Reset”
- Displaying the software revision – “Software Revision”
- Adjustment tips
- Cleaning the radio microphone
- If a problem occurs ...
- Specifications

6
Product overview
Product overview
Overview of the SKM 100 radio microphone
쐃 Microphone head (interchangeable)
쐇 Name and pick-up pattern
of the microphone head (siehe Seite 4)
쐋 Body of radio microphone
쐏 Battery compartment (not vi
sible from outside)
쐄 Display panel, backlit in orange
쐂 Infra-red interface
쐆 Antenna
쐊 Color-coded protection ring;
avai
lable in different colors
쐎 Operation and battery status indicator, red LED
(lit =
ON/flashing = LOW BAT)
쐅 Charging contacts
쐈 Multi-function switch:
(DOWN), (UP) and (SET)
쐉 ON/OFF button
(serves as the ESC (cancel) key in the operating menu)
쐊
쐇
쐋
쐏
쐄
쐂
쐆
쐉
쐅
쐅
쐎
쐅
쐊
쐈