APCC Sensys Networks VDS240 Wireless Vehicle Detection System Access Point Controller Card (APCC) Installation Guide P/N 152-240-030-005, Rev F June 2015
Document Properties This document is reference material for the Sensys Networks VDS240 wireless vehicle detection system from Sensys Networks, Inc. P/N 152-240-030-005 Rev F Sensys Networks, Inc. makes no representation or warranties with respect to the contents hereof and specifically disclaims any implied warranties of merchantability or fitness for any particular purpose.
Lithium Thionyl Chloride Batteries Sensys Networks uses Lithium Thionyl Chloride batteries in the following products: Sensors (VSN240-F, VSN240-T, VSN240-S, VSN240-M, VSN240-F-2, VSN240-T-2) Repeaters (RP240-BH-2, RP240-BH-LL-2, FLEX-RP-B-2, FLEX-RP-B-LL-2) Lithium batteries are widely used in electronic products because they contain more energy per unit -weight than conventional batteries.
Sensys Networks Technical Publications For additional information regarding Sensys Networks products and applications, design guides, configuration guides, and best practices, refer to the Sensys Networks technical documents library available at http://sensysnetworks.com/ resources?tech_docs. Contact Information Sensys Networks, Inc. 1608 Fourth Street, Suite 200 Berkeley, CA 94710 USA +1 (510) 548-4620 www.sensysnetworks.
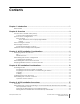
Contents Chapter 1: Introduction ............................................................................................... 1 What's Inside ..................................................................................................................................1 Chapter 2: Overview ................................................................................................... 3 Access Point Controller Card (APCC) ...........................................................................
Exception ........................................................................................................................19 Setting the Shelf-Number With Circuit-board Dip Switch SW1 ........................................19 Determining the Controller Type and Setting it via Circuit-board Dip Switch SW1 .............19 Connecting the Cables to Each Device .................................................................................20 Cabling Summary ............................................
Appendix B: Circuit-board Dip Switch SW1 Settings ............................................... 49 Settings for Shelf Number ...........................................................................................................49 Settings for TS1 and TS2 Controllers ...........................................................................................50 Appendix C: Circuit-board Dip Switch SW2 Settings .............................................. 51 Settings for Slot Number ..................
viii Access Point Controller Card (APCC) Installation Guide Sensys Networks, Inc.
Chapter 1 Introduction This guide provides information and procedures for installing Sensys Networks Access Point Controller Card (APCC) and the APCC Serial Port Protocol (SPP) digital radio in conjunction with the Sensys Networks VDS240 wireless vehicle detection system.
Chapter 1 Appendix B: Circuit-board Dip Switch SW1 Settings, depicts SW1 settings that identify the shelf number portion of the unique card address. Appendix C: Circuit-board Dip Switch SW2 Settings, depicts combinations of switch settings on the circuit-board dip switch SW2. Appendix D: Pre-Installation Worksheets, provides worksheets for capturing pre-installation information.
Chapter 2 Overview This chapter provides an overview of the APCC and its additional components. The chapter also describes the contents of a product shipment. Access Point Controller Card (APCC) The Sensys Networks VDS240 Wireless Vehicle Detection System detects the presence and movement of vehicles with magneto-resistive sensors mounted in the pavement.
Chapter 2 Types of APCC Configurations The APCC single-slot configuration consists of dual APCC radio ports, Sensys Networks Expansion (EX) port, and contact closure interface via backplane to a traffic controller. It also has dual USB 2.0 full speed host ports and 10/100Base-T network access. The APCC dual-slot configuration adds an SD memory card, realtime battery-backed clock, dual serial (DB9) interface, or an optional built in cellular modem. Figure 2.1.
Overview APCC Serial Port Protocol (SPP) Digital Radio The APCC, along with the SPP, maintains two-way wireless links to an installation’s sensors and repeaters, establishes overall time synchronization, and transmits configuration commands and message acknowledgements. Figure 2.3.
Chapter 2 Product Description APCC-M APCC Module APCC-M-E APCC Module with Enhanced Ethernet APCC-MP-E APCC Module with Peripheral Support and Enhanced Ethernet APCC-MP-EG APCC Module with Peripheral Support and Enhanced Ethernet, GSM APCC -MP-EV APCC with Peripheral Support and Enhanced Ethernet, Verizon EX240 Expansion Card for Type 170, Type 2070, or NEMA TS1 or TS2 traffic controllers Table 1. APCC models SPP Package Contents Each SPP is shipped with the items listed below.
Overview Universal Mounting Kit Contents The following parts are included in the SPP mounting kit: SPP ball plate (rectangular, attached to the SPP at the factory, refer to Figure 2.5) Figure 2.5. Factory installed ball plate (rectangular) Surface mounting ball plate (square, refer to Figure 2.6) Figure 2.6. Surface (wall/beam/pole) mounting ball plate (square) Double socket arm (refer to Figure 2.7) Figure 2.7. Double socket arm Sensys Networks, Inc.
Chapter 2 5-foot clamp band Clamp fastener Additional Parts and Equipment Required Additional parts and equipment required for installation and configuration of a APCC include the following: RJ45 jack kit and crimp tool Cable ties NOTE: Standard Ethernet compatible, outdoor rated, 4-pair CAT5 (or better) cable (refer to Notes below) PC or laptop with Microsoft® Windows® XP Professional or Windows 7 (including 64-bit editions) and TrafficDOT, the system management software tool from
Chapter 3 APCC Installation Considerations This chapter provides the installation considerations for the APCC. Prior to installing an APCC ensure that the following aspects have been considered in the site design. 1. Identify the devices that will be used with the APCC (refer to Identifying the SPP and Sensors). 2. Determine the configuration of the APCC (refer to Determining the Device Configuration). 3.
Chapter 3 Wireless Sensors Each channel of an APCC interfaces a designated set of sensors to a designated contact closure. Ensure information describing which sensor (or sensors) will actuate a given APCC is available. NOTE: Wireless sensors have a unique identifier known as the Sensor ID. Use this identifier to refer to sensors in design notes and plans.
APCC Installation Considerations Configuration Element Example Data Options 5. Channel Holdover Setting 0 -.75 seconds in .05 second increments 0 6. Channel Status Communications LED-only | LED and Tone LED APCC identifier (from APCC) 192.2.68.100 Distance from APCC (without Isolator) 328 feet (100 meters) – 10BaseT 6 feet List of wireless sensor for the channel (use SensorIDs of each sensor) 0707 AC15 020D Other Information (Optional) Table 2.
Chapter 3 Mapping Wireless Sensors to Contact Closures The final installation consideration for contact closure cards are the assignment of sensors to specific channels. The four channels represent independent contact closures which, in turn, are actuated by the vehicle detection events transmitted by a defined group of wireless sensors. Each sensor may be associated with zero or one Card ID/Channel combinations.
Chapter 4 SPP Installation Considerations This chapter provides the installation considerations for the SPP. Prior to installing the SPP, ensure that the following aspects have been considered in the site design. Powering the SPP Collecting Data From the APCC Determining the Location of the SPP Each consideration is discussed below.
Chapter 4 Figure 4.1. SPP radio powered from a traffic controller Acquiring Power From Traffic Controller Using an Isolator An optional isolator can be used when acquiring power from the traffic controller as shown in following figure. Figure 4.2. SPP radio powered from a traffic controller 14 Access Points Controller Card (APCC) Installation Guide Sensys Networks, Inc.
SPP Installation Considerations Voltages The APCC uses the following voltages drawn from one of the following sources: 20VDC – 28 VDC (24 VDC nominal) – typically supplied from a nearby traffic controller cabinet or power pole 10VDC – 16 VDC (12 VDC nominal) – typically supplied from a solar panel Cabling Standard Ethernet compatible, outdoor rated, 4-pair CAT5 or better cable is required. The maximum cable length is 328 feet (100 meters) or 2,000 ft (610 meters) with isolator.
Chapter 4 are within recommended distances for the APCC, (optional) isolator, and wireless sensors allow the SPP to be mounted with its bulkhead connector and cellular antenna (if applicable) pointed toward the ground are within specified cable length limits do not submit the SPP to avoidable vibration, shaking, or movement are reasonably accessible to field support personnel 16 Access Points Controller Card (APCC) Installation Guide Sensys Networks, Inc.
Chapter 5 APCC Installation Procedures This chapter provides the instructions for installing and cabling an APCC.
Chapter 5 Factory Default Card ID Card IDs are implemented on Sensys Networks contact closure cards via two dip switches found on the side of the card. In this guide, the switches – named SW1 and SW2 respectively – are referred as circuit-board dip switches to differentiate them from other dip switches on the front-panel of contact closure cards. A default Card ID of “03-15” is assigned at the factory and is shown in the following figure.
APCC Installation Procedures NOTE: After the cabinet backplane is queried for an address, be sure to take the APCC card out of X-mode by setting front-panel dip switch 2 to the right, and resetting the card. Setting the Slot-Number With Circuit-board Dip Switch SW2 Circuit-board dip switch SW2 implements the slot number component of the Card ID. Set switch SW2 to match the value derived from the figure in Appendix A subject to the exception noted below.
Chapter 5 Connecting the Cables to Each Device Cable the devices according to the steps below. Refer to the section Cabling Summary below for figures that depict the supported cabling schemes. NOTE: The steps below are for a system configuration that contain an optional isolator, and an EX card. A figure of a minimal cabling configuration is shown in the Cabling Summary section. 1.
APCC Installation Procedures Figure 5.2. Cabling an isolator and hub or switch to an APCC Cabling Summary The cabling to connect an APCC, SPP, and laptop is shown in the following figure. Figure 5.3. Cabling a PC or laptop Sensys Networks, Inc.
Chapter 5 22 Access Point Controller Card (APCC) Installation Guide Sensys Networks, Inc.
Chapter 6 SPP Installation Procedures This chapter provides the instructions for installing and mounting an SPP. Installing an SPP consists of the following: Attaching the square surface mounting ball plate to an available vertical surface Attaching the SPP to the surface mounting ball plate via the double socket arm Mounting hardware is included in the universal mounting kit provided with each SPP.
Chapter 6 2 straight-through Cat5 Ethernet cables – each approximately three feet in length; used in installations where the SPP is connected to a contact closure card in a controller cabinet. Additional straight-through Cat5 Ethernet cables – optional; each approximately one foot in length; these cables are used to daisy chain multiple contact closure cards. Required only in the case of multiple CC/EX cards.
SPP Installation Procedures Figure 6.2. Clamp band threading through surface mounting ball plate 4. Use the cloth to clean the area of the pole that will meet the ball plate. Remove the double stick tape cover from the back of the plate, wrap the clamp band around the pole, and attach the second (non-engaged) end of the fastener. Tighten the clamp to secure it. 5. Attach the double socket arm to the square ball plate. 6. Attach the SPP ball plate to the other end of the double socket arm. Figure 6.3.
Chapter 6 Determining the Type of SPP Radio Bulkhead Connector The bulkhead connector mechanism used on SPPs from Sensys Networks is one type: Hex-head type Refer to the following figure to determine the proper installation procedure. SPP Radio Bulkhead Connector Figure 6.4. SPP radio bulkhead connector type: hex-head Figure 6.4 shows the SPP hex-head connector.
SPP Installation Procedures NOTE: Figures in this section depict only one of the bushings. The procedures apply equally to either bushing. Figure 6.5. Components used with the hex-head bulkhead connector Step-by-Step Procedures 1. Remove the factory installed hex-head cap from the bottom of the SPP and set it aside. The cap may be discarded after the cable has been completely connected. Figure 6.6. Remove the factory-installed cap 2.
Chapter 6 Figure 6.7. Inspect the factory-installed gasket Replace the gasket if it does not uniformly seat or shows signs of fatigue or wear. (When replacing an SPP, always use a new gasket.) NOTE: Use gaskets from Sensys Networks only. Never substitute a different gasket; doing so exposes the device to environmental risk and voids the product warranty. Figure 6.8. Replace damaged or used gaskets 3. Thread the cable through the Connector A as shown in the following figure. Figure 6.9.
SPP Installation Procedures 4. Thread the cable through Connector B as shown in the following figure. Figure 6.10. Thread cable through connector B 5. Inspect the outer diameter (OD) of the Ethernet cable. Use the following chart to select one of the provided bushings based on the cable OD. NOTE: Use only one bushing. Discard the other bushing after the job is complete. Figure 6.11. Ethernet cable bushing chart (not to scale) 6.
Chapter 6 Proper Fit (little to no gap between edges of cut) Figure 6.13. Correct fit: bushing closes fully around cable with little or no gap Improper Fit (gap between edges of cut) Figure 6.14. Incorrect fit: bushing does not close fully around cable leaving large gap 7. Connect the cable to the RJ45 input jack on the bottom of the SPP. Figure 6.15. Connect cable to input jack 8. Thread Connector B onto the hex-head nut on the bottom of the SPP and tighten by hand until it no longer turns easily.
SPP Installation Procedures Figure 6.16. Thread connector B onto the SPP and hand tighten 9. Slide the cable bushing toward the SPP and fully insert it into the guide fingers on Connector B as shown in the following figure. Proper fit is achieved when the edge of the bushing is flush with the edge of the guide fingers. Figure 6.17. Slide cable bushing fully into connector B Proper Fit (bushing fully seated into guides) Figure 6.18. Proper fit of cable bushing into connector B Sensys Networks, Inc.
Chapter 6 Improper Fit (bushing poorly seated into guides) Figure 6.19. Improper fit of cable bushing into connector B 10. Thread Connector A onto Connector B and tighten by hand until it no longer turns easily. NOTE: Snug Connector A down by hand. Do not over-tighten or use tools. Figure 6.20. Thread connector A onto connector B and hand tighten 11. Inspect the seating of the bushing by looking at it from the exposed cable end of Connector A.
SPP Installation Procedures Proper Fit (recessed bushing, smooth face) Figure 6.21. Proper fit of the cable bushing inside connector A Improper Fit (bushing not recessed, pinched edge, mushroomed face) Figure 6.22. Improper fit of the cable bushing inside connector A Figure 6.23. Removing the Cable Connection Perform procedure above in reverse to remove the cable from the SPP. Sensys Networks, Inc.
Chapter 6 34 Access Point Controller Card (APCC) Installation Guide Sensys Networks, Inc.
Chapter 7 Configuration This chapter explains how to configure channels and other operating elements of contact closure cards in the APCC and EX cards. NOTE: Prior to configuring channels, ensure that each contact closure card has been given a unique Card ID. Refer to the Identifying the SPP and Sensors section in the Installation Considerations chapter for more information. Overview Each channel of an APCC or EX card is configured separately.
Chapter 7 Configuration Methods Configuration occurs through two mutually exclusive choices: (i) the card's frontpanel interface or (ii) with TrafficDOT, the system management application from Sensys Networks.
Configuration Figure 7.1. Configuration via the front-panel interface Saving the Configuration After the MASTER RESET button is pressed, the LINK LED flashes. When the flashing stops, the settings have been stored in flash memory. The sections below give examples of setting specific configurations via the frontpanel interface. The procedures may be performed in any order or combination. Enabling / Disabling a Channel APCC and EX cards ship with channels one and two enabled.
Chapter 7 Specifying the Channel Mode Contact closure cards operate in either pulse or presence mode. (Refer to the Sensys Networks VDS240 Wireless Vehicle Detection System Reference Guide for information about the operating modes.) Follow these steps to specify the operating mode of the channel. 1. Position front-panel dip switch 7 to the left to select presence mode or to the right to select pulse mode. Figure 7.3. Selecting the channel operating mode with front-panel switch 7 2.
Configuration Figure 7.4. Setting a delay or extension with front-panel dip switches 5 and 6 (rotary switch not shown) NOTE: This step is optional; set both dips to right-hand position to disable the feature. Additionally, front-panel switches 5 and 6 are ignored for channels operating in pulse mode. 2. Press the Enter button for five seconds to save the configuration to flash memory or continue with other configuration activities described in this section.
Chapter 7 Figure 7.5. Setting the channel monitor buzzer with front-panel dip switch 1 2. Press the Enter button for five seconds to save the configuration to flash memory or continue with other configuration activities described in this section. Starting TrafficDOT and Connecting to an APCC TrafficDOT is a configuration manager and monitoring tool for an access point and all its associated devices (sensors, repeaters, and contact closure cards).
Configuration Figure 7.6. TrafficDOT Main and Connect windows 2. Type the IP address of the APCC into the IP Address field and accept the default value in the TCP Port field. Click Connect. 3. After clicking Connect, wait a moment for the Main window. Figure 7.7. Map view Sensys Networks, Inc.
Chapter 7 Configuring Channels with TrafficDOT To select an controller card for configuration, click a controller card on your image map. The Controller Card Configuration window displays. Figure 7.8. Controller Card Configuration window Entering controller card information To enter controller card information, select the controller card image on the map and enter the information into the Configuration Panel, or drag and drop a sensor onto the controller card icon, and then enter the information.
Configuration Figure 7.9. Controller Card Channels tab Configuring Channel State Contact closure card channels are independent of one another and are individually configured. Each channel occupies one of the following states: Enabled – the channel is operational; Sensor event data collected by the access point is transmitted to the contact closure card. Disabled – the channel is not operational. (When a channel is disabled, its contact closure relay and status relay are continuously open.
Chapter 7 Configuring Presence Mode Modifier The behavior of a channel operating in presence mode may adjusted by applying one of the following modifiers: Delay – defers the onset of the contact closure by a specified duration. If a vehicle moves off of the sensor before the specified delay expires, the contact does not close. Delay is expressed in seconds from zero to 31. Extension – increases the duration of the contact closure by a specified increment.
Configuration Figure 7.10. Card Addresses window 3. Select a Shelf number, a Slot number, and a Channel from the drop-down lists. NOTE: The C button clears the data in that row. 4. Click Apply to save configuration. NOTE: To assign a sensor to multiple controller channels, supply entries to the additional Card Addresses areas. Exiting TrafficDOT End the TrafficDOT session by selecting Disconnect from the Connect menu. Sensys Networks, Inc.
Chapter 7 46 Access Point Controller Card (APCC) Installation Guide Sensys Networks, Inc.
Appendix A X Mode LED Displays for Slot Numbers This appendix depicts the channel LED displays when an APCC operates in X mode. When a card is configured in X mode, the front-panel channel LEDs display one of the patterns shown in the figure below. Match the pattern of the front-panel channel LEDs to a pattern in the figure. Use the corresponding value found under the heading Address as the slot-number portion of the Card ID. (Refer to Examples after the figure.) Sensys Networks, Inc.
Appendix A Figure A.1. Channel LED display / slot number combinations Examples 1. All fours channel LEDs lighted indicates slot number 15. 2. Single lighted LED on channel 2 indicates slot number 4. 48 Access Point Controller Card (APCC) Installation Guide Sensys Networks, Inc.
Appendix B Circuit-board Dip Switch SW1 Settings This appendix depicts combinations of switch settings on the circuit-board dip switch SW1. Settings for Shelf Number The figure below depicts SW1 settings that identify the shelf number portion of the unique card address. NOTE: The small, slide switches are referred to by number [1-4] starting with the left-most switch. Switches three and four of SW1 are not used in setting the shelf number. Sensys Networks, Inc.
Appendix B Figure B.1. SW1 settings for shelf number (switches 1 and 2 only) Settings for TS1 and TS2 Controllers The following figure depicts SW1 settings that identify the type of traffic controller. Type 170 and TS1 controllers are set the same way. Figure B.2. SW1 settings for TS controller types (switch 3 only) NOTE: Slide switches one, two, and four are not used in setting the controller type. 50 Access Point Controller Card (APCC) Installation Guide Sensys Networks, Inc.
Appendix C Circuit-board Dip Switch SW2 Settings This appendix depicts combinations of switch settings on the circuit-board dip switch SW2. Settings for Slot Number Circuit-board switch SW2 is used to designate the slot number portion of a contact closure card's Card ID. The switch combinations and the slot number values they represent are shown in the following figure. (Slot number values appear beneath the switches.) Sensys Networks, Inc.
Appendix C Figure C.1. SW2 settings for slot number 52 Access Point Controller Card (APCC) Installation Guide Sensys Networks, Inc.
Appendix D Pre-Installation Worksheets This appendix provides worksheets for capturing pre-installation information. Refer to the chapter APCC Installation Considerations for more information. Configuration Element Options Value 1. Card identifier (Defined by the traffic controller or installer) 2. Channel 1, 2, 3, 4 3. Channel State Enabled | Disabled 4. Channel Mode Pulse | Presence 4a. Presence Mode Modifier (applicable only to channels in presence mode) 4b.
Appendix D Configuration Element Options Distance from Sensys APCC (without Isolator) 328 feet (100 meters) - 10BaseT List of Wireless Sensor for the Channel (use SensorIDs of each sensor) Value Table 4. Channel configuration worksheet Card ID Channel (1 - 4) Sensor ID Channel Extension (opt.) Location / Lane / Description (opt.) Table 5. Sensor-to-channel mapping worksheet 54 Access Point Controller Card (APCC) Installation Guide Sensys Networks, Inc.
Appendix E Contact Closure Card External Interfaces This appendix shows the connector pin assignments for the external interfaces of contact closure master and expansion cards. Sensys Networks, Inc.
Appendix E Backplane Edge Connections Pin Function (TS1 mode) Function (TS2 mode) 1 Not connected Channel 1 Delay enable 2 Not connected Channel 2 Delay enable 3 Address 3 Address 3 4 Daisy chain RS485 Uplink + Daisy chain RS485 Uplink + 5 Daisy chain RS485 Uplink - Daisy chain RS485 Uplink - 6 Address 0 Address 0 7 Not connected Channel 1 status 8 Daisy chain RS485 Downlink + Daisy chain RS485 Downlink + 9 Daisy chain RS485 Downlink - Daisy chain RS485 Downlink - 10 Address
Contact Closure Card External Interfaces Pin Function (TS1 mode) Function (TS2 mode) H Channel 1 emitter Channel 1 emitter J Not connected Not connected K Not connected Not connected L Chassis Ground Chassis Ground M AC power neutral AC power neutral N AC power line AC power line P Not connected Not connected R Not connected Not connected S Channel 3 collector Channel 3 collector T Channel 3 emitter Channel 3 emitter U Not connected Not connected V Not connected Not co
Appendix E IN RJ45 Connector Pin Assignments Pin Function on CC Card Function on EX Card 1 Not connected Daisy Chain RS485 Downlink + 2 Not connected Daisy Chain RS485 Downlink - 3 Not connected Daisy Chain Uplink + 4 RS485+ Not connected 5 RS485- Not connected 6 Not connected Daisy Chain RS485 Uplink - 7 +48V Not connected 8 48V Return Not connected Table 2.