
Installation Guide

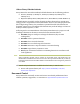


Table Of Contents
- Sensys Networks VDS240 Wireless Vehicle Detection System
- Access Point Controller Card (APCC) Installation Guide
- Contents
- Introduction
- Overview
- Access Point Controller Card (APCC)
- Types of APCC Configurations
- APCC Package Contents
- SPP Package Contents
- Additional Parts and Equipment Required
- 1. Cabling – a minimum of one straight-through Ethernet cables are required.
- 2. Laptop PC and TrafficDOT software – if contact closure cards will be configured via TrafficDOT's GUI, a suitable host is required.
- 3. Contact closure card functions can be configured from the switches on the front panel eliminating the need for a laptop PC and TrafficDOT.
- APCC Installation Considerations
- SPP Installation Considerations
- APCC Installation Procedures
- SPP Installation Procedures
- Tools Required for SPP Installation
- Step-by-Step Procedures
- Installing the Mounting Plate on Poles
- Installing the Mounting Plate on Walls
- Installing the Mounting Plate on Beams
- Determining the Type of SPP Radio Bulkhead Connector
- Connecting the Cable to an SPP Radio with the Hex-head Connector
- Step-by-Step Procedures
- Figure 6.6. Remove the factory-installed cap
- Figure 6.7. Inspect the factory-installed gasket
- Figure 6.8. Replace damaged or used gaskets
- Figure 6.9. Thread cable through connector A
- Figure 6.10. Thread cable through connector B
- Figure 6.11. Ethernet cable bushing chart (not to scale)
- Figure 6.12. Fit bushing onto cable between connector A and connector B
- Proper Fit (little to no gap between edges of cut)
- Improper Fit (gap between edges of cut)
- Proper Fit (bushing fully seated into guides)
- Improper Fit (bushing poorly seated into guides)
- Proper Fit (recessed bushing, smooth face)
- Improper Fit (bushing not recessed, pinched edge, mushroomed face)
- Removing the Cable Connection
- Configuration
- Overview
- Configuring Channels With the Front-Panel Interface
- Starting TrafficDOT and Connecting to an APCC
- Configuring Channels with TrafficDOT
- Defining Sensor-to-Channel Mappings
- Exiting TrafficDOT
- X Mode LED Displays for Slot Numbers
- Circuit-board Dip Switch SW1 Settings
- Circuit-board Dip Switch SW2 Settings
- Pre-Installation Worksheets
- Contact Closure Card External Interfaces

vi Access Point Controller Card (APCC)
Installation Guide Sensys Networks, Inc.
Exception ........................................................................................................................19
Setting the Shelf-Number With Circuit-board Dip Switch SW1 ........................................19
Determining the Controller Type and Setting it via Circuit-board Dip Switch SW1 .............19
Connecting the Cables to Each Device .................................................................................20
Cabling Summary .......................................................................................................................21
Chapter 6: SPP Installation Procedures .................................................................... 23
Tools Required for SPP Installation .............................................................................................23
Step-by-Step Procedures ...........................................................................................................24
Installing the Mounting Plate on Poles ...............................................................................24
Installing the Mounting Plate on Walls ...............................................................................25
Installing the Mounting Plate on Beams .............................................................................25
Determining the Type of SPP Radio Bulkhead Connector ..............................................26
SPP Radio Bulkhead Connector ...................................................................................26
Connecting the Cable to an SPP Radio with the Hex-head Connector .......................26
Components ...................................................................................................................26
Step-by-Step Procedures .....................................................................................................27
Proper Fit (little to no gap between edges of cut) ....................................................30
Improper Fit (gap between edges of cut) ..................................................................30
Proper Fit (bushing fully seated into guides) ...............................................................31
Improper Fit (bushing poorly seated into guides) ......................................................32
Proper Fit (recessed bushing, smooth face) ...............................................................33
Improper Fit (bushing not recessed, pinched edge, mushroomed face) ..............33
Removing the Cable Connection ......................................................................................33
Chapter 7: Configuration .......................................................................................... 35
Overview ......................................................................................................................................35
Configuration Methods ........................................................................................................36
Configuring Channels With the Front-Panel Interface ............................................................36
General Procedure ..............................................................................................................36
Saving the Configuration ..............................................................................................37
Enabling / Disabling a Channel ..........................................................................................37
Specifying the Channel Mode ............................................................................................38
Setting a Presence Mode Modifier (Optional) ..................................................................38
Using Delay and Extension ............................................................................................38
Specifying the Type of Communication Used by the Channel Status Monitor ............39
Starting TrafficDOT and Connecting to an APCC ...................................................................40
Configuring Channels with TrafficDOT ......................................................................................42
Entering controller card information ..................................................................................42
Configuring Channel State .................................................................................................43
Configuring Channel Mode ................................................................................................43
Configuring Presence Mode Modifier ................................................................................44
Configuring Channel Holdover Duration ...........................................................................44
Defining Sensor-to-Channel Mappings ....................................................................................44
Exiting TrafficDOT .........................................................................................................................45
Appendix A: X Mode LED Displays for Slot Numbers .............................................. 47
Examples ......................................................................................................................................48