
User's Manual
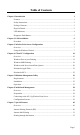
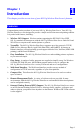


Table Of Contents
- Chapter 1 Introduction
- Chapter 2 LAN Installation
- Chapter 3 Wireless Print Server Configuration
- Chapter 4 Client PC Configuration
- Chapter 5 BiAdmin Management Utility
- Chapter 6 Web-Based Management
- Chapter 7 Special Features
- Chapter 8 Troubleshooting
- Appendix A Specifications
- Appendix B Windows Server Configuration
- Appendix C Unix Systems
- Appendix D NetWare

Page 7
3
Chapter 3
Wireless Print Server
Configuration
This chapter provides an overview of the configuration process.
Overview
The 802.11g Wireless Print Server is designed to support many different platforms, and the
configuration required would depend upon the environment in which it is installed.
• The 802.11g Wireless Print Server usually requires configuration, but if there's a DHCP
server on your network, then the device is just plug-and-play. A Windows-based setup
Wizard is also provided on the CD-ROM to simplify this task.
• PCs wishing to use the printer attached to the 802.11g Wireless Print Server always
require configuration. See Chapter 4- Client Configuration for details.
• If you wish to use a queue-based printing system using Windows NT Server/Windows
2000/Windows XP, the Network Server must be configured as detailed in Appendix B -
Windows Server Configuration. However, it is not necessary to use a Network Server-
based queue; client PCs can print directly to the 802.11g Wireless Print Server using the
Peer-to-peer Printing installed by the User setup option on the CD-ROM.
Configuration Methods
The following methods are available to perform the required Print Server configuration:
• Windows-based Wizard - see below for details.
• BiAdmin management utility program - see Chapter 5 for details.
• Web-based setup - see Chapter 6 for details.
Advanced Configuration and Management
The BiAdmin management utility is provided for advanced configuration and management.
This program is installed by default when the Administrator install option is chosen. See
Chapter 5 for details on using BiAdmin.
Using the Windows Wizard
The Windows-based Wizard is supplied on the CD-ROM, and runs on Windows 95, 98,
NT4.0, ME, Windows 2000 and Windows XP.
Using this Wizard is the recommended method to configure the Print Server.
It can be used configure the 802.11g Wireless Print Server for your Network environment,
even if the Print Server does not have a valid IP address.
Procedure
1. Insert the supplied CD-ROM into your drive. If the setup program does not start
automatically, run SETUP.exe in the root folder.
2. On the first screen, shown below, click Setup Wizard.