
User's Manual
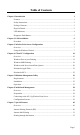


Table Of Contents
- Chapter 1 Introduction
- Chapter 2 LAN Installation
- Chapter 3 Wireless Print Server Configuration
- Chapter 4 Client PC Configuration
- Chapter 5 BiAdmin Management Utility
- Chapter 6 Web-Based Management
- Chapter 7 Special Features
- Chapter 8 Troubleshooting
- Appendix A Specifications
- Appendix B Windows Server Configuration
- Appendix C Unix Systems
- Appendix D NetWare

Page 5
Diagnostic Push Button
The 802.11g Wireless Print Server is fitted with a Diagnostic Push Button. The button is
recessed; a pin or paper clip can be used to press it. This button has 2 functions:
• Restore the factory default settings
• Print a test page containing all current settings.
To restore the factory default settings:
1. Turn the 802.11g Wireless Print Server OFF.
2. Press and hold the diagnostic button. While pressing the button, switch the 802.11g
Wireless Print Server ON.
3. If you continue pressing the button for 10 seconds, a diagnostic page will be printed,
showing the new (default) settings.
To generate a Diagnostic print out
1. Ensure that both the 802.11g Wireless Print Server and the printer attached to port 1 are
ON.
2. Press the diagnostic button, and hold it in for 2 seconds.
3. The test page, containing the current settings, will be printed.
Note:
PostScript printers are unable to print this page. If you have a PostScript printer on Port 1,
the test page will not be printed.