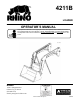
4211B LOADER Part No. F-4253C Published 02/10 OPERATOR’S MANUAL This Operator's Manual is an integral part of the safe operation of this machine and must be maintained with the unit at all times. READ, UNDERSTAND, and FOLLOW the Safety and Operation Instructions contained in this manual before operating the equipment. C01Cover RHINO ® 1020 S. Sangamon Ave. Gibson City, IL 60936 800-446-5158 Email: parts@servis-rhino.com ©2010 Alamo Group Inc. $0.
To the Owner/Operator/Dealer All implements with moving parts are potentially hazardous. There is no substitute for a cautious, safe-minded operator who recognizes the potential hazards and follows reasonable safety practices. The manufacturer has designed this implement to be used with all its safety equipment properly attached to minimize the chance of accidents. BEFORE YOU START! Read the safety messages on the implement and shown in your manual.
TABLE OF CONTENTS SAFETY SECTION .............................................................................................................. 1-1 General Safety Instructions and Practices ......................................................................................................... 1-2 Operator Safety Instructions and Practices ....................................................................................................... 1-4 Equipment Operation Safety Instructions and Practices .......
Transporting the Tractor and Implement .......................................................................................................... 4-38 Transporting on Public Roadways ................................................................................................................... 4-40 Hauling the Tractor and Implement .................................................................................................................. 4-42 TROUBLESHOOTING GUIDE ................................
SAFETY SECTION Safety Section 1-1
SAFETY General Safety Instructions and Practices SAFETY A careful operator is the best operator. Safety is of primary importance to the manufacturer and should be to the owner/operator. Most accidents can be avoided by being aware of your equipment, your surroundings, and observing certain precautions. The first section of this manual includes a list of Safety Messages that, if followed, will help protect the operator and bystanders from injury or death.
SAFETY Never allow children to operate, ride on, or come close to the Tractor or Implement. Usually, 16-17 year-old children who are mature and responsible can operate the implement with adult supervision, if they have read and understand the Operator’s Manuals, been trained in proper operation of the tractor and Implement, and are physically large enough to reach and operate the controls easily. (SG-11) Never allow children or other persons to ride on the Tractor or Implement.
SAFETY Operator Safety Instructions and Practices Never operate the Tractor or Implement until you have read and completely understand this Manual, the Tractor Operator’s Manual, and each of the Safety Messages found in the Manual or on the Tractor and Implement. Learn how to stop the tractor engine suddenly in an emergency. Never allow inexperienced or untrained personnel to operate the Tractor or Implement without supervision.
SAFETY Prolonged operation may cause operator boredom and fatigue affecting safe operation. Take scheduled work breaks to help prevent these potentially impaired operating conditions. Never operate the Implement and Tractor in a fatigued or bored mental state which impairs proper and safe operation. (SG-32) Use extreme caution when getting onto the Implement to perform repairs, maintenance and when removing accumulated material. Only stand on solid flat surfaces to ensure good footing.
SAFETY The Boom is designed only to position and operate the Bucket which is attached to it. Never attempt to lift, pull, or push other solid objects with the boom or bucket. Serious injury could result from a structural failure when the Boom is used for purposes other than those for which it was designed.
SAFETY Keep bystanders 10 feet away from the tractor and loader while operating. The bystanders could enter the path of the tractor or items could fall from the loader resulting in serious injury to the bystander. (SL-01) Before dismounting the tractor and loader lower the loader to the ground or onto solid support blocks. Engage the loader valve travel lock to prevent inadvertent movement of the valve controls causing the loader to suddenly move and drop.
SAFETY Only mount the loader on a tractor that is listed on the mounting instructions. Never mount on a tricycle steering front axle. Move the tractor front and rear wheels to the widest spacing and add the recommended rear tractor ballast to prevent tractor tip over. Keep the tractor tires properly inflated. Maintain at least 25% of the total Tractor and Loader weight including the maximum load in the bucket or attachment on the rear axle.
SAFETY Do not operate the loader from the ground. Operate the tractor and loader only while seated in the tractor seat with the seatbelt fastened. The loader could fall crushing a person resulting in serious injury or death. (SL-16) Use extreme care when piling material above 6 feet high. Material could shift and fall onto the operator or bystanders. The material could crush or suffocate the operator or bystander resulting in serious injury or death.
SAFETY Operate the tractor and loader only in conditions where you have clear visibility in daylight or with adequate artificial lighting. Never operate in darkness or foggy conditions where you cannot clearly see at least 100 feet in front and to the sides of the tractor. Make sure you can clearly see bystanders, ditches, steep slopes, drop-offs, overhead obstructions, power lines, and debris or obstruction in the travel path. If you are unable to clearly see these types of items discontinue operating.
SAFETY Connecting or Disconnecting Implement Safety Instructions and Practices Do not stand or allow bystander or coworkers between the loader and the tractor while installing or disconnecting the loader from the tractor. Keep hands and body clear of the loader and the loader mounts. Serious injury or death can result from a person being crushed between the tractor and loader. (SL-03) Make sure the loader is properly attached to the tractor and the retaining pins securely lock the loader into position.
SAFETY Transporting Safety Instructions and Practices Transport only at speeds where you can maintain control of the equipment. Serious accidents and injuries can result from operating this equipment at high speeds. Understand the Tractor and Implement and how it handles before transporting on streets and highways. Make sure the Tractor steering and brakes are in good condition and operate properly.
SAFETY Lower the loader to the bed of the truck or trailer when transporting the tractor and loader with a truck. Measure to ensure the transport height does not exceed the legal limits. Contact with overhead obstructions or power lines can cause property damage or serious injury. (SL-34) Before dismounting the tractor and loader, lower the loader to the ground or onto solid support blocks. Sudden dropping of the loader and attachment could result in serious injury.
SAFETY Do not modify or alter this Implement. Do not permit anyone to modify or alter this Implement, any of its components or any Implement function. (SG-8) Never work under the Implement, the framework, or any lifted component unless the Implement is securely supported or blocked up to prevent sudden or inadvertent falling which could cause serious injury or even death. (SL-36) SAFETY Do not operate this Equipment with hydraulic oil or fuel leaking.
SAFETY Avoid contact with hot surfaces including hydraulic oil tanks, pumps, motors, valves and hose connections. Relieve hydraulic pressure before performing maintenance or repairs. Use gloves and eye protection when servicing hot components. Contact with a hot surface or fluid can cause serious injury from burns or scalding. (SG-34) Use caution and wear protective gloves when handling sharp objects such as blades, knives, and other cutting edges. Be alert to worn component surfaces which have sharp edges.
SAFETY Storage and Parking Safety Instructions and Practices Never crawl under or allow children to play around or on a loader that is disconnected from the tractor. The loader could fall crushing a person resulting in serious injury or death. (SL-13) Do not remove the attachment from the loader when the loader is disconnected from the tractor. The attachment stabilizes the loader. If the attachment is removed, the loader will fall and could result in serious injury.
SAFETY Decal Location NOTE: Rhino supplies safety decals on this product to promote safe operation. Damage to the decals may occur while in shipping, use, or reconditioning. Rhino cares about the safety of its customers, operators, and bystanders, and will replace the safety decals on this product in the field, free of charge (Some shipping and handling charges may apply). Contact your Rhino dealer to order replacement decals. SAFETY 4211B 02/10 © 2010 Alamo Group Inc.
SAFETY SAFETY ITEM PART NO. QTY LEVEL DESCRIPTION 1. 49696 1 LOGO Rhino, Left 2. 51448 1 LOGO Rhino, Right 3. 55481 2 MODEL 4211B 4. 52740 2 WARNING Oil Leaks 5. 52203 1 WARNING Lock Valve in Transport 6. 52204 1 INSTRUCT Loader Positions 7. D469 1 WARNING Loader Safety 8. D468 2 DANGER Crushing, Electrocution, Falling Hazard 9. D471 1 WARNING Handling Bales 10. D470 1 DANGER Use ROPS, Seatbelt, Rear Ballast 11. 03200347 * REFLCTR SMV Sign 12.
SAFETY Decal Description Rhino, Left SAFETY P/N 49696 Rhino, Right P/N 51448 MODEL NAME: 4211B P/N 55481 4211B 02/10 © 2010 Alamo Group Inc.
SAFETY SAFETY WARNING! - DO NOT operate with oil leaks. -Inspect hoses regularly. Failure to inspect and replace worn hoses may allow them to rupture suddenly and violently, resulting in serious bodily injury or death from scalding, fire burn injury, or oil penetration. -Frayed, torn or crimped hoses may rupture and spray hot oil on operator causing serious injury. Oil may spray on hot tractor parts and catch fire resulting in severe injury, burn or death.
SAFETY Loader Safety D469 Crushing Hazard, Electrocution Hazard, Falling Hazard. D468 Crushing Hazard D471 4211B 02/10 © 2010 Alamo Group Inc. Safety Section 1-21 SAFETY -Read, understand and follow the operation, warning, and safety instructions in the Operator’s Manual. -Equip tractor with ROPS (Roll Over Protection System) before installing or operating the loader. -Operate Loader only from operator’s seat with the seatbelt securely fastened around you.
SAFETY DANGER! - Use ROPS and seatbelt at all times. Add recommended rear ballast. Operate tractor at low speeds. Failure to comply may result in serious injury or death. SAFETY D470 Read Operator’s Manual! The operator’s manual is located inside this canister. If the manual is missing order one from your dealer. P/N 00776031 WARNING! - Crushing Hazard. -To Avoid Serious Injury or Death Make sure attachment is securely attached to the loader. See Operator’s Manual for instructions.
SAFETY Federal Laws and Regulations This section is intended to explain in broad terms the concept and effect of federal laws and regulations concerning employer and employee equipment operators. This section is not intended as a legal interpretation of the law and should not be considered as such. Employer-Employee Operator Regulations U.S. Public Law 91-596 (The Williams-Steiger Occupational and Health Act of 1970) OSHA This Act Seeks: DUTIES Sec.
INTRODUCTION SECTION Introduction Section 2-1
INTRODUCTION INTRODUCTION This 4211B Loader is designed with care and built with quality materials by skilled workers. Proper assembly, maintenance, and operating practices, as described in this manual, will help the owner/operator get years of satisfactory service from the machine. The purpose of this manual is to familiarize and instruct. The Assembly Section instructs the owner/operator in the correct assembly of the Front End Loader using standard and optional equipment.
INTRODUCTION Engine Exhaust, some of its constituents, and certain vehicle components contain or emit chemicals known to the state of California to cause cancer and birth defects or other reproductive harm. (SG-30) Never walk or work under any raised boom or bucket. The Boom could fall and cause serious bodily injury or death. Always lower the boom and bucket flat on the ground or support the Boom and bucket on safety stands. Unload all hydraulic actuators prior to performing any maintenance.
INTRODUCTION INTRODUCTION The RHINO 4211B Loader is designed for four-wheel drive tractors. They are intended to lift only loose materials that will fit in the bucket. All cylinders are double-acting. Parking stands support loader so tractor can be “driven in” for quick attaching. Front and rear, and left and right are determined by the normal direction of travel (the same as on your automobile). 4211B 02/10 © 2010 Alamo Group Inc.
INTRODUCTION Attention Owner/Operator BEFORE OPERATING THIS MACHINE: 1. Carefully read the Operator’s Manual, completely understand the Safety Messages and instructions, and know how to operate correctly both the tractor and implement. 2. Fill out the Warranty Card in full. Be sure to answer all questions, including the Serial Number of the implement. Mail within 30 days of delivery date of this implement. 3. Record the Loader Model and Serial Numbers on the Warranty page.
ASSEMBLY AND CONNECTING THE LOADER SECTION Assembly Section 3-1
ASSEMBLY Assembly Instructions To avoid injury during installation of the loader attachment, do not allow bystanders within 10 feet of loader or attachment. Always wear safety glasses when removing or installing buckets. ASSEMBLY Always use a drift and hammer made of non-sparking material (a shot-filled mallet is recommended) to install or remove pins. A steel hammer or drift could generate flying metal fragments and result in injury.
ASSEMBLY Do not use an attachment that is not securely attached to the quick hitch, The attachment could fall resulting in severe crushing injuries or death to the operator or bystanders. Rotate both hitch pin levers down to the locked position. You should feel a firm resistance when locking the levers down. The pins must extend through the slots in the bottom of the attachment bracket. • Examine the fit between the quick hitch and the bottom of the attachment bracket.
ASSEMBLY Proper Rear Ballasting and Wheel Spacing ASSEMBLY Spread front wheels to maximum distance. Spread rear wheels to maximum distance. Add rear wheel weight, rear ballast box or implement. Make sure there is 25% of total weight on rear axle. 4211B 02/10 © 2010 Alamo Group Inc.
ASSEMBLY Dismounting Loader and Mounting Loader to Tractor To avoid injury during installation of loader: • Place loader bucket against barrier to restrict forward movement of loader. • Do not permit bystanders within 15 feet of loader. Loader must be equipped with a bucket or other optional attachment to dismount from tractor. 4211B 02/10 © 2010 Alamo Group Inc. Assembly Section 3-5 ASSEMBLY When dismounting loader, maintain clearance between loader side frames and tractor hood and front axle.
ASSEMBLY ASSEMBLY Dismounting Loader 1. Locate tractor and loader on firm level ground. 2. Rotate parking stands from storage position to operation position by removing linch pins and clevis pin. Inner tube of parking stand is now free to slide within outer tube. Reinstall clevis pin and linch pin when parking stands are in operation position. See Figure Asm-L0089. 3. Level and lower bucket to ground. Rotate bucket down slightly to remove pressure on hitch pins (See Figure Asm-L-0090). 4.
ASSEMBLY Attaching Pin on Bucket Always wear safety glasses when removing or installing buckets. Always use a drift and hammer made of non-sparking material (a shot-filled mallet is recommended) to install or remove pins. A steel hammer or drift could generate flying metal fragments and result in injury. Always wear safety glasses when using a hammer to remove or install pins. Attach bucket to lift boom frame and bucket cylinders with four 3/8” cap screws and 3/8” lock nuts (supplied with loader).
ASSEMBLY ASSEMBLY Mounting and Dismounting Attachment Mounting Attachment to Loader To avoid injury during installation of bucket or attachment, do not allow bystanders within 10 feet of loader, bucket or attachment. 1. Locate tractor and attachment on level ground. Lower boom to rest on the ground. Extend the bucket cylinders slightly, while raising the boom to provide three to five inches of ground clearance.
ASSEMBLY When Connecting an Attachment to the Loader Quick Hitch Never walk or work under or allow any person to be underneath a raised loader or attachment. • Examine the fit between the quick hitch and the bottom of the attachment bracket. The pins must extend through the slots in the bottom of the attachment bracket. The tapered side of each pin must be firmly wedged against the surface of the slot on the bottom of the attachment bracket.
ASSEMBLY ASSEMBLY 5. On level ground, tilt the attachment down 90 degrees and lower it to the ground. Lower the loader further to slightly raise the front of the tractor of the tractor off the ground. Drive the tractor in reverse while the attachment is on the ground for 20-30 feet to insure the attachment does not disconnect. If the attachment disconnects during this process, discontinue the use of attachment and contact your dealer.
ASSEMBLY Installing Quick Attach Device Always use a drift and hammer made of non-sparking material (a shot-filled mallet is recommended) to install or remove pins. A steel hammer or drift could generate flying metal fragments and result in injury. Always wear safety glasses when using a hammer to remove or install pins. 4211B 02/10 © 2010 Alamo Group Inc. Assembly Section 3-11 ASSEMBLY 3.
OPERATION SECTION Operation Section 4-1
OPERATION RHINO 4211B LOADER OPERATION INSTRUCTIONS OPERATION READ, UNDERSTAND, and FOLLOW the following Safety Messages. Serious injury or death may occur unless care is taken to follow the warnings and instructions stated in the Safety Messages. Always use good common sense to avoid hazards. (SG-2) Si no lee ingles, pida ayuda a alguien que si lo lea para que le traduzca las medidas de seguridad.
OPERATION 1. Standard Equipment and Specifications Specifications will vary with tractor, tire size, hydraulic system and bucket used. The specifications are given for a loader equipped with 72” HD material bucket, quick attach device and 4-bar linkage, operated with an average tractor hydraulic system of 16.5 GPM with engine operating at 2300 RPM and control valve relief setting of 2900 PSI. A. B. C. D. E. F. G. H. I. Maximum Lift Height at Pivot Pin ..............................131 in.
OPERATION 2. Operator Requirements OPERATION NEVER use drugs or alcohol immediately before or while operating the Tractor and Implement. Drugs and alcohol will affect an operator’s alertness and coordination and therefore affect the operator’s ability to operate the equipment safely.
OPERATION Always read carefully and comply fully with the manufacturer’s instructions when handling oil, solvents, cleansers, and any other chemical agent. (SG-22) Never run the Tractor engine in a closed building or without adequate ventilation. The exhaust fumes can be hazardous to your health. (SG-23) Prolonged operation may cause operator boredom and fatigue affecting safe operation. Take scheduled work breaks to help prevent these potentially impaired operating conditions.
OPERATION OPERATION Repeated or substantial breathing of hazardous dusts, including crystalline silica, could cause fatal or serious respiratory disease including silicosis. Concrete, masonry, many types of rock, and various other materials contain silica sand. California lists respirable crystalline silica as a substance known to cause cancer. Operation of this equipment under certain conditions may generate airborne dust particles that could contain crystalline silica.
OPERATION 3. Tractor Requirements Operate this Equipment only with a Tractor equipped with an approved rollover-protective system (ROPS). Always wear seat belts. Serious injury or even death could result from falling off the tractor--particularly during a turnover when the operator could be pinned under the ROPS. (SG-7) Tractor Requirements and Capabilities • • • ASABE approved Roll-Over Protective Structure (ROPS) or ROPS cab and seat belt. Tractor Safety Devices .................
OPERATION 3.3 Tractor Ballast OPERATION Before operating tractor and loader, add sufficient counterweight so a minimum of 25% of the total weight is on the rear axle. Total weight includes weight of: tractor, loader, rated load in bucket, and counterweight. Rated load is lift capacity at full height at 500mm forward of bucket pivot point (See Standard Equipment and Specifications).
OPERATION 4.1 Boarding the Tractor Never allow children or other persons to ride on the Tractor or Implement. Falling off can result in serious injury or death. (SG-10) Never grasp control levers when mounting the machine. (SBH-4) Never allow passengers to ride on the tractor or attached equipment. Riders can easily fall off and be seriously injured or killed from falling off and being ran over. It is the operator’s responsibility to forbid all extra riders at all times. OPS-L- 0023 4.
OPERATION 5. Starting the Tractor OPERATION Never run the Tractor engine in a closed building or without adequate ventilation. The exhaust fumes can be hazardous to your health. (SG-23) Start tractor only when properly seated in the Tractor seat. Starting a tractor in gear can result in injury or death. Read the Tractor operators manual for proper starting instructions.
OPERATION 6. Pre-Operation Inspection and Service Periodically inspect all moving parts for wear and replace when necessary with authorized service parts. Look for loose fasteners, worn or broken parts, and leaky or loose fittings. Make sure all pins have cotter pins and washers. Serious injury may occur from not maintaining this machine in good working order. (SG-21) 6.
OPERATION 6.2 Loader Pre-Operation Inspection and Service OPERATION Periodically inspect all moving parts for wear and replace when necessary with authorized service parts. Look for loose fasteners, worn or broken parts, and leaky or loose fittings. Make sure all pins have cotter pins and washers. Serious injury may occur from not maintaining this machine in good working order. (SG-21) Avoid contact with hot surfaces including hydraulic oil tanks, pumps, motors, valves and hose connections.
OPERATION The operator’s manual and safety signs affixed on the unit contain important instructions on the safe and proper use of the equipment. Maintain these important safety features on the implement in good condition to ensure the information is available to the operator at all times. • • OPERATION Ensure the manual canister is secured to the equipment with the operator’s manual inside. Ensure all safety signs are in place and legible. Replace missing, damaged, and illegible decals.
OPERATION HYDRAULIC LINE INSPECTION • OPERATION • • • Check for hydraulic leaks along hoses, cylinders and fittings. IMPORTANT: DO NOT use your hands to check for oil leaks. Use a piece of heavy paper or cardboard to check for hydraulic oil leaks. Inspect the condition of the valve weldment. Ensure fitting is properly connected Inspect condition of bushings. OPS-L-0018_B Hydraulic Hoses BUCKET INSPECTION • • • • Ensure all pins are in place.
OPERATION Tractor PRE-OPERATION Inspection Tractor ID#______________________ Make____________________ Date___________________________ Shift_____________________ Condition at Start of Shift Item Specific Comments if not O.K.
OPERATION FRONT END LOADER PRE-OPERATION Inspection Front End Loader ID#_______________Make____________________ OPERATION Date_____________________________Shift____________________ Before conducting the inspection, make sure the tractor engine is off, all rotation has stopped and the tractor is in park with the parking brake engaged. Make sure the Loader is resting on the ground or securely blocked up and all hydraulic pressure has been relieved.
OPERATION 7. Driving the Tractor and Loader This Implement may be wider than the Tractor. Be careful when operating or transporting this equipment to prevent the Implement from running into or striking sign posts, guard rails, concrete abutments or other solid objects. Such an impact could cause the Implement and Tractor to pivot violently resulting in loss of steering control, serious injury, or even death. Never allow the Implement to contact obstacles.
OPERATION OPERATION Use extra care when turning or stopping. Allow for increased length and weight of added loader. The loader adds five to six feet of length in front of the tractor and significant weight. Allow extra distance when stopping or turning. Do not allow loader or attachment to contact solid objects. (SL-07) Safe tractor transport requires the operator possess a thorough knowledge of the model being operated and precautions to take while driving with an attached implement.
OPERATION Do not raise the loader on a hillside. Do not transport across a slope with a raised loader. When the loader is raised, the center of gravity of the tractor and loader is raised increasing the potential for the tractor to tip over. Tractor wheel contact with any wash out, drop off or the ground obstruction with a raised loader could result in the tractor tipping over and causing serious bodily injury. (SL-21) The Boom is designed only to position and operate the Bucket which is attached to it.
OPERATION Use extra care when turning or stopping. Allow for increased length and weight of added loader. The loader adds five to six feet of length in front of the tractor and significant weight. Allow extra distance when stopping or turning. Do not allow loader or attachment to contact solid objects. (SL-07) OPERATION Do not raise the loader into an overhead structure or allow a raised attachment to contact overhead structures.
OPERATION Do not use an attachment that is not securely attached to the quick hitch, The attachment could fall resulting in severe crushing injuries or death to the operator or bystanders. Rotate both hitch pin levers down to the locked position. You should feel a firm resistance when locking the levers down. The pins must extend through the slots in the bottom of the attachment bracket. • Examine the fit between the quick hitch and the bottom of the attachment bracket.
OPERATION Do not use loader as a jack to raise the tractor tires off the ground. The loader could fail causing the tractor and loader to fall to the ground resulting in serious injury. (SL-25) OPERATION Use extreme care when loading, transporting or dumping loads that impair or partially block the operator’s line of sight. Know where you are traveling. Make sure no bystanders are in the area of travel. If a bystander assists in providing guidance, make sure they are not in the path of travel.
OPERATION If the loader valve controls fail to functions properly discontinue use of the tractor and loader until the controls are properly repaired. Sudden or unexpected movement or dropping of the loader and attachment could result in serious injury. (SL-31) Do not raise the loader on a hillside. Do not transport across a slope with a raised loader. When the loader is raised, the center of gravity of the tractor and loader is raised increasing the potential for the tractor to tip over.
OPERATION 8.1 Operating the Loader The following text and illustrations offer suggested loader and tractor operating techniques. FILLING THE BUCKET OPERATION Approach and enter the pile with a level bucket. Loaders with 1-lever control, ease lever back toward you to lift and roll back bucket. With series valve, prevent loader stall by not lifting and rolling back at the same time. 4211B 02/10 © 2010 Alamo Group Inc.
OPERATION 4211B 02/10 © 2010 Alamo Group Inc. Operation Section 4-25 OPERATION Lift and roll back of bucket will increase efficiency because...
OPERATION OPERATION A level bucket throughout the lifting cycle resists bucket lift and increases breakaway effort. NOTE: Do not be concerned if the bucket is not completely filled during each pass. Maximum productivity is determined by the amount of material loaded in a given period of time. Time is lost if two or more attempts are made to fill the bucket on each pass. LIFTING THE LOAD When lifting the load, keep the bucket positioned to avoid spillage.
OPERATION CARRYING THE LOAD Position bucket just below tractor hood for maximum stability and visibility, whether bucket is loaded or empty. When transporting the load, keep bucket as low as possible, to avoid tipping, in case a wheel drops in a rut. 4211B 02/10 © 2010 Alamo Group Inc. Operation Section 4-27 OPERATION Use extreme care when operating loader on a slope, keep bucket as low as possible. This keeps center of gravity low and will provide maximum stability.
OPERATION DUMPING THE BUCKET OPERATION Lift bucket high enough to clear side of vehicle. Move tractor in as close as possible to side of vehicle, then dump bucket. LOWERING THE BUCKET After bucket is dumped, back away from vehicle while lowering and rolling back bucket. 4211B 02/10 © 2010 Alamo Group Inc.
OPERATION OPERATING WITH FLOAT CONTROL During hard surface operation, keep bucket level and put lift control in float position to permit bucket to float on working surface. If hydraulic down pressure is exerted on bucket, it will wear faster than normal. OPERATION Float will also prevent mixing of surface material with stockpile material. Float position will reduce the chance of surface gouging when removing snow or other material. 4211B 02/10 © 2010 Alamo Group Inc.
OPERATION LOADING FROM A BANK Choose a forward gear that provides sufficient ground speed for loading. OPERATION Exercise caution when undercutting high banks. Dirt slides can be dangerous. Load from as low as possible for maximum efficiency. Loader lift and breakaway capacity diminish as loading height is increased. Side cutting is a good technique for cutting down a big pile.
OPERATION Another method for large dirt piles is to build a ramp approach to the pile. 4211B 02/10 © 2010 Alamo Group Inc. Operation Section 4-31 OPERATION It is important to keep the bucket level when approaching a bank or pile. This will help prevent gouging the work area.
OPERATION PEELING AND SCRAPING OPERATION Use a slight bucket angle, travel forward and hold lift control forward to start the cut. Make a short 5 to 8 foot angle cut and break out cleanly. With bucket level, start a cut at notch approximately 2 inches deep. Hold depth by feathering bucket control to adjust cutting lip up or down. When front tires enter the notch, adjust lift cylinder to maintain proper depth. Make additional passes until desired depth is reached.
OPERATION LOADING LOW TRUCKS OR SPREADERS FROM A PILE For faster loading, minimize angle of turn and length of run between pile and spreader. Back grade occasionally with a loaded bucket to keep working surface free of ruts and holes. Also, hold lift control forward so full weight of bucket is scraping ground. 4211B 02/10 © 2010 Alamo Group Inc. Operation Section 4-33 OPERATION Do not roll bucket over and attempt to backgrade.
OPERATION BACKFILLING OPERATION Approach pile with a level bucket. Poor methods actually move no more dirt and make it more difficult to hold a level grade. Do not use bucket in dumped position for bulldozing. This method, shown above, will impose severe shock loadings on dump linkage, bucket cylinder and tractor. 4211B 02/10 © 2010 Alamo Group Inc.
OPERATION Leave dirt in bucket. Dumping on each pass wastes time. 4211B 02/10 © 2010 Alamo Group Inc. Operation Section 4-35 OPERATION Operate tractor at right angles to ditch. Take as big a bite as tractor can handle without lugging down.
OPERATION OPERATION Leave dirt which drifts over side of bucket for final cleanup. Pile dirt on high side for easier backfilling on a slope. HANDLING LARGE HEAVY OBJECTS 1. Using front end loaders for handling large heavy objects such as large round or rectangular bales, logs and oil drums is not recommended. 2. Handling large heavy objects can be extremely dangerous due to: 3. • Danger of tractor rolling over. • Danger of up-ending tractor.
OPERATION 8.2 Operating Bale Spear Operate the bale spear using extreme caution. Sharp points on bale spear can cause serious injury or death. Because of size and weight of large bales, extreme care must be taken in handling them. Be aware of forces acting on stacked bales due to gravity and keep workers far from zones of potential hazard from shifting or falling bales. DO NOT ALLOW BYSTANDERS! Keep bale spear and loader boom clear of overhead lines.
OPERATION OPERATION Carry bales as low to the ground as possible to allow maximum visibility and avoid tipping. 8.3 Shutting Down the Implement Park the tractor on a level surface, place the transmission in park or neutral and apply the parking brake, lower the attached implement to the ground, shut down the engine, remove the key, and wait for all motion to come to a complete stop before exiting the tractor. OPS-L- 0014 9. Loader Storage Never allow children to play on or around Tractor or Implement.
OPERATION Transport only at speeds where you can maintain control of the equipment. Serious accidents and injuries can result from operating this equipment at high speeds. Understand the Tractor and Implement and how it handles before transporting on streets and highways. Make sure the Tractor steering and brakes are in good condition and operate properly. Before transporting the Tractor and Implement, determine the proper transport speeds for you and the equipment.
OPERATION OPERATION Inherent hazards of operating the tractor and implement and the possibility of accidents are not left behind when you finish working in an area. Therefore, the operator must employ good judgement and safe operation practices when transporting the tractor and implement between locations. By using good judgement and following safe transport procedures, the possibility of accidents while moving between locations can be substantially minimized.
OPERATION Extreme caution should be used when transporting the tractor and implement on public roadways. The tractor must be equipped with all required safety warning features including a SMV emblem and flashing warning lights to alert drivers of the tractor’s presence. Remember that roadways are primarily designed for automotive drivers and most drivers will not be looking out for you, therefore, you must look out for them.
OPERATION 10.2 Hauling the Tractor and Implement OPERATION Before transporting a loaded tractor and implement, measure the height and width dimensions and gross weight of the complete loaded unit. Ensure that the load will be in compliance with the legal limits set for the areas that will be traveled through. OPS-U- 0024 Use adequately sized and rated trailers and equipment to transport the tractor and implement. Consult an authorized dealer to determine the proper equipment required.
OPERATION 11. TROUBLESHOOTING GUIDE POSSIBLE CAUSE POSSIBLE REMEDY Loader slow or will not lift and/or dump Hydraulic oil too heavy. Change to proper oil. Oil filter plugged. Hydraulic pump worn. Oil line restricted or leaking. Cylinder leaks internally. Faulty relief valve (tractor). Clean or replace filter. Repair or replace pump. Check all hoses and tubes for leaks, damage or restrictions. Replace damaged or restricted hoses or tube oil lines. Inspect, clean, repair or replace valve.
MAINTENANCE SECTION Maintenance Section 5-1 © 2010 Alamo Group Inc.
MAINTENANCE READ, UNDERSTAND, and FOLLOW the following Safety Messages. Serious injury or death may occur unless care is taken to follow the warnings and instructions stated in the Safety Messages. Always use good common sense to avoid hazards. (SG-2) MAINTENANCE Never interfere with factory-set hydraulic calibrations. Any change in calibration could cause a failure of the equipment and may result in injury. (SBH-13) Always maintain the safety signs in good readable condition.
MAINTENANCE Do Not fill fuel tank while engine is running. Refuel only after engine has cooled down. If fuel is spilled, move machine away from the area of the spill and avoid creating any source of ignition until the fuel has evaporated. (SBH-49) Avoid contact with hot surfaces including hydraulic oil tanks, pumps, motors, valves and hose connections. Relieve hydraulic pressure before performing maintenance or repairs. Use gloves and eye protection when servicing hot components.
MAINTENANCE Lubrication Schedule MAINTENANCE Before operating your Loader, take the time to inspect and repair any damage to the machine or tractor. Only a minimum of time and effort is required to regularly maintain this machine to provide long life and trouble free operation. Lubricate all grease fittings: one at each end of lift boom arms and one at rod and base ends of each lift and bucket cylinders. NOTE: Fully retract bucket to a comfortable height to grease bucket/loader boom joint.
MAINTENANCE Daily Maintenance Regular maintenance of your loader and hydraulic system will insure maximum loader efficiency and long life. 1. Check fluid level of tractor hydraulic system before starting each day’s operation. If necessary, add hydraulic oil as recommended in your tractor operator’s manual. 2. After every eight hours of operation, lubricate all twelve grease fittings; one at each end of lift boom arms and one at rod and base ends of each lift and bucket cylinder. 4.
MAINTENANCE Cylinder Service MAINTENANCE Loader cylinders are designed to be reliable and easy to service. If a cylinder should malfunction during warranty period, return complete cylinder assembly, without disassembling, to your authorized service department or contact your authorized service department for instructions. Unauthorized disassembly of a cylinder in warranty period will VOID WARRANTY.
MAINTENANCE Lift and Bucket Cylinder Reassembly Note: Be careful not to damage seals and o-rings on edges or holes in cylinder tube. Inspect and remove burrs and sharp edges if necessary before reassembly. 1. Place rod seal (3) into groove inside cylinder head. Note: Lips of seal (3) must be face inward and seal must be firmly seated in groove. 3. Place o-ring (7) with back-up washer (6) in groove on outside of head. Back-up washer must be on rod side. 4.
MAINTENANCE MAINTENANCE 1. Store loader attached. with attachment securely 2. Place dust caps on hydraulic quick couplers. 3. Do not remove attachment from stored loader. 4. Do not allow children to play on or around loader. 4211B 02/10 © 2010 Alamo Group Inc.
MAINTENANCE Proper Torque for Fasteners The chart lists the correct tightening torque for fasteners. When bolts are to be tightened or replaced, refer to this chart to determine the grade of bolts and the proper torque except when specific torque values are assigned in manual text. RECOMMENDED TORQUE IN FOOT POUNDS UNLESS OTHERWISE STATED IN THE MANUAL* 4211B 02/10 © 2010 Alamo Group Inc.
MAINTENANCE MAINTENANCE 4211B 02/10 © 2010 Alamo Group Inc.
MAINTENANCE MAINTENANCE 4211B 02/10 © 2010 Alamo Group Inc.
RHINO LIMITED WARRANTY 1. 2. LIMITED WARRANTIES 1.01. Rhino warrants for one year from the purchase date to the original non-commercial, governmental, or municipal purchaser (“Purchaser”) and warrants for six months to the original commercial or industrial purchaser (“Purchaser”) that the goods purchased are free from defects in material or workmanship. 1.02.
TO THE OWNER/OPERATOR/DEALER To keep your implement running efficiently and safely, read your manual thoroughly and follow these directions and the Safety Messages in this Manual. The Table of Contents clearly identifies each section where you can easily find the information you need. The OCCUPATIONAL SAFETY AND HEALTH ACT (1928.51 Subpart C) makes these minimum safety requirements of tractor operators: REQUIRED OF THE OWNER: 1.
4211B LOADER 4211B -SOM-02/10 Printed U.S.