LUMBERJACK 60/72 ® TREE CUTTER Revised 02-02 Effective Serial No. LJ 60-10001 Through Current Effective Serial No. LJ 72- 10330Through Current P/N 00772058C OPERATOR'S MANUAL This Operator's Manual is an integral part of the safe operation of this machine and must be maintained with the unit at all times. READ, UNDERSTAND, and FOLLOW the Safety and Operation Instructions contained in this manual before operating the equipment.
TO THE OWNER/OPERATOR/DEALER All implements with moving parts are potentially hazardous. There is no substitute for a cautious, safe-minded operator who recognizes the potential hazards and follows reasonable safety practices. The manufacturer has designed this implement to be used with all its safety equipment properly attached to minimize the chance of accidents. BEFORE YOU START!! Read the safety messages on the implement and shown in your manual.
BE SAFE! BE ALERT! BE ALIVE! BE TRAINED before operating the Mower! Safety Training Makes the Difference In order to reduce accidents and enhance the safe operation of mowers, Alamo Group Ag Division, in cooperation with other industry manufacturers has developed the AEM/FEMA Industrial and Agricultural Mower Safety Practices video and guide book. The video will familiarize and instruct mower-tractor operators in safe practices when using industrial and agricultural mowing equipment.
Alamo Group Ag.
TABLE OF CONTENTS SAFETY SECTION ...................................................................................................................................... 1-1 Safety Information .................................................................................................................................. 1-2 Safety Decal Location ............................................................................................................................ 1-11 Safety Decals ....................
SAFETY SECTION Safety Section 1-1
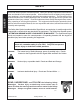
SAFETY SAFETY A safe and careful operator is the best operator. Safety is of primary importance to the manufacturer and should be to the owner/operator. Most accidents can be avoided by being aware of your equipment, your surroundings, and observing certain precautions. The first section of this manual includes a list of Safety Messages that, if followed, will help protect the operator and bystanders from injury or death.
SAFETY PELIGRO! Si no lee Ingles, pida ayuda a alguien que si lo lea para que le traduzca las medidas de seguridad. (SG-3) DANGER! Never operate the Tractor or Implement until you have read and completely understand this Manual, the Tractor Operator’s Manual, and each of the Safety Messages found in the Manual or on the Tractor and Implement. Learn how to stop the tractor engine suddenly in an emergency.
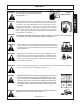
SAFETY DANGER! Never allow children to operate or ride on the Tractor or Implement. SAFETY (SGM-11) WARNING! Do not mount the Tractor while the tractor is moving. Mount the Tractor only when the Tractor and all moving parts are completely stopped. (SG-12) DANGER! Start tractor only when properly seated in the Tractor seat. Starting a tractor in gear can result in injury or death. Read the Tractor operators manual for proper starting instructions.
SAFETY WARNING! Before transporting the Tractor and Implement, determine the safe transport speeds for you and the equipment. Make sure you abide by the following rules: 1. Test the tractor at a slow speed and increase the speed slowly. 2. 3. Apply the Brakes smoothly to determine the stopping characteristics of the Tractor and Implement. As you increase the speed of the Tractor the stopping distance increases. Determine the maximum safe transport speed for you and this Equipment.
SAFETY KEEP AWAY FROM ROTATING ELEMENTS to prevent entanglement and possible serious injury or death. (SG-24) SAFETY DANGER! DANGER! Never allow children to play on or around Tractor or Implement. Children can slip or fall off the Equipment and be injured or killed. Children can cause the Implement to shift or fall crushing themselves or others. (SG-25) WARNING! DANGER! Do not exceed the rated PTO speed for the Implement.
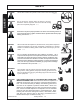
SAFETY DANGER! DANGER! The rotating parts of this machine have been designed and tested for rugged use. However, they could fail upon impact with heavy, solid objects such as steel guard rails and concrete abutments. Such impact could cause the broken objects to be thrown outward at very high velocities. To reduce the possibility of property damage, serious injury, or even death, never allow the cutting blades to contact such obstacles.
SAFETY SAFETY DANGER! Replace bent or broken blade with new blades. NEVER ATTEMPT TO STRAIGHTEN BLADES SINCE THIS WILL LIKELY CRACK OR OTHERWISE DAMAGE THE BLADE WITH SUBSEQUENT FAILURE AND POSSIBLE SERIOUS INJURY FROM THROWN BLADES. (SGM-10) WARNING! Do not mow with two machines in the same area except with Cab tractors with the windows closed. (SGM-11) Rotary Mowers are capable under adverse conditions of throwing objects for great distances (100 yards or more) and causing serious injury or death.
SAFETY There are obvious and hidden potential hazards in the operation of this Implement as in all power-driven or pulled equipment. REMEMBER! This machine is often operated in rough terrain conditions that include tall grass, weeds, gullies, holes, slopes, hidden obstructions and the like. Serious injury or even death may occur unless care is taken to assure the safety of the operator and bystanders in the area. Do not operate this machine with anyone in the immediate area.
SAFETY SAFETY WARNING! WARNING! Follow these guidelines to reduce the risk of equipment and grass fires while operating, servicing, and repairing the Mower and Tractor: -Equip the Tractor with a fire extinguisher in an accesible location. -Do Not operate the Mower on a Tractor with an underframe exhaust. -Do Not smoke or have an open flame near the Mower and Tractor. -Do Not drive into burning debris or freshly burnt areas.
SAFETY NOTE: Rhino supplies safety decals on this product to promote safe operation. Damage to the decals may occur while in shipping, use, or reconditioning. Rhino cares about the safety of its customers, operators, and bystanders, and will replace the safety decals on this product in the field, free of charge (Some shipping and handling charges may apply). Contact your Rhino dealer to order replacement decals. 12 SAFETY 10 2 11 4 15 14 6 16 7 13 5 9 9 7A 1 12 15 14 8 ITEM PART NO.
SAFETY SAFETY 3 - 00725746 2 - 00756004 6 - 00756494 7 - 00760657 4 - 00756005 1 - - 00749117 - Not Shown (See Inside Front Cover of Manual) 11 - - 03200347 SMV Reflector LJ60/72 02-02 © 2004 Alamo Group Inc.
SAFETY 5 - 02962764 10 - D103 10 - D114 8 - 00769736 13 - 00763977 12 - 00763613 9 - 00769737 7A - 00773723 LUMBERJACK 15 - 00771818 LJ60/72 02-02 © 2004 Alamo Group Inc.
SAFETY SAFETY FEDERAL LAWS AND REGULATIONS This section is intended to explain in broad terms the concept and effect of federal laws and regulations concerning employer and employee equipment operators. This section is not intended as a legal interpretation of the law and should not be considered as such. Employer-Employee Operator Regulations U.S. Public Law 91-596 (The Williams-Steiger Occupational and Health Act of 1970) OSHA This Act Seeks: “...
INTRODUCTION SECTION Introduction Section 2-1
INTRODUCTION This Cutter is designed with care and built with quality materials by skilled workers. Proper assembly, maintenance, and operating practices, as described in this manual, will help the owner/operator get years of satisfactory service from the machine. INTRODUCTION The purpose of this manual is to familiarize, instruct, and train. The Assembly Section instructs the owner/operator in the correct assembly of the Mower using standard and optional equipment.
INTRODUCTION INTRODUCTION This cutter is available in lift-type models only. These rugged Cutters are designed for heavy-duty work. They can cut brush up to 6" in diameter. DANGER For Non-Agricultural use, OSHA, ASAE, SAE, and ANSI standards require the use of Chain Guards, Deflectors, or Solid Skirts at all times.
ASSEMBLY SECTION Assembly Section 3-1
ASSEMBLY This Cutter will attach to most tractors with Cat. II & III and II & III Quick Hitch. The Lumberjack can be purchased for tractors with 540 or 1000 RPM PTO. DEALER SET-UP INSTRUCTIONS Assembly of this mower is the responsibility of the Servis-Rhino dealer. The mower should be delivered to the owner completely assembled, lubricated, and adjusted for normal cutting conditions. Set up mower as received from the factory with these instructions. Open parts box and lay parts out to make location easy.
ASSEMBLY A-FRAME ASSEMBLY (FIGURE 2) 60" MODEL To assemble the Mower’s A-Frame, follow the procedures listed below: 1. One side at a time, position the mower’s left and right A-frame halves (21 and 22) to the inside of the respective front set of mower deck upright lugs. Align A-frame hole with with inside lug back hole. From inside the A-frame half, insert a 3/4” x 2” bolt (19) to connect the A-frame half to the lug. Install a 3/4” locknut (20) onto bolt (19), but do not tighten at this point.
ASSEMBLY GEARBOX SHIELD (FIGURE 2) Position the bell shield over the input shaft and align it with threaded holes in the gearbox. Make sure access windows are facing left and right ( Not up and down ). Install flatwashers, mounting bolts and tighten securely. NOTE: Access window must be removed for installation of shield to gearbox. This access window will also need to be used for mounting slip clutch to the input shaft of the gearbox.
ASSEMBLY FRONT CHAINGUARD ASSEMBLY 72 MODEL Install front chainguard as illustrated below. 1 2 13 13 3 4 9 13 6 12 14 CAUTION! 12 11 10 8 7 5 12 11 Do not operate Cutter without Front Chainguard in place. LJ60/72 02-02 © 2004 Alamo Group Inc.
OPERATION SECTION Operation Section 4-1
OPERATION LUMBERJACK 60/72 HEAVY-DUTY TREE CUTTERS OPERATION INSTRUCTIONS Rhino Lumberjack 60 and Lumberjack 72 (LJ60/72) Heavy-Duty Tree Cutters are manufactured with quality material by skilled workers. Lumberjack cutters are engineered to cut vegetative material that a properly rated tractor can drive over (up to about 3” in diameter) and larger vegetation (up to 6” maximum diameter) by raising the retractable rear door and backing the cutter into the material.
OPERATION (7) DRIVELINE ATTACHMENT.................................................................................................................4-12 (7.1) Driveline Length Modification.....................................................................................................4-13 (8) PRE-OPERATION INSPECTION AND SERVICE.............................................................................4-14 (8.1) Tractor Pre-Operation Inspection/Service...................................................
OPERATION 1. OPERATOR REQUIREMENTS Safe operation of the Rhino Lumberjack 60 and Lumberjack 72 (LJ60/72) Heavy-Duty Tree Cutter is the responsibility of a qualified operator. A qualified operator has read and understands both the cutter and tractor Operator Manuals and is experienced in tractor and cutter operations and all associated safety practices. In addition to the safety messages contained in this manual, safety message decals are affixed to the cutter and tractor.
OPERATION 2. TRACTOR REQUIREMENTS The tractor used to operate the cutter must have the power capacity to lift, pull, and operate the Power Take Off (PTO) at the required speed (540 or 1000 revolutions per minute, depending on cutter gearbox) while traveling at a ground speed between 1 and 3 mph. Operating a cutter with a tractor that does not meet the following requirements may cause tractor or cutter damage and be a potential danger to the operator and passersby.
OPERATION 2.3 Tractor Horsepower The power required to operate a cutter is determined by the tractor PTO horsepower. For most cutting conditions, the LJ60 and LJ72 require a tractor with 50 and 90 HP, respectively. Operating the cutter with a tractor that does not have adequate power may damage the tractor engine. Exceeding 125 HP may cause cutter damage by overpowering the unit in heavy cutting conditions. Top link attaches here 2.
OPERATION 2.6 Power Take Off (PTO) Depending on the equipped gearbox, LJ60/72 cutters are designed to operate at either 540 or 1000 rpm. Most tractors operate at either 540, or a combination of 540 and 1000 rpm PTO speeds. The speed of the tractor PTO can be determined by the number of splines on the PTO output shaft. Those operating at 540 rpm will have a 6spline 1-3/8” diameter shaft and those operating at 1000 rpm will have a 21-spline 1-3/8” shaft.
OPERATION 3.1 Boarding the Tractor Use both hands and equipped handrails and steps for support when getting on the tractor. Never use tractor control levers for support when mounting the tractor. Always seat yourself in the operator’s seat and fasten the seatbelt. Only operate the tractor and cutter with the ROPS in the raised position. Never allow passengers to ride on the tractor or cutter.
OPERATION 4. STARTING THE TRACTOR The operator must have a complete understanding of the placement, function, and operational use of all tractor controls before starting the tractor. Review the tractor operator’s manual and consult an authorized dealer for tractor operation instructions if needed.
OPERATION 5. CONNECTING THE CUTTER TO THE TRACTOR Use extreme caution when connecting the cutter to the tractor. The cutter should be securely resting at ground level or setting securely on blocks. Keep hands and feet from under cutter deck and clear of pinch points between tractor hitch arms and cutter pins. DANGER! Never stand or allow another person to stand between a running Tractor and the Mower when attaching the Implement to the Tractor 3-point hitch.
OPERATION 6. SETTING THE CUTTER Properly setting the cutter height is essential for efficient and safe operation. A properly set cutter will make a more uniform cut, distribute clippings more evenly, require minimal tractor work, and follow the contour of uneven terrain. Note: Avoid very low cutting heights; striking the ground with the blades gives the most damaging shock loads and will cause damage to the cutter and drive. 6.1 Setting Cutting Height 1. Park the tractor and cutter on level ground. 2.
OPERATION 6.2 Setting Deck Level The cutter deck should be level from front to rear and side to side. It is especially important that the cutter be level with the ground when cutting large diameter trees. If the cutter is not level, the blades are making contact with the tree on an elevated angle, and its ability to cut is greatly reduced. There is extreme pressure being applied to the blades, the blade carrier, the gearbox, and the driveline when cutting large diameter size trees.
OPERATION 7.1 Driveline Length Modification WARNING! Before operating the Mower, check to make sure the driveline will not bottom out or become disengaged. Bottoming out occurs when the inner shaft penetrates the outer housing until the assembly becomes solid-it can shorten no more. Bottoming out can cause serious damage to the Tractor PTO by pushing the PTO into the Tractor and through the support bearings or downward onto the PTO shaft, breaking it off.
OPERATION 1. 2. 3. 4. 5. Engagement Check Procedure With the driveline attached, raise and lower the cutter within its operating range. Position the mower at the point where the telescoping driveline is at its maximum extension. Turn off the tractor and apply the parking brake. Securely block the cutter at this height. Mark the inner shield 1/8” from the end of the outer shield. Disconnect the driveline from the tractor and separate the two driveline halves.
OPERATION 8.1 Tractor Pre-Operation Inspection/Service Refer to the tractor operator’s manual to ensure a complete pre-operation inspection and scheduled service is performed according to manufacturer recommendations. The following is a partial list of items requiring inspection: 8.2 Cutter Pre-Operation Inspection/Service Before each cutter use, a complete inspection and service is required to ensure the cutter is in a good and safe working condition.
OPERATION " " OPERATION " Ensure chain guards and rubber deflectors are in position and not damaged. Replace worn, broken, and missing pieces. Check the condition of the retractable rear guard and ensure it raises and lowers properly. Ensure the cylinder operating the retractable door is correctly installed and attached. Inspect the cylinder, hose, fittings, and connection for leaks.
OPERATION " " Ensure the driveline slip clutch shield is in place and in good condition. Ensure the driveline integral shield is in good condition and rotates freely. " Make sure the tractor PTO master shield is in place, lowered, and in good condition. " Inspect the gearbox oil level. A low oil level is a warning sign that the gearbox may be cracked or its seal is damaged and needs replacement. Ensure the gearbox vent is in place on the top of the box and free from clogs.
OPERATION 9. DRIVING THE TRACTOR AND CUTTER Safe tractor transport requires the operator possess a thorough knowledge of the model being operated and precautions to take while driving with an attached implement. Ensure the tractor has the capacity to handle the weight of the cutter and the tractor operating controls are set for safe transport. To ensure safety while driving the tractor with an attached cutter, review the following.
OPERATION 9.1 Starting the Tractor The procedure to start the tractor is model specific. Refer to the tractor operator’s manual for starting procedures for your particular tractor. Consult an authorized dealer if the starting procedure is unclear. Ensure the 3-point control lever is in the lowered position and the PTO lever is off before starting the tractor. 9.2 Brake and Differential Lock Setting WARNING! Be aware of the operating conditions. Do not operate the Tractor with weak or faulty brakes.
OPERATION 9.3 Raising the Cutter Using the tractor 3-point hitch control lever, raise the cutter off the ground about 6”, or just high enough to clear any ground obstacles. When raising the cutter, make sure all connection points are securely attached and at least 1” clearance is maintained between the driveline and the deck. If necessary, place an upper lift stop on the 3point hitch control lever to limit the height the cutter can be raised to avoid driveline damage. 9.
OPERATION To avoid overturns, drive the tractor with care and at safe speeds, especially when operating over rough ground, crossing ditches or slopes, and turning corners. Tractor wheel tread spacing should be increased when working on inclines or rough ground to reduce the possibility of tipping. Use extreme caution when operating on steep slopes. Keep the tractor in a low gear when going downhill. DO NOT coast or free-wheel downhill. 9.
OPERATION 10. OPERATING THE TRACTOR AND CUTTER Before starting any cutting operation, the operator must become familiar with the area to be cut and any obstacles and hazards contained within to ensure safety to the operator, bystanders, and equipment. Special attention should be paid to foreign debris, rough terrain, steep slopes, and passersby and animals in the area. OPERATION DANGER! DANGER! Extreme care should be taken when operating near loose objects such as gravel, rocks, wire, and other debris.
OPERATION If you hit a solid object or foreign debris, stop the cutter and tractor at once. Immediately idle the engine speed and disengage the PTO. Wait for all cutter rotating motion to stop, then raise the cutter and move the tractor and implement off the object. Inspect the area and remove, or mark the location of the debris. Inspect the condition of the cutter and make any needed repairs immediately. Make sure the blades are not damaged and the carrier is balanced before resuming operation.
OPERATION 10.3 Engaging the Power Take Off (PTO) Before engaging the PTO, make certain that the area is clear of bystanders and passersby. Set the tractor engine speed at approximately 1,000 rpm before engaging the PTO. Shift the PTO control to the on position, and slowly increase the engine speed until the PTO is operating at 540 or 1000 rpm. If you hear unusual noises or see or feel abnormal vibrations, disengage the PTO immediately.
OPERATION WARNING! Mow at the speed that you can safely operate and control the Tractor and Mower. Safe mowing speed depends on terrain condition and grass type, density, and height of cut. Normal ground speed range is from 1 to 3 mph. Use slow mowing speeds when operating on or near steep slopes, ditches, drop-offs, overhead obstructions, power lines, or when debris and foreign objects are to be avoided. (SGM-7) 10.
OPERATION When you get to the end of a pass, slightly raise the cutter (2-4”) before turning. Never raise the cutter entirely while the blades are turning. If the cutter must be raised higher than 12” from ground level, disengage the tractor PTO and wait for all cutter rotation to come to a complete stop before proceeding to raise the cutter. OPERATION Large, dense, or wet vegetation may need to be cut in two or more passes to achieve a uniform cut.
OPERATION Stay alert and watch for trees, low hanging limbs, power lines, and other overhead obstacles and solid ground objects while you are operating. Use care to avoid hitting these items. Do not cut, or drive the tractor into, material that is burning, or areas that recently burnt and may contain hot spots. Burning material, sparks, and coals could be thrown from the cutter to areas of vegetation that might ignite. Tire damage can occur when driving over hot material.
OPERATION 11. DISCONNECTING THE CUTTER FROM THE TRACTOR DANGER! Never stand or allow another person to stand between a running Tractor and the Mower when disconnecting the Implement from the Tractor 3-point hitch. Always shut the Tractor off completely and set the parking brake before attempting to disconnect the Mower pins from the Tractor hitch. Before disconnecting the mower, the PTO must be disengaged and blade rotation at a complete stop.
OPERATION 12. CUTTER STORAGE Properly preparing and storing the cutter at the end of the season is critical to maintaining its appearance and to help ensure years of dependable service. The following are suggested storage procedures: It is critical that the driveline clutch slip when an obstacle or heavy load is encountered to avoid cutter and/ or tractor damage.
OPERATION 13. TRANSPORTING THE TRACTOR AND CUTTER Inherent dangers of operating the tractor and cutter and the possibility of accidents are not left behind when you finish cutting an area. Therefore, the operator must employ good judgement and safe operation practices when transporting the tractor and cutter between locations. By using good judgement and following safe tranport procedures, the possibility of accidents while moving between locations can be substantially minimized.
OPERATION Before transporting the tractor on a public roadway or boarding a trailer for transport, the tractor brake pedals should be locked together. Locking the pedals ensures that both wheels brake simultaneously while stopping, especially when making an emergency stop. Use extreme caution and avoid hard applications of the tractor brakes when towing heavy loads at road speeds. 13.
OPERATION OPERATION Make sure that all tractor flashing warning lights, headlights, and brake/taillights are functioning properly before proceeding onto public roads. While newer model tractors have plenty of lighting to provide warning signals as well as artificial operating lighting, most older models where only equipped with operating lights. Consult an authorized tractor dealer for lighting kits and modifications available to upgrade the lighting on older tractor models.
OPERATION 13.2 Hauling the Tractor and Cutter Before transporting a loaded tractor and cutter, measure the height and width dimensions and gross weight of the complete loaded unit. Ensure that the load will be in compliance with the legal limits set for the areas that will be traveled through. Arrange the chains so that when tightened, the chains are pulling downward and against themselves.
OPERATION TROUBLESHOOTING PROBLEM POSSIBLE CAUSE REMEDY NOT CUTTING CLEAN Blades dull. Blade rotation incorrect. Carrier RPM too low. Mower not leveled. Ground speed too fast. Blades locked back. Blades riding up due to blade bolt wear. Blades bent up. Sharpen or replace Blades. Use correct Blade for Carrier. Increase PTO speed. Adjust machine level Reduce ground speed. Free Blades. Replace Blade Bolts Operating with loose Blade Bolts. Worn Blade Bolt. Tighten Blade Bolts to 400 ft. lbs.
OPERATION TROUBLESHOOTING (Continued) POSSIBLE CAUSE REMEDY BROKEN CROSS OR CUPS Load too high for joint. Use protective device with joint. Check joint angles and phasing. Slow down or raise Cutter. END GALLING OF CROSS AND CUPS Speed too high. Ears have deformed. Operate at proper speed (540 or 1000 rpm). Install thrust washer. NEEDLE ROLLERS HAVE BRINELLED INTO CUP AND CROSS Load too high for joint. Check for small joint angles. Use protective device. Check joint angles and phasing.
OPERATION TROUBLESHOOTING (Continued) POSSIBLE CAUSE REMEDY GEARBOX LEAKING Damaged Oil Seal. No Oil Seal. Oil too light. Bent Shaft. Oil Seal race rough. Oil Seal installed wrong. Oil Seal not sealing in the housing. Bearings loose. Vent Plug stopped up. Oil level too high. Gasket damaged. Bolts loose. Replace Seal. Install Oil Seal. Use EP140. Replace Oil Seal and Shaft. Replace Shaft or repair Race. Replace Seal. Replace Seal or use a sealant on O.D. of Seal. Adjust Bearings. Open Vent Plug.
MAINTENANCE SECTION Maintenance Section 5-1
MAINTENANCE Before operating your Rotary Cutter, make sure it is properly lubricated and thoroughly inspected. Only a minimum of time and effort is required to regularly lubricate and maintain this machine to provide long life and trouble free operation. WARNING! Always disengage the PTO before raising the Rotary Cutter for transporting or making adjustments. LUBRICATION INFORMATION Do not let excess grease collect on or around parts, particularly when operating in sandy areas.
MAINTENANCE GEARBOX The Gearbox has been filled with lubricant to the Test Plug Level prior to shipment. However, you should check the oil level at Test Plug before operating, and frequently thereafter. The gearbox should not require additional lubricant unless the box is cracked or a seal is leaking. It is recommended that the oil level plug be removed after every 8 to 10 hours of operation and oil added until it runs out Test Plug hole. The Test Plug is located on the side of the Gearbox.
MAINTENANCE DRIVELINE LUBRICATION Grease Fittings are located on the Cross Assembly of each U-Joint and on the telescoping tubes. Grease the UJoint after each 8 hours of use. Figure 5. Grease the telescoping tubes after every 8 hours use. Some PTO-toHitch connections may necessitate cutting a hole in the shields to be able to align the Grease Fitting holes for lubrication. Lubricate the shield bearings every 16 hours. Figure 6. FIGURE 5.
MAINTENANCE MAIN DRIVELINE & CAT 4 SAFETY SHIELD To remove the main inner driveline shield, Remove the locking screws. Align the bearing tabs with the cone pockets. FIGURE 7. Remove the half-guard and remove the bearing ring. FIGURE 8. FIGURE 7 FIGURE 8 Inspect the driveline shield for worn areas or cracks. If the shield has any dents or cracks, replace the Shield. While the Shields are off, examine the Driveline for signs of abnormal wear, bent or twisted shafts, or cracks in the shafts or tubes.
MAINTENANCE BLADE SERVICING Inspect blades before each use to determine that they are properly installed and in good condition. Replace any blade that is bent, excessively nicked, worn, or has any other damage. Small nicks can be ground out when sharpening. IMPORTANT! When sharpening blades, grind each blade the same amount to maintain balance. The difference in blade weights should not exceed 1 ounce. Unbalanced blades will cause excessive vibration which can damage gear box bearings.
MAINTENANCE BLADE REMOVAL/INSTALLATION To remove blades for sharpening or replacement, remove the cover plate on deck of cutter near gear box. Remove lock nut from blade bolt. NOTE: Inspect lock nut after removal and replace if threads are damaged. Always replace nut when replacing blade bolt. When installing blades be sure and check blade bolt pivot diameter for wear. Replace bolt if worn more than 1/4 inch at any point. See Figure 12.
MAINTENANCE SEASONAL CLUTCH MAINTENANCE It is important that the clutches slip when an obstacle or load heavier than the clutch setting is encountered. Therefore, if the machine sits outside longer than 30 days and is exposed to rain and/or humid air it is important to make sure that the clutch lining plates are not rusted/coroded together. Before using the cutter use the following procedure to make sure the clutch will slip and give the overload protection required. 1.
MAINTENANCE GEARBOX MAINTENANCE 15 16 17 18 19 14 20,21,22 13 23 24 26 25 12 27 11 28 10 29,30,31 9 1 8 3 7 6 FIGURE 14 LJ60/72 02-02 © 2004 Alamo Group Inc.
MAINTENANCE RIGHT ANGLE GEARBOX (OUTBOARD) ASSEMBLY & DISASSEMBLY PROCEDURES INPUT SHAFT REMOVAL Step 1. Step 2. Step 3. Step 4. Step 5. Step 6. Step 7. Step 8. Place Gearbox on appropriate work surface. Remove Vent Plug (item #16) or Complete Top Cover (item #18) Turn Gearbox upside doan allowing Oil to drai from gearbox into catch pan for proper disposal. Turn Gearbox right side up and drop bottom into a hole for support or lay it on its side laying flat.
MAINTENANCE OUTPUT SHAFT INSTALLATION Step 1. Step 2. Step 3. Step 4. Step 5. Step 6. Step 7. Install Upper Output Shaft Bearing Cup (item # 12) into Main Housing from the top, Install Output Shaft Lower Bearing Cup (item # 2) into Main Housing (item # 1) from the bottom, Make sure both Bearing Cup are seated firmly against housing. Install Lower Bearing Cone (item #2) down over Output Shaft from top making sure it is completely seated against shoulder on lower part of Output Shaft.
MAINTENANCE STORAGE Your rotary cutter represents an investment from which you should get the greatest possible benefit. Therefore, when the season is over, the cutter should be thoroughly checked and prepared for storage so that a minimum amount of work will be required to put it back into operation for the next season. The following are suggested storage procedures: 1. 2. 3. 4. 5. 6. Thoroughly clean the cutter. Lubricate the cutter as covered in Maintenance Section.
SERVIS-RHINO LIMITED WARRANTY 1. LIMITED WARRANTIES 1.01. Servis-Rhino warrants for one year from the purchase date to the original non-commercial, governmental, or municipal purchaser (“Purchaser”) and warrants for six months to the original commercial or industrial purchaser (“Purchaser”) that the goods purchased are free from defects in material or workmanship. 1.02.
TO THE OWNER/OPERATOR/DEALER To keep your implement running efficiently and safely, read your manual thoroughly and follow these directions and the Safety Messages in this Manual. The Table of Contents clearly identifies each section where you can easily find the information you need. The OCCUPATIONAL SAFETY AND HEALTH ACT (1928.51 Subpart C) makes these minimum safety requirements of tractor operators: REQUIRED OF THE OWNER: 1. 2. 3. 4.
LUMBERJACK 60/72 TREE CUTTER LJ60/72-SOM - 02/02 Printed U.S.A.
An Alamo Group Company SERVIS-RHINO® 1020 S. Sangamon Ave. Gibson City, IL 60936-9907 Please fold (do not tear), tape, and drop in any mailbox. PLEASE FILL OUT OWNER WARRANTY REGISTRATION INFORMATION SIGN, AND DROP LAST COPY IN ANY MAILBOX. IMPORTANT! TO PLACE THIS WARRANTY IN EFFECT, THIS WARRANTY REGISTRATION MUST BE FILLED OUT, SIGNED, AND MAILED WITHIN 30 DAYS OF DELIVERY DATE OF THIS MACHINE. DEALER AND PURCHASER MUST SIGN.
SERVIS-RHINO WARRANTY REGISTRATION INFORMATION MONTH Servis-Rhino Model Serial No. DAY YEAR Purchase Date Purchaser Last Name Street & No., RFD, Box, &/or Apt. No. First Name City M.I.
2. REMOVE WHITE COPY FOR CUSTOMER RECORDS. 3. REMOVE YELLOW COPY FOR DEALERS RECORDS. 4. MAIL LAST CARD POSTAGE FREE. SERVIS-RHINO® WARRANTY REGISTRATION INFORMATION MONTH Servis-Rhino Model Serial No. Purchaser Last Name Street & No., RFD, Box, &/or Apt. No. City DAY YEAR Purchase Date First Name M.I.
2. REMOVE WHITE COPY FOR CUSTOMER RECORDS. 3. REMOVE YELLOW COPY FOR DEALERS RECORDS. 4. MAIL LAST CARD POSTAGE FREE. SERVIS-RHINO® WARRANTY REGISTRATION INFORMATION MONTH Servis-Rhino Model Serial No. Purchaser Last Name Street & No., RFD, Box, &/or Apt. No. City DAY YEAR Purchase Date First Name M.I.