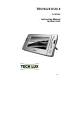
TECHLUX DUO 2 TL107003 - Instruction Manual for Main Unit V20080509
Table Of Contents Introduction 2 Safety Precautions 2 Main Features 3 Unit View 3 The Remote Control 4 The Package 5 Powering and installation 6 Connecting to external device 6 Basic Operation 7 System Setup 12 Specifications 15 Troubleshooting 15 Warranty Terms and Conditions 16 -1-
Introduction Thank you for choosing our portable DVD player. The unit applies the latest state of art electronics and is designed for use in car, at home, in hotels etc... The compact size makes carrying easier as well as installation. Please read the manual carefully prior to use and keep it well for later consultation.
Main Features High definition colour 7” 16/9 TFT LCD screen Compatible disc: DVD, VCD, SVCD, CD, MP3, MPEG4. Built-in anti shock system (DVD-3s, CD-6s and MP3-25s) Built-in stereo speaker (2x1W) PAL /NTSC system Multi-language OSD Full function remote control SD/MMC Card reader (up to 2GB) and USB connection (1.1) AV out function Unit View 1 2 3 4 1. 2. 3. 4. 5. 6. 7. 8. 16 17 5 9 6 10 7 11 8 12 Open knob Earphone jack Volume knob Power ON/OFF switch MODE button MENU button.
The Remote Control 1 10 11 12 13 14 15 16 20 17 18 19 2 3 4 5 6 7 8 9 1. Number button 11. ZOOM(To zoom in/out the image during the playback) 2. TITLE ( To display title information) 12. Menu (To enter or exit root menu) 3. AUDIO (To select audio language) 13. Subtitle (To select subtitle language when playing DVD disc) 4. SETUP (To enter or exit setup menu) 14. Angle (To change viewing angle when playing disc with multiangle) 5.
The use of Remote Control Please put the battery into the remote control as per illustration below. When using remote control, make sure the infrared window is pointed to infrared receiving window of the machine The distance between machine and remote control must be within 3 metres. Please refer to the illustration on the right Note: 1. To avoid falling off or place near damp environment 2. To avoid infrared receiving window of the unit being under direct sunlight. 3.
Powering and installation Using car cigarette lighter adaptor to connect to the power: Plug one end of the cigarette lighter adaptor into the DC IN jack on the unit, plug the other end into the car cigarette lighter socket. See illustration below.
Basic Operation Playing disc of DVD, MPEG4, SVCD, VCD, CD, MP3 1. Connect the unit to the power; 2. Open the unit and adjust the monitor to the best position for viewing. 3. Turn on the unit by sliding the ON/OFF switch to ON, the source menu will be displayed on the screen: DVD MEDIA Press [ ] to enter DVD mode or Media mode and press OK to confirm. When selecting media, ensure to insert USB or SD/MMC card properly. 4. Open the disc door and insert a disc into the door. 5. Close the disc door.
Basic Operation Fast forward and fast backward When playing disc of DVD, MPEG4, SVCD, VCD, CD, the unit can search forward or backward. 1. Press [ ], the unit will search forward. Press it repeatedly, the unit will play at 2,4,8,16,32 times of speed. 32x 2x 4x 16x 8x 2. Press[ ],the unit search backward.
Basic Operation Repeat playing of favourite scene When playing disc of DVD, MPEG4, SVCD, VCD, CD or MP3 user can repeatedly play a specific section. During playback, press A-B button at a point A, then press this button again in point B, the unit will automatically repeat playing the part between A-B A Press it the third time, the unit will return to normal playback A-B Number A-B Angle Angle During playing DVD disc with multi-angle, press “Angle”, button, the followings will be displayed on screen.
Basic Operation Zoom in/out When playing disc of DVD, MPEG4, SVCD or VCD user can zoom in or zoom out the image During playback, press Zoom button, the image will be enlarged; press it again the image will be enlarged again; press it fourth time, the image will zoom out, press it repeatedly and the image will return to normal status. When the image is enlarged, user can press [ ] to move the image.
Basic Operation Playing JPG file 1 Place a JPG disc into the tray, the unit will start reading and play. 2 Press "MENU" to browse JPG file. 3 When viewing JPG file, press [ ], pictures will be displayed in thumbnail mode, press [efcd] or OK button to select one picture to view. 4 Press [cd] and OK button to select a JPG file from the menu. 5 To browse JPG file selected, press [f] or OK button. 6 To rotate the picture counter-clockwise, press [e]; Press [f] to rotate the picture clockwise.
System setup Press ”Setup” button, the main menu will be displayed on the screen Press ef button to highlight this item. Press OK button to access. Press cd button to select the setting. Press OK button to confirm your selection. Press e button to exit.
System setup Video setup page Enter this option, user can adjust picture quality of video output. There are items available to be adjusted: Brightness, contrast, Hue and Saturation. For all these items the default is 00 --Video Setup Page-Panel Quality Go to Video Setup Pa ge Password setup page Enter this option, you can set a password (four numbers). All parental Control features are protected. --Password Setup Page-Password The default password is 8888.
System setup Preference page Audio: Enter this option, user can select his preferred audio langua ge for DVDs, The default is English Note: - The audio language depend on the material on each disc. - User can also change the audio language during playback by pres sing the Audio button. -- Preference Page -Audio Subtitle Disc Menu Parental Default ENG OFF ENG English French German Dutch Preferred Audio Language Subtitle Select your preferred language to show the subtitles on the screen.
Specifications Compatible disc: DVD/VCD/CD/MP3/MPEG4 Compatible support : DVD+/-R(W), CD-R(W) Signal system: PAL/NTSC Panel size: 7“ with LED backlight Resolution: 480(RGB)x234 Contrast: 300:1 Brightness: 80cd/m² Frequency response: 20 Hz to 20 kHz Video output: 1 Vp-p/75 Ohm, unbalanced Audio output: 1.
Warranty Terms and Conditions 1) Coverage: Claims can be validly made only upon presentation of proof of purchase through an invoice or receipt. 2) Application: The present warranty enters into effect on the date of delivery to the user. 3) Period of validity: 2 years warranty for the device - 90 days for the accessories (components of the product).